

CSGO players often record gameplay to capture clutch moments, create YouTube videos, share highlights, review strategies, or improve their gaming skills. Whether you want to save competitive matches or upload high-quality clips online, choosing the right recording method is important for smooth gameplay and clear video quality. If this is what you want, this guide covers all effective ways to record CSGO on PC, including beginner-friendly tools, built-in recording features, and advanced gameplay recorders that help you record CSGO gameplay and highlight clips without lag.
Things to Know Before You Record CSGO
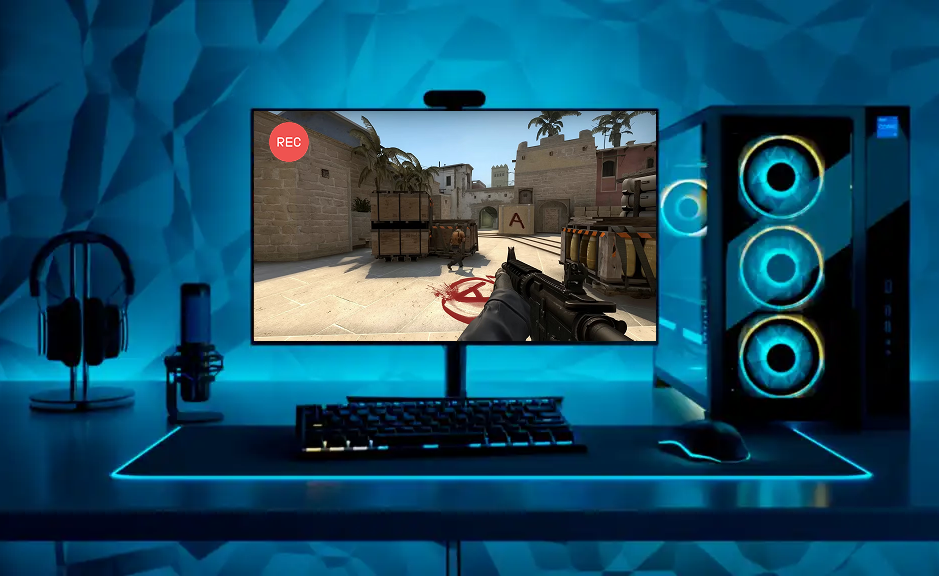
Before you start recording CSGO, there are several important things you should know to ensure smooth performance and high-quality video capture. Using the wrong settings or recording on unsupported hardware can lead to lag, FPS drops, blurry footage, or audio issues during gameplay. It is important to understand the hardware requirements for smooth recording, choose the best recording settings for CSGO, and follow practical tips to record CSGO clips without lag.
Hardware Requirements for Smooth Recording
● GPU: NVIDIA GTX/RTX or AMD Radeon
● CPU: Intel i5/i7 or AMD Ryzen 5/7 processors
● RAM: at least 8GB and 16GB
● Using an SSD instead of an HDD
Best Recording Settings for CSGO
● Resolution: 1920×1080 (1080p) for YouTube and high-quality uploads; 1280×720 (720p) for lower-end PCs; 2560×1440 or 4K for powerful gaming PCs
● FPS: 60FPS for most YouTube videos and 120FPS for slow-motion edits and high-refresh gameplay
Best Ways to Record CSGO on PC
There are many ways to record CSGO gameplay on PC, and the best option depends on your experience level, recording needs, and computer performance. Some tools are designed for beginners who want quick and easy gameplay recording, while others provide advanced customization for professional-quality videos and streaming. Below are the best CSGO recorders that can help you record game clips efficiently.
- Beginner-friendly tool - iTop Screen Recorder
- Advanced tool - OBS Studio
- Built-in methods - Xbox Game Bar
- Professional game recorder - NVIDIA ShadowPlay
|
Best For |
FPS Impact |
Ease of Use |
Free Version |
iTop Screen Recorder |
Beginners & Smooth Gameplay |
Low |
Easy |
Yes |
OBS Studio |
Advanced users |
Medium |
Moderate |
Yes |
Xbox Game Bar |
Casual recording |
Low |
Easy |
Yes |
ShadowPlay |
NVIDIA users |
Very Low |
Easy |
Yes |
How to Screen Record CSGO with iTop Screen Recorder
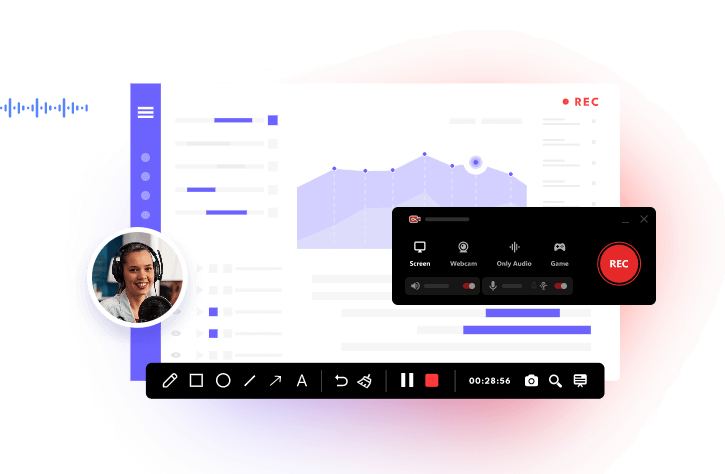
How to record CSGO without complicated settings? using iTop Screen Recorder is a great option. It is designed for gamers who want smooth HD recording with minimal FPS drops. The inbuilt Game Mode allows you to capture game clips with audio (from system and microphone) and webcam simultaneously. Whether you want to record competitive matches, create YouTube highlights, or save funny moments with friends, the screen recording software can help you record CSGO smoothly.
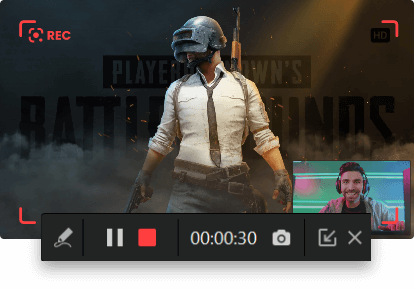
Game Mode for optimized gameplay recording
iTop Screen Recorder includes a dedicated Game Mode that helps capture gameplay smoothly with no lag and no fps drops, making it ideal for recording fast-paced games and creating high-quality CSGO highlights.
High-quality gameplay recording
The CSGO recorder supports multiple resolutions and frame rates, up to 4K/120fps, allowing users to capture clear and detailed gameplay videos for YouTube, Twitch, and social media platforms.
Customizable clip recording
iTop Screen Recorder supports capturing internal/external audio and facecam, enabling you to capture clips with in-game audio and make CSGO tutorials narrated by yourself. Also, you can turn on voice changer and personalize webcam overlay making your video look more professional.
Unlimited game recording
iTop Screen Recorder allows you to record CSGO with no time limit. Whether you try to record the whole game-playing period or only need to capture highlights or great moments, it will not disappoint you.
Additional tools you may like
iTop Screen Recorder provides a set of tools helping you screenshot CSGO, edit gameplay recordings and compress videos with no quality loss for better sharing.
iTop Screen Recorder is regarded as an easy-to-use game recorder for its easy-to-navigate interface and straightforward yet powerful features. Now, let's get how to screen record CSGO with iTop Screen Recorder.
Step 1. Download and install iTop Screen Recorder on your Windows computer.
Step 2. Prepare and launch CSGO.
Step 3. Go back to iTop Screen Recorder and select “Game” mode to auto-detect your game or add it manually. Enable the speaker, mic, HUD, and webcam, and restore them depending on your needs. Once done, click "REC" to start recording.
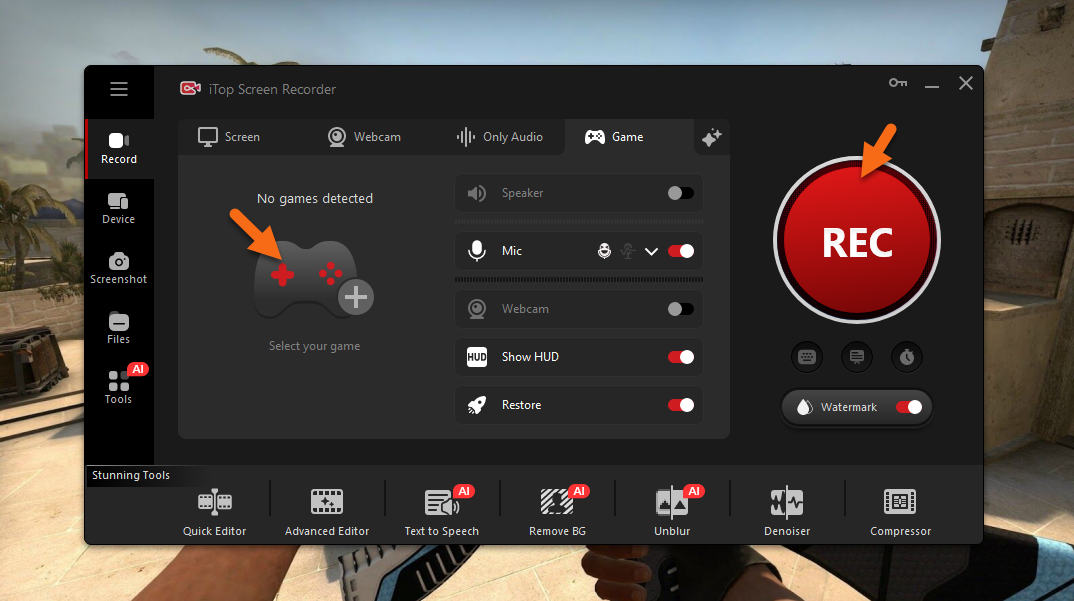
Step 4. Tap the "Stop" button to end the recording process and then go to "Files" to check the local storage or do further editing and compression.
Pros & cons of using iTop Screen Recorder
✔ Easy to use for beginners
✔ Built-in Game Mode for gameplay recording
✔ Supports HD and 4K recording
✔ Records the microphone and system audio together
✔ Webcam overlay support
✔ Screenshot and quick editing tools included
✔ Supports multiple video formats
✘ Some advanced features require the premium version
✘ Video editing features are relatively basic compared with dedicated editors
How to Record CSGO Gameplay with OBS Studio
For players who want more advanced recording controls and professional-quality gameplay capture, OBS Studio is one of the most popular choices for recording CSGO. It is a free and open-source recorder widely used by gamers, streamers, and content creators for its customizable recording settings, high-quality video output, and powerful audio controls.
OBS Studio is especially suitable for users who want to fine-tune bitrate, encoder, resolution, and FPS settings for smoother CSGO recordings. Although the setup process is slightly more complicated than beginner-friendly tools, OBS can deliver excellent recording quality with the right configuration.
Here's how to record CSGO on OBS.
Step 1. Launch OBS Studio, then click the "+" icon in the Sources panel and select “Game Capture.” After that, choose either "Capture specific window" to record your active game window or select "Capture any fullscreen application" for fullscreen gameplay recording.
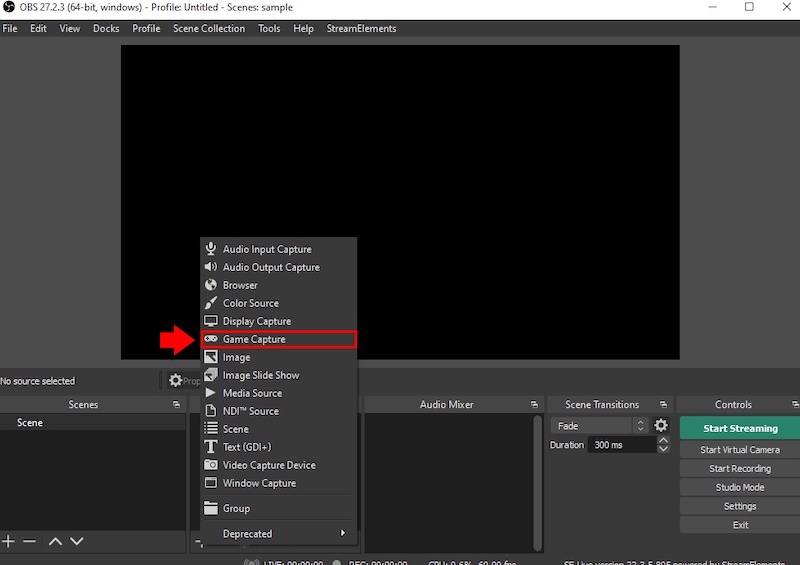
Step 2. If OBS cannot detect the game through Game Capture, switch to "Display Capture" to record everything displayed on your screen.
Step 3. Check the Audio Mixer section and confirm that both Desktop Audio and your microphone are enabled properly for game sound and voice recording.
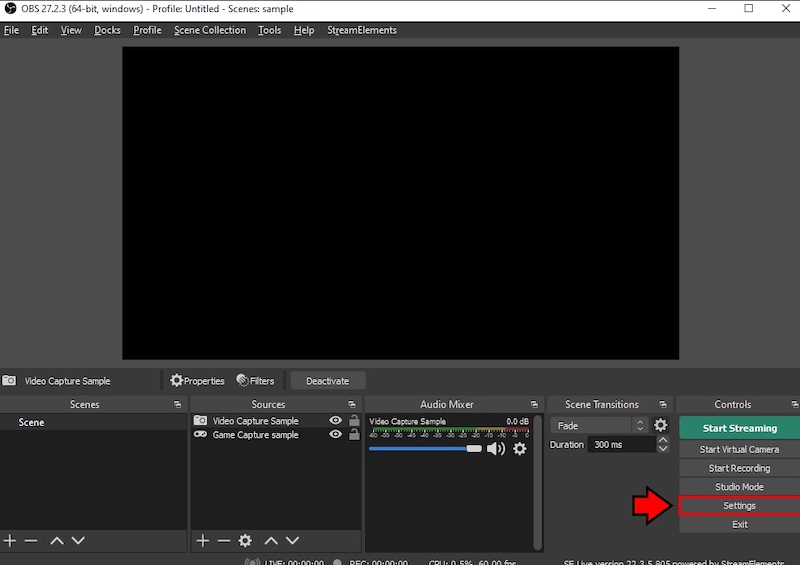
Step 4. Navigate to Settings > Output > Recording to select the folder for saving recordings and choose your preferred video format, such as MP4 or MKV.
Step 5. Click "Start Recording" in the bottom right corner to start capturing CSGO.
Pros and cons of using OBS
✔ Completely free and open source
✔ Professional-grade recording quality
✔ Highly customizable settings
✔ Supports multiple audio sources
✔ Excellent for streaming and recording
✔ Supports plugins and advanced features
✔ No watermark or recording limits
✘ More difficult for beginners
✘ Incorrect settings may cause FPS drops
✘ Requires manual configuration
✘ The interface may feel overwhelming at first
✘ Higher resource usage on low-end PCs
How to Record CSGO Clips Using Xbox Game Bar
If you prefer a simple and built-in way to record CSGO gameplay, Xbox Game Bar can be a convenient solution. Since it comes preinstalled with Windows, you do not need to download any third-party software to start capturing gameplay clips.
Xbox Game Bar is ideal for casual players who want to quickly record matches, highlights, or funny moments without dealing with complicated recording settings. Although it does not offer as many advanced features as OBS Studio or dedicated game recorders, it provides a fast and efficient way to record CSGO gameplay with decent quality.
Here's how to record CSGO Xbox
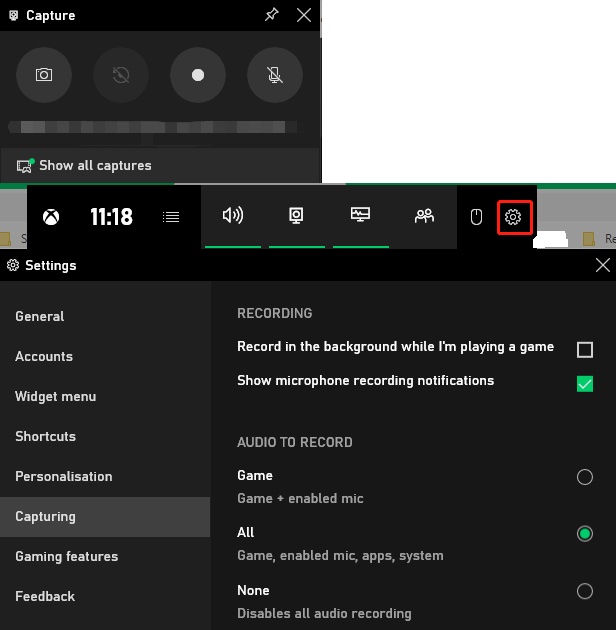
Step 1. Use the Windows + G keyboard shortcut to launch the built-in Xbox Game Bar recorder.
Step 2. Select the Record button to begin screen recording, or simply press Windows + Alt + R. You can also open the Settings menu to adjust options like audio recording preferences.
Step 3. While recording, a small capture panel will appear on the upper-right side of the screen showing the recording duration. To stop recording, click the green stop button.
Pros and cons of using Xbox Game Bar
✔ Built directly into Windows 10 and 11
✔ Completely free to use
✔ Easy setup for beginners
✔ Quick recording with keyboard shortcuts
✔ Low system resource usage
✔ Supports microphone and game audio recording
✔ Good for quick gameplay clips and highlights
✘ Limited recording customization options
✘ Fewer advanced features compared with OBS
✘ May not support some full-screen game modes properly
✘ Lower recording quality flexibility
✘ Limited editing capabilities
Also Read: Xbox Game Bar Not Working? How to Fix? >>
How to Record CSGO Highlights with NVIDIA ShadowPlay
For gamers using an NVIDIA graphics card, recording CSGO with NVIDIA ShadowPlay is one of the best ways to capture gameplay with minimal FPS loss. NVIDIA ShadowPlay is a built-in gameplay recording feature included in NVIDIA GeForce Experience that uses GPU hardware acceleration to record games smoothly in high quality.
Because the recording process is handled primarily by the GPU rather than the CPU, ShadowPlay can deliver excellent performance while keeping gameplay responsive. Other than that, it also includes useful features like Instant Replay, manual recording, screenshot capture, and live streaming support, making it a popular choice among CSGO players and streamers.
Here are the steps to record CSGO using NVIDIA ShadowPlay.
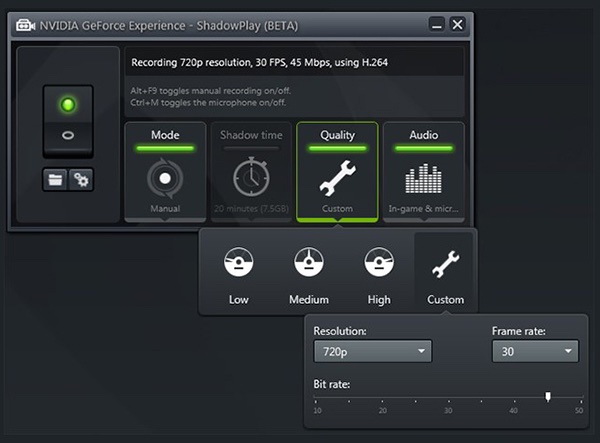
Step 1. Install and open NVIDIA GeForce Experience on your PC. After launching the program, click the ShadowPlay icon located in the top-right corner.
Step 2. Turn on ShadowPlay by clicking the toggle switch on the left side of the overlay window, or press Alt + Z to access the NVIDIA overlay directly. Once enabled, the indicator light will turn green.
Step 3. Choose your preferred recording mode, such as Shadow Mode, Manual Mode, or Twitch Streaming. Manual Mode is commonly recommended because it gives you full control over when recording starts and stops.
Step 4. Use the Alt + F9 shortcut to begin recording gameplay manually. Press the same keys again to stop recording. Your recorded videos will automatically be saved in a game-related folder inside the Videos directory by default.
Pros and cons of using NVIDIA ShadowPlay
✔ Very low FPS impact during gameplay
✔ Uses GPU hardware acceleration
✔ Supports HD and 4K recording
✔ Instant Replay automatically saves highlights
✔ Easy keyboard shortcuts for quick recording
✔ Supports microphone and game audio recording
✔ Built-in live streaming support
✔ Game screen recording without watermark
✘ Only available for NVIDIA GPU users
✘ Requires GeForce Experience installation
✘ Limited advanced editing features
✘ Fewer customization options compared with OBS
✘ May occasionally have overlay compatibility issues
✘ Some older NVIDIA GPUs may not fully support all features
Bonus Tip: Best CSGO Recording Settings for YouTube and Twitch
No matter which CSGO recorder you choose, using the right recording settings is essential for creating smooth and high-quality CSGO videos. Incorrect settings can lead to blurry footage, audio sync problems, lag, or extremely large file sizes. If you plan to upload gameplay videos to YouTube or share highlights on Twitch, optimizing your resolution, FPS, bitrate, and encoder settings can greatly improve both video quality and performance. Below are the best CSGO recording settings for YouTube and Twitch to help you capture clear gameplay while maintaining stable FPS during matches.
Recommended YouTube Settings:
- 1080p 60FPS
- MP4 format
- H.264 codec
Recommended Twitch Clip Settings
- Short clips
- Lower bitrate
Conclusion
Recording CSGO gameplay is a great way to save competitive matches, create YouTube highlights, share clutch moments, or improve your gameplay through match reviews. In this guide, we covered multiple ways to record CSGO on PC. Each tool has its own advantages, but the best option depends on your recording needs, PC performance, and experience level.
If you want an easy yet powerful solution that can record CSGO clips smoothly without a complicated setup, iTop Screen Recorder is definitely worth trying. Download iTop Screen Recorder now and start recording your best CSGO moments effortlessly.