Have you ever been in a Zoom meeting and realized you missed some crucial information discussed in the chat? Or perhaps you want to recall the links and ideas that were shared during the discussion. If you’re in one of these situations, here is the good news. You can save your in-meeting chat in Zoom to ensure that you don’t miss any of the important details. With Zoom’s manual and automatic saving features, you are able to save chat in Zoom on your local device or in the cloud.
In this article, you will see detailed and step-by-step instructions on how to save Zoom chat within a Zoom meeting. From saving the chat manually to recording online meetings, you’ll learn everything you need.
How to Save Zoom Chat Manually
Usually, there are many participants in one Zoom meeting. To ensure that you don’t lose any of the important discussions, Zoom provides an option to manually save the chat logs. This allows you to keep a record for future reference. Here are the steps of how to save chat in Zoom manually.
Step 1. Begin by either starting a new Zoom meeting or joining an existing one where you want to save the chat.
Step 2. In the meeting, find and click the Chat icon. This will open the chat window where you can see the ongoing conversations.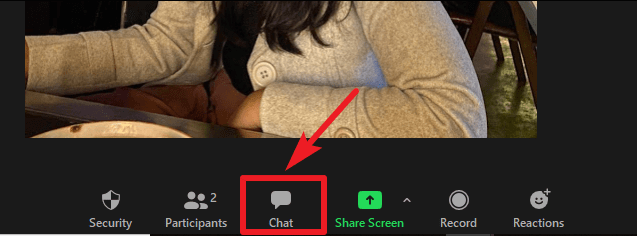 Step 3. Near the bottom of the chat window, you will find an ellipsis icon (three dots) next to the To option. Click on this icon to access more options.
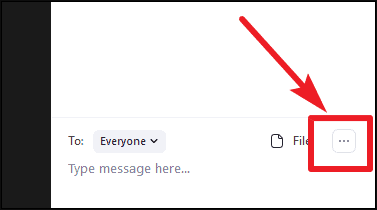 Step 4. Select Save Chat in the newly appears context menu. This will save your Zoom chat as a text file by default.
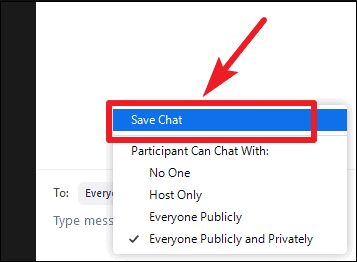
One thing you should be aware of is that if the 'Allow users to save chat logs from meetings' checkbox is unchecked in settings, this will prevent all meeting participants, including the host, from saving chat logs. So, make sure this option is enabled by your meeting host or administrator.
How to Auto Save Zoom Chat
Manually changing the above settings every time you start a Zoom meeting can be tedious. So is there a way to save chat on Zoom automatically? Yes! Follow the guide here to see how to save Zoom chat automatically.
Step 1. Sign in to your Zoom account on the web and go to the settings page.
Step 2. Click the Meetings tab on the web page.
Step 3. Scroll down and find the In Meeting (Basic) section.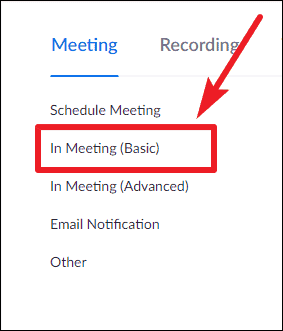
Step 4. Find the Meeting chat - Auto save toggle, and click on this toggle to enable the auto-saving for Zoom chat.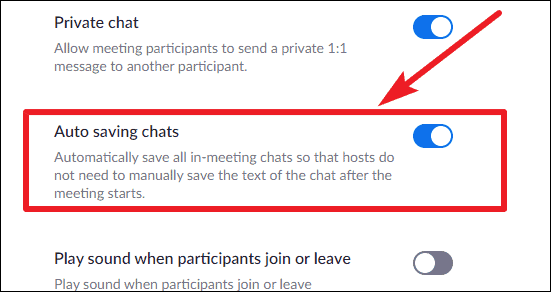
Step 5. If you see a verification dialog appears, click Enable or Disable to verify the change.
There is also an important note you should pay attention to about this method. The auto-saved chats are only saved automatically for the host. This means that the host must be present during the meeting to save the local chat. If you're a participant in the meeting, consider manually saving the chat as a backup.
Keep in mind that enabling the auto-saving feature will save your chat to your local recording location by default. This is usually your Documents folder, under a sub-folder named Zoom.
How to Save Chat in Zoom Cloud
Another way introduced here is to save chat in Zoom Cloud. This is a helpful feature that allows you to access and review your meeting conversation later. Follow the steps here to learn how to save Zoom chat in the cloud service.
Step 1. Make sure you have a Zoom account with cloud recording enabled. If you are not an account owner or admin, contact your Zoom administrator to enable this feature.
Step 2. Start a cloud recording in your Zoom meeting. There is a Record button at the bottom. Select Record to the Cloud.
Step 3. Once finished setting it, you can record chat in Zoom to the cloud now.
Now that the whole meeting process is being recorded to the cloud. Keep in mind that participants need to be aware of the recording to comply with privacy regulations and consent. After your meeting has ended, you will receive an email notification with a link to access your cloud recording. The saved chat is included in the recording as a separate text file.
How to Auto Save Full Chat Screen
However, it is essential to know that these methods may not work without the Zoom host's permission or may not save the entire chat. And you should know that all the saved Zoom chats with the above methods are stored in text forms. This is where capturing the full chat screen becomes a useful alternative. If you want to save the whole Zoom chat screen, an HD screen recorder like iTop Screen Recorder can be of great help.
iTop Screen Recorder is a user-friendly screen recording software that enables you to capture your Zoom chat screen. It supports users to record part of screen or the full screen. With iTop Screen Recorder, you can record the desktop screen, webcam, and microphone audio, making sure you can recall the Zoom meeting without hassle. You can also use the built-in teleprompter to help sort out the meeting process.
What You Can Get from iTop Screen Recorder:
- Save chat in zoom free & easily: You can choose wherever you want to save the recorded Zoom chat videos, with no storing path limitation.
- Facecam recording with teleprompter: You can write the script or notes of discussion in advance and paste it into the built-in teleprompter to help you look more fluent and professional.
- Various drawing tools to highlight: This webinar recorder provides you with unlimited free annotation and drawing tools to help you add comments or highlight key points in the recording video.
- Built-in editor to refine Zoom Chat: iTop Screen Recorder also has a video editor that enables you to simply edit the video after finishing recording.
- Eliminate audio noise during meetings: There is also a denoiser available for iTop Screen Recorder users to elevate the audio quality during meetings.
Now you can follow the steps here to learn how to save chat from Zoom using iTop Screen Recorder:
Step 1. Download and install iTop Screen Recorder on your computer.
Step 2. Set the recording settings. You can choose the record part of screen, full screen, or a window. Then choose whether to turn on the Speaker, Mic, and Webcam or not.
Step 3. Once all set, click the REC button to start recording. The recorded video will be saved to the files automatically.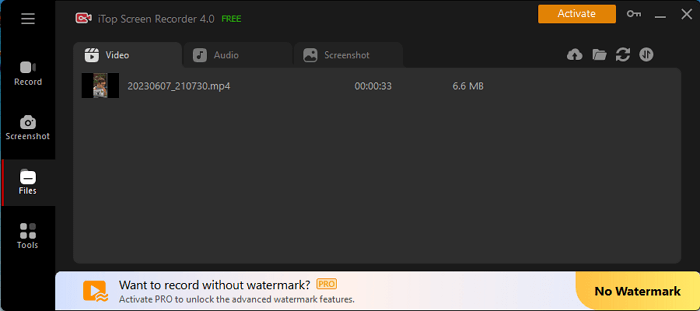
Save Chat in Zoom FAQs
Q1. How to access saved Zoom chats after meeting?
To access your saved Zoom chats after a meeting, you can locate them in your local recording location. By default, it will be in your Documents folder, under the Zoom subfolder, with the folder named as the meeting name, date, and time. During the meeting, click the Chat option, and at the bottom of the chat window, click the ellipses, then click Save Chat to save the chat.
Q2. How long are Zoom chats stored?
Account owners or admins can choose how long chat messages are stored in the Zoom Cloud and on local devices. All messages older than the designated retention periods will be deleted. The specific duration depends on the settings chosen by the account owner or admins.
Q3. How to disable Auto-save chats in Zoom?
To disable the auto-save chats feature in Zoom, you must have account owner or admin privileges. Sign in to the Zoom web portal with the appropriate privileges, go to the settings page, and disable the auto-saving of chats feature for meetings and webinars.
Q4. Can I recover a Zoom meeting that wasn't recorded?
If a Zoom meeting was not recorded or saved, unfortunately, it is not possible to recover the content from the meeting, including the chat messages. It is essential to enable recording and chat-saving options during the meeting to have access to the content afterward.
Conclusion
In this article, you learned how to save Zoom chat to ensure you never lose important information shared during a meeting. In all, you can save Zoom chat manually, enable auto-saving, or choose to save it to the cloud. However, using a third-party tool like iTop Screen Recorder to record online meetings might be the best method. It can help you to capture even more detailed information during meetings. With it, you can record video, audio, and chat history, ensuring that nothing is missed. It is also a screen recorder without watermark. Give this screen recorder a try and see how it can elevate your virtual meeting experience.