


A video’s visuals capture attention, and its audio also truly completes the experience. Unfortunately, poor sound quality, distracting background noise, or a soundtrack that feels out of place can instantly lower the overall impact of a video. Mismatched audio, in an old home recording, a vlog, or a presentation clip, is a common frustration for creators and casual users alike. The good news is that it doesn’t require professional editing suites or complex skills to replace audio in a video. Figure out simple steps here to change audio in a video and make sure the output audio and visuals look and sound fantastic.
Why Replace Audio in a Video?
There are some advantages you can enjoy to replace audio track in video. You'll quickly know how fresh audio really boosts your projects in many common scenarios.
- Improve audio quality: Poor sound can instantly undermine a video’s overall impact. Got audio that's fuzzy, garbled, or just too quiet? Replacing it makes your message sharp and clear.
- Fix errors in the original audio: Technical glitches, accidental background conversations, or dropped audio sections can occur during recording. Replacing flawed segments keeps the final sound clean.
- Correct audio-video sync issues: Even slight delays between sound and image can be jarring. Adjusting or replacing the audio track allows you to realign it perfectly with the on-screen action.
- Add voiceovers or commentary: Tutorials, reaction videos, and promotional clips often need explanatory narration. Swapping the original audio for voiceovers makes your content clearer, more informative, and easier to follow.
- Enhance video impact: Swapping out or dropping in a new sound for your video can totally change the vibe, pulling viewers in and making it stick in their minds.
- Localize content for different regions: To reach a global audience, creators often replace original audio tracks with translations or region-specific commentary.
Method 1: Best Way to Replace Audio in a Video
It doesn’t have to involve complex professional editing suites to replace audio in a video. Many accessible video tools now offer simple ways to mute, remove, or swap out audio tracks without needing advanced skills. Among them, iTop Screen Recorder tops the list as one of the most efficient and beginner-friendly options for handling this task smoothly.
iTop Screen Recorder isn’t just a free screen recording tool to record part of screen or the full screen, it also comes with a built-in video editor that makes audio replacement straightforward. You'll find it simple to use, yet surprisingly capable. Beyond capturing your screen activities, it allows users to trim, mute, split, and overlay audio tracks directly within the editing panel. This tool handles a bunch of different video and audio files, then spits out your finished work.
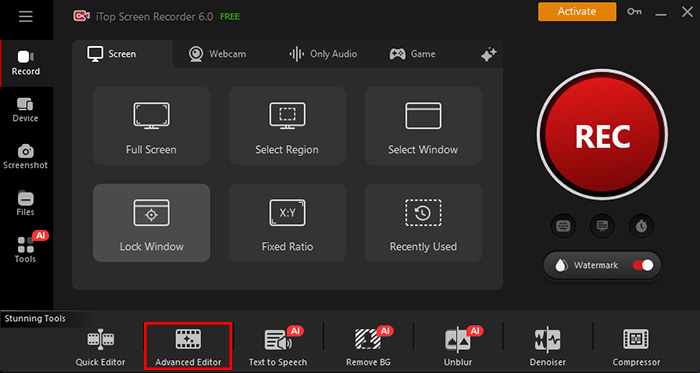
Here’s how to replace audio in a video using its advanced editor in iTop Screen Recorder on PC.
Step 1. Download iTop Screen Recorder, install it, and open the program.
Step 2. Click the "Advanced Editor" tab, select “Start a new creation”, and import your video. Drag and drop the video file to the timeline.
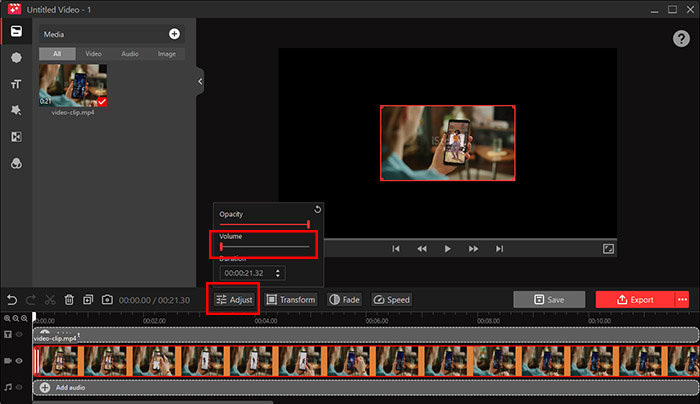
Step 3. In the editor, click “Adjust” and drag the volume bar to mute the original audio track first.
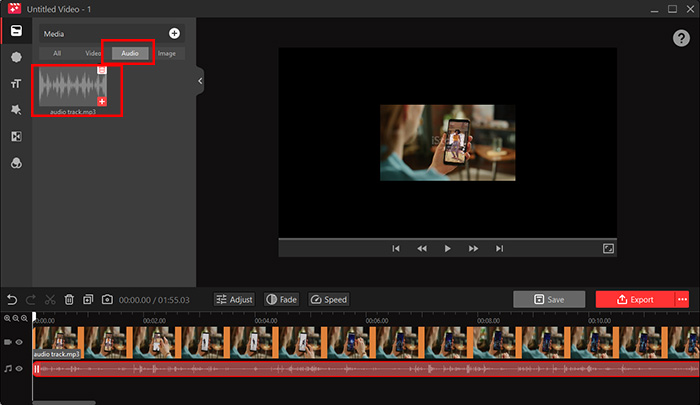
Step 4. Click "Add Audio" to import your new sound file. You can also use the tools to split audio clips, adjust volume levels, or speed as needed. Click the Export button, rename the new video file with audio replaced, and save it to your location.
Main Features of iTop Screen Recorder
Free & User-Friendly
Despite its rich video/audio feature set, the screen recorder Windows 10 keeps the interface intuitive. Beginners can easily navigate its basic and advanced editor, while experienced users will appreciate the direct and clutter-free workflow.
Advanced Customization Options
From audio speed control to precise clip trimming and custom aspect ratios, the editor offers enough flexibility for you to fine-tune your video and audio projects without extra software. Both basic and advanced video editors are built for beginners and professionals alike.
Preserve Your Video Quality
Unlike many free tools that compress files heavily after you replace video audio, iTop Screen Recorder ensures your video is sharp, smooth, and high-resolution, just like the original, without compression after editing.
Extensive Format Support
iTop Screen Recorder supports popular video and audio file types like MP4, AVI, MKV, MOV, MP3, FLAC, and AC3, making it easy to tailor your final project for YouTube, social media, or personal archiving without conversion hassles.
Method 2: How to Replace Audio in Video Online
If you prefer a quick, no-installation option, you can also replace audio in a video entirely online. An online audio replacement tool is a practical choice for those working on smaller files or looking to make simple adjustments. One of the more reliable tools for this task is OnlineConverter’s Add Audio to Video tool.
You have two options for audio replacement: replace audio in video and keep audio on video (new audio will be added as background music for the video file). It supports lots of formats like MP4, AVI, MOV, MP3, OGG, WAV, M4A, FLAC, etc., and allows you to adjust the start/end position of the new audio for better timing. The maximum video file size you can upload is 200MB.
Here’s how to change audio in a video online using Online Converter for free.
Step 1: Open OnlineConverter’s Add Audio to Video page.
Step 2: Click “Choose File” to upload your video, then select your replacement audio file.
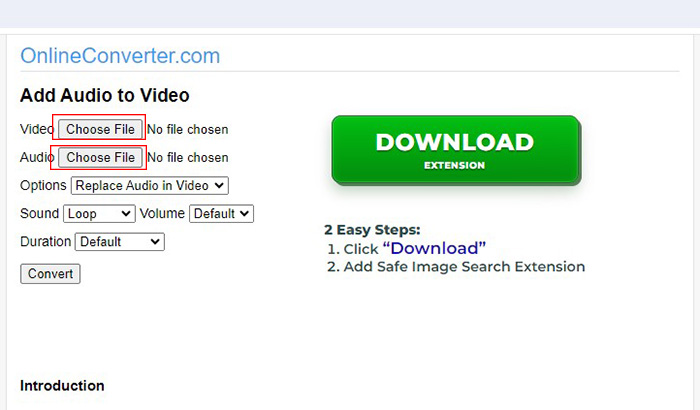
Step 3: Click “Convert” to start to replace video audio online. Once the conversion process finishes, click the “Download Now” link to save the video file with the new audio track. Watch out for the red “DOWNLOAD EXTENSION” button.

It is quick and convenient to change audio in a video using this online method; however, the online tool comes with limitations. The process lacks precision and flexibility since it only supports basic audio replacement without offering control over audio alignment, transitions, volume adjustments, or synchronization.
Also Read: How to Clip on PC: Last 30 Seconds or 5 Minutes [5 Ways] >>
Pro Tips for Replacing Audio in a Video
Now that you know how to replace audio in a video, here are some pro tips to help you do it more effectively.
Use Quality Assured Audio
Poorly recorded or compressed audio can lower the entire video. Always choose clean, high-bitrate audio files for replacement. Otherwise, you may need to remove breathing from the audio or other annoying noise.
Match Audio Vibe to Visuals
Ensure that your new soundtrack complements the video’s mood and pacing. A mismatch can feel jarring and distract viewers.
Preview the Effect Before Exporting
Always watch the full edit before saving to catch any sync issues, abrupt cuts, or volume inconsistencies.
Note the Copyright of the Audio
If you’re using music or voiceovers from third parties, make sure you have the appropriate rights to avoid copyright takedowns.
Backup the Originals
Before you replace audio in a video, remember to save copies of your source files. This makes it easy to revert if something doesn’t go as planned.
Conclusion
Replacing audio in a video is easier than many think, using either dedicated software or online tools. For the best balance of feature set, quality, and ease of use, iTop Screen Recorder is highly recommended. Grab the screen recorder for PC now and start to replace audio in a video with better, clearer, and perfectly synced sound.


