

Trying to capture a clean moment from Twitch sounds simple until the interface ruins the shot. A perfectly timed victory screen, a funny streamer reaction, or a frame you want to use as fan art can end up buried under pause icons, volume controls, or dim overlays. Even worse, some controls stay visible for several seconds.
Fortunately, there are several easy ways to capture Twitch content without being distracted by on-screen elements. You can use built-in screenshot shortcuts, browser add-ons that hide overlays automatically, or dedicated recording tools that let you save high-quality Twitch screenshot from VODs and livestreams. Some methods work best for instant snapshots, while others are better for archiving longer moments in full quality. Keep reading to find the option that fits your workflow.
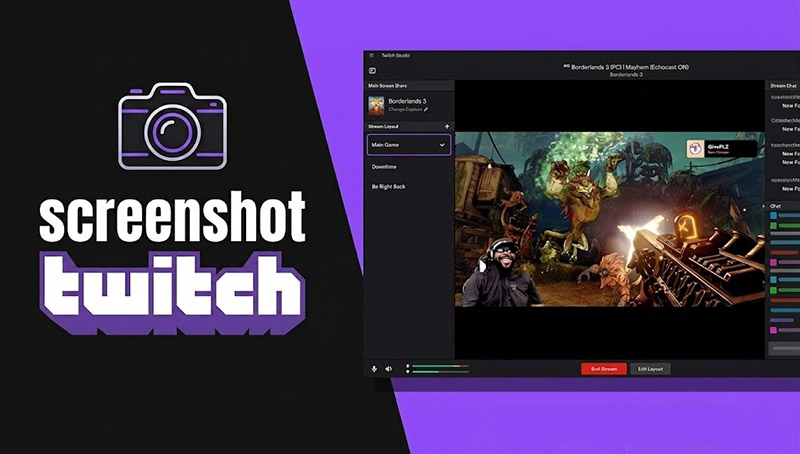
Does Twitch Notify Streamers When You Take a Screenshot?
No. Twitch does not alert streamers when viewers capture a screenshot during a live stream or VOD. Unlike platforms built around disappearing content, Twitch has no feature that detects or reports screen captures. A streamer can still see general engagement data, such as viewer counts, chat activity, or usernames appearing in chat, but they cannot tell who saved an image from the stream. If you take a Twitch screenshot, it remains private on your device. Note that screenshots should be kept for personal use whenever possible. Reposting or sharing someone else’s content without permission may violate copyright or the creator’s guidelines.
Quickest Ways to Screenshot Twitch Using Built-in Tools
If you only want to save a reaction, a funny moment, or a Twitch chat screenshot, the built-in screenshot tools on your device are usually the easiest choice. Before capturing the image, move your cursor away from the player for a few seconds so the playback controls fade out. This simple trick helps you get a cleaner Twitch screenshot without the pause icon or volume bar covering the stream.
Windows
- Windows + Shift + S: Open the Twitch stream, press the shortcut, select the area, and save from the Snipping Tool preview.
- PrtScn: Press Print Screen on the Twitch page, paste into Paint/Word with Ctrl + V, then save.
- Win + Alt + PrtSc: Start full screen when needed, press the shortcut.
Mac
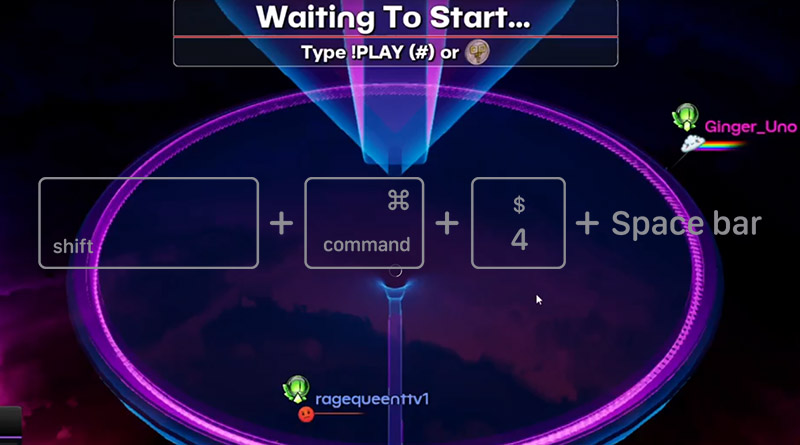
- Command (⌘) + Shift + 4: Press the shortcut, drag to select the Twitch area, then release to save.
- Command (⌘) + Shift + 4 + Space: Activate window capture, click the Twitch window, and it saves automatically.
- Command (⌘) + Shift + 3: Capture the full screen instantly and find it on your desktop.
Mobile
On iPhone
- Open the Twitch stream in the app or browser.
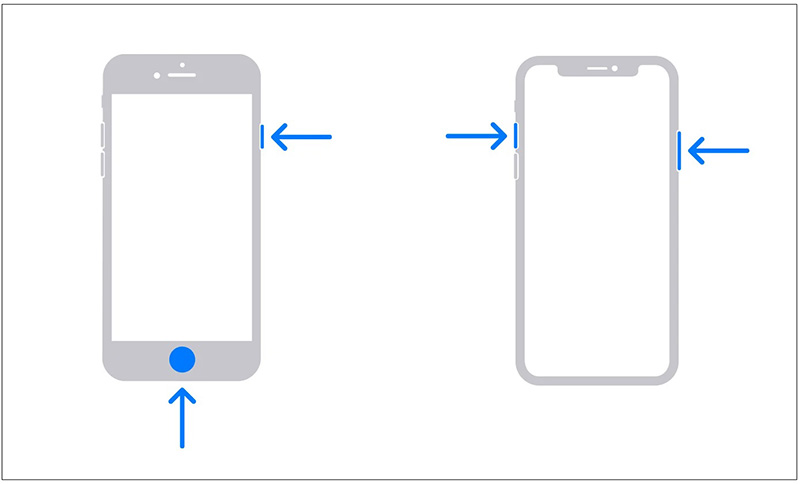
- Face ID models: press the Side Button + Volume Up together.
- Touch ID models: press the Top/Side Button + Home Button together.
- Release both buttons quickly after pressing.
On Android:
- Open the Twitch app or stream you want to capture.
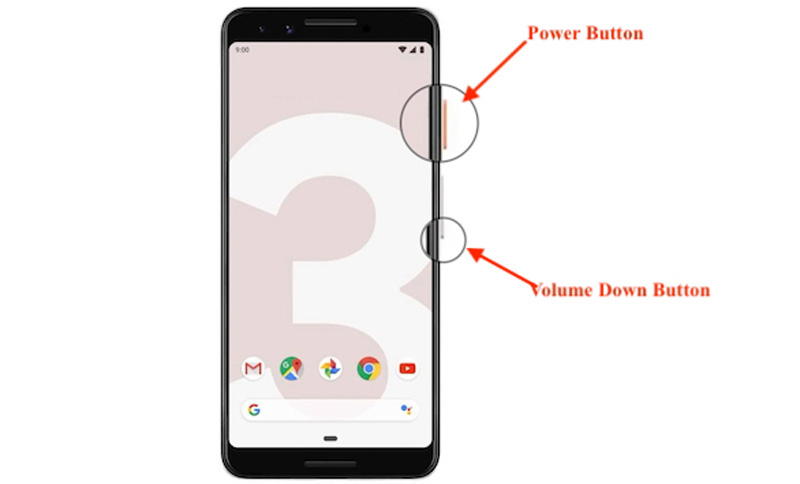
- Press Power + Volume Down at the same time to take a screenshot. On some Android phones, you can also use a 3-finger swipe-down gesture if screenshot gestures are enabled in Settings.
- Hold briefly until the screen flashes or the capture animation appears. For scrolling window capture, check how to take a scrolling screenshot.
Twitch Screenshot Extensions for Clean, Overlay-Free Frames
Built-in screenshot tools can be fast, but a Twitch screenshot may end up messy, with interface elements like volume bars, pause icons, or dimmed overlays accidentally included. On fast-moving streams, those small UI details can easily ruin an otherwise perfect frame.
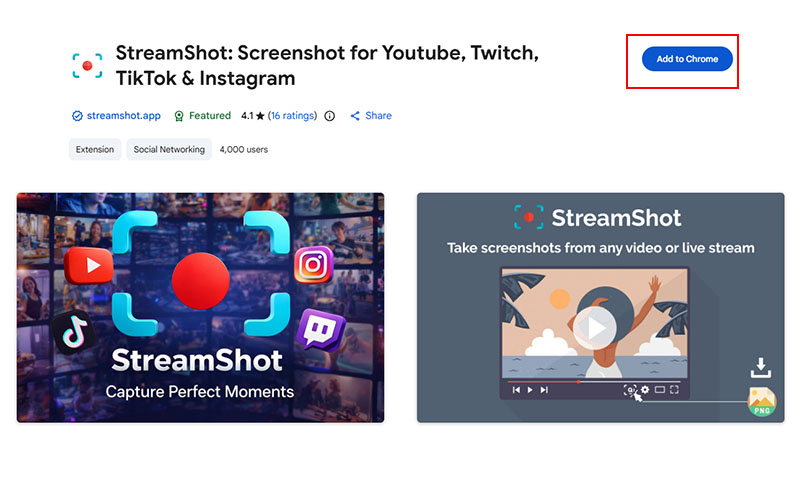
A more reliable approach is using a dedicated browser add-on such as StreamShot, a Twitch extension Chrome tool designed specifically for clean, overlay-free captures. StreamShot can capture screenshots instantly from Twitch, TikTok, Douyin, YouTube, and Instagram videos or live streams with one click, then store, edit, and share your favorite moments in high quality.
Below is how to screencast Twitch with the StreamShot Chrome extension. For VODs on Twitch, refer to the guide on how to record VODs on Twitch.
Step 1. Install StreamShot from the Chrome Web Store StreamShot Chrome Web Store.
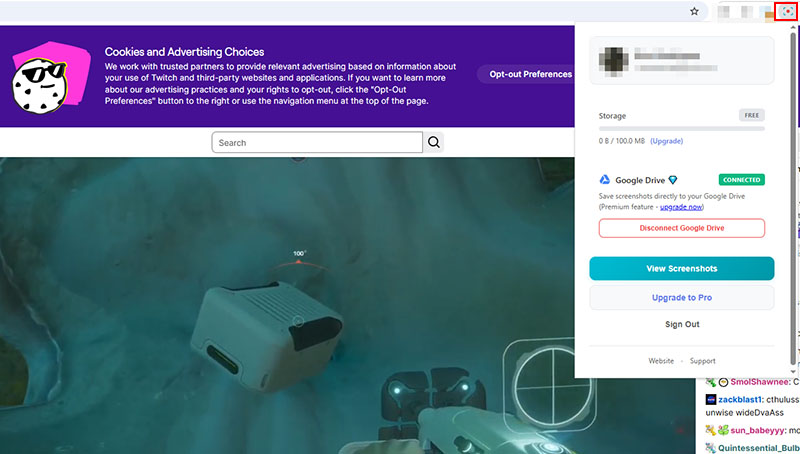
Step 2. Pin the extension to your browser toolbar for access.
Step 3. Open your Twitch stream and wait for the moment you want to capture.
Step 4. Click the StreamShot icon or use its Instant Snap feature. The screenshot is saved automatically, without on-screen overlays.
Versatile All-in-One Solution for Twitch VODs & Clips Capture
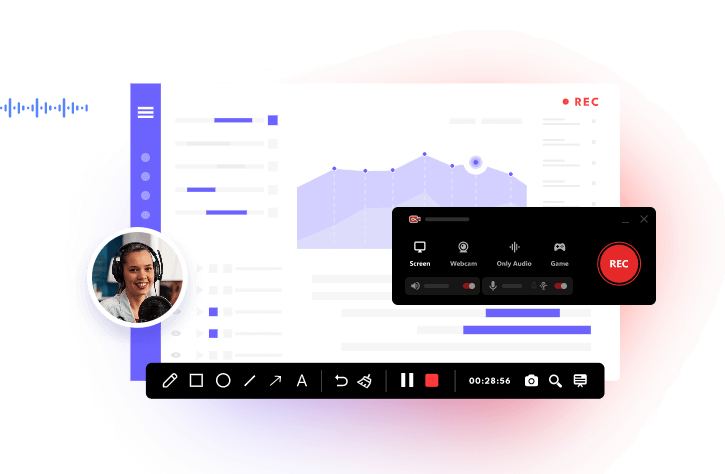
For quick captures and control over both quality and post-editing, a desktop tool becomes the more reliable path. Instead of relying on basic system shortcuts, iTop Screen Recorder works as an all-in-one capture program that connects screenshots, recording, and editing in one place. It is especially useful when saving moments from Twitch VODs or clips in high quality where timing and clarity matter.
- Free Twitch screenshots in multiple output formats: iTop Screen Recorder saves Twitch screenshot in JPG, PNG, WEBP, BMP, etc., ensuring compatibility for sharing, editing, or archiving Twitch moments across different platforms and workflows.
- Customizable capture area with lossless quality: You can select full screen, active window, or a manual region for Twitch, and screen record protected videos. Every Twitch screenshot maintains sharp detail, ideal for gameplay frames or UI-heavy screenshot Twitch captures.
- Scheduled recording with seamless multitasking: The tool lets you record Twitch stream and set automatic recording times for long streams or VOD sessions. The system runs quietly in the background while you continue browsing or watching other content.
- Lag-free capture with high-speed hotkeys: Instant keyboard shortcuts ensure a Twitch stream screenshot can be taken without delay, even during fast-paced gameplay or live moments with heavy on-screen action.
- Built-in image editor for advanced post-editing: After capture and Twitch clip save, crop, annotate, or highlight key details. This helps refine visuals and supports clearer sharing or breakdowns of Twitch content.
How to Use iTop Screen Recorder for Twitch Screenshots?
Here’s a walkthrough of how to capture Twitch screenshots using iTop Screen Recorder on PC.
Step 1. Download iTop Screen Recorder from the official website and install it on your computer for a Twitch screenshot.
Step 2. Open the software and adjust settings such as image format, quality, and save location in the menu.
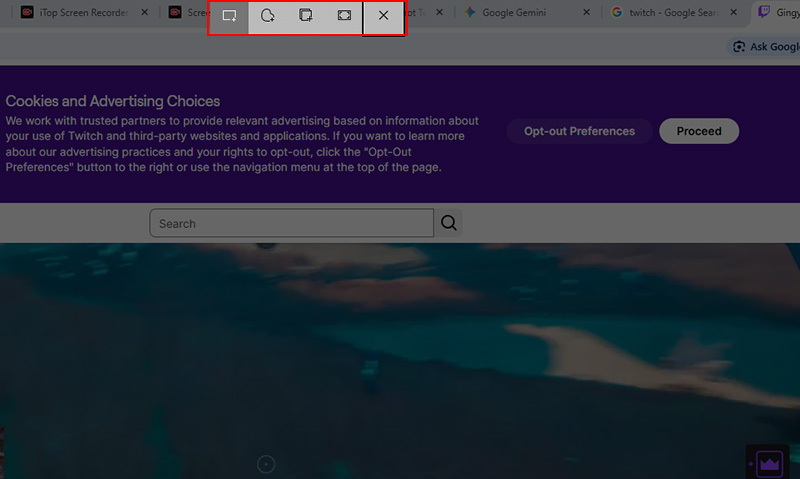
Step 3. Click the Screenshot tool from the side panel and choose full screen, window, or custom area capture.
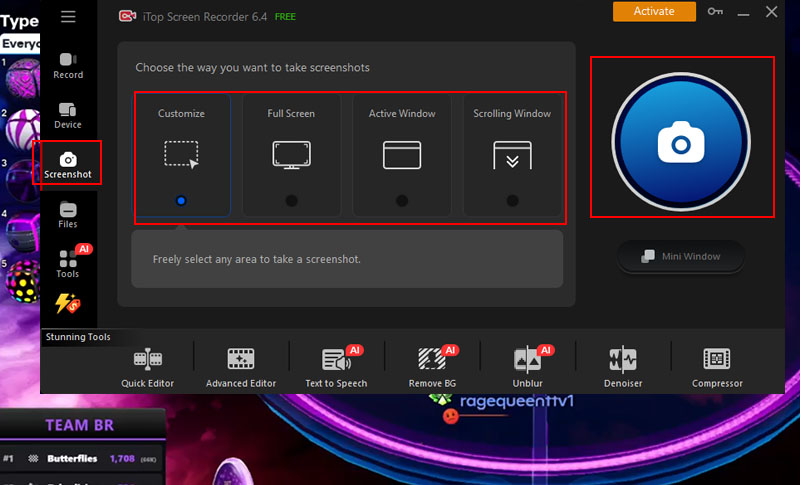
Step 4. Click the capture button or use hotkeys while watching Twitch to take instant screenshots. Use the built-in editor to crop, annotate, or refine the image before saving or exporting.
[Bonus Tip] Let Viewers Trigger Screenshots via Channel Points
Adding interactivity to a stream can significantly improve audience engagement, and this setup takes it a step further. By using Streamer.bot together with a screen capture tool such as iTop Screen Recorder, streamers can allow viewers to trigger screenshots using Twitch Channel Points. When a reward is redeemed, Streamer.bot detects the event and executes an automated action such as a hotkey press or script.
The Twitch recorder does not directly integrate with Streamer.bot. Instead, automation is achieved through local triggers like simulated keyboard input or command execution, which then activates the screenshot function.
Step 1. Install Streamer.bot and iTop Screen Recorder on your PC. In iTop Screen Recorder, configure a dedicated hotkey for taking Twitch screenshots.
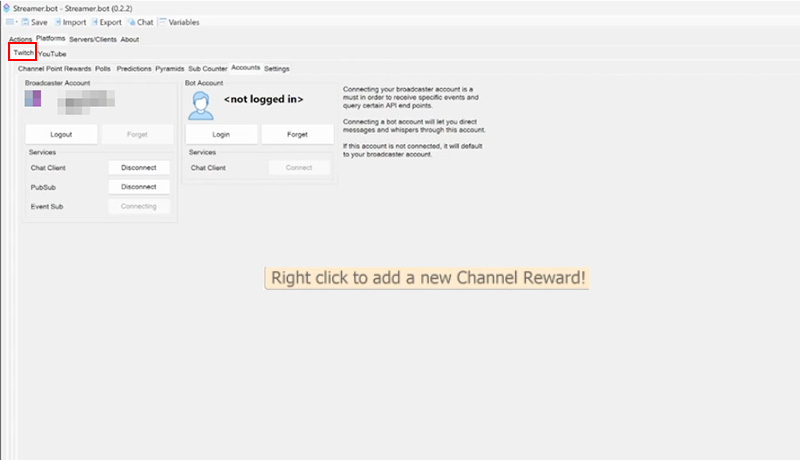
Step 2. Link your Twitch account inside Streamer.bot and create a Channel Points reward. Assign it to trigger a custom action whenever a viewer redeems it.
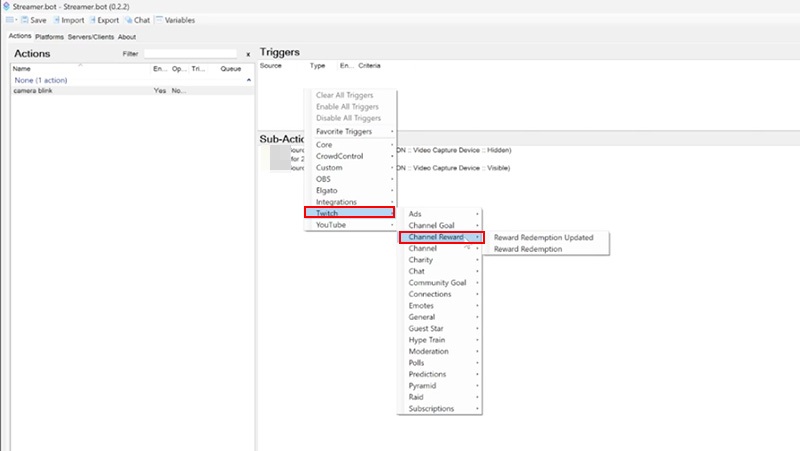
Step 3. Set Streamer.bot to either simulate the screenshot hotkey or run a local script when the Channel Points reward is activated. This allows iTop Screen Recorder to capture the current screen frame automatically.
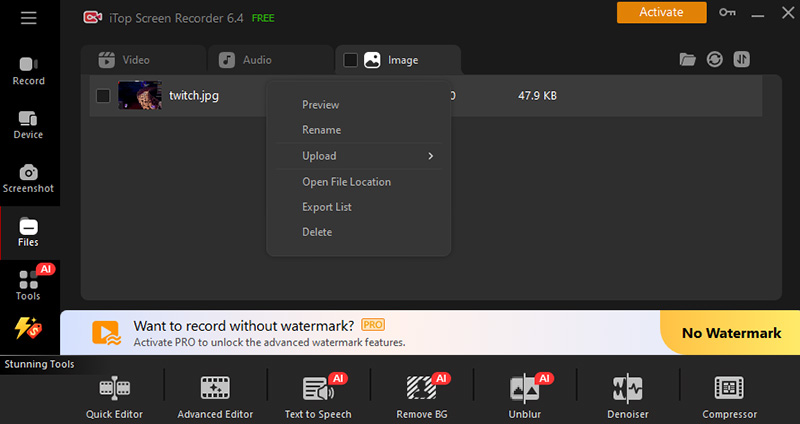
Step 4. Once triggered, iTop Screen Recorder saves the screenshot to a designated folder. You can optionally extend the workflow using additional scripts or a webhook system to automatically send the image to Discord for instant sharing.
This workflow is ideal for community-driven streams, making viewer interaction more engaging while keeping screenshot quality consistent and fully automated.
Conclusion
Taking a clean Twitch screenshot is quite straightforward once you choose the right method, from built-in shortcuts to advanced tools and automation setups. For fast captures and interactive streaming, having the right workflow makes a clear difference. Try this free screen recorder if you want more screenshot and editing control, better quality, and a smoother way to capture and manage Twitch highlights, gameplay moments, chat reactions, etc., without hassle.