VODs, short for Video on Demand, refer to saved recordings of past live streams that viewers can watch after the broadcast ends. People can enable or disable this option in their profile settings, allowing their followers to catch up on missed streams or highlights. But Twitch only stores VODs on its platform within limited time. That's why some of you choose to screen record Twitch VODs for getting access to the content whenever they want. If you want to know how to record VODs on Twitch, this article lists several working ways to walk you through.
Can You Download VODs from Twitch
Twitch's built-in system allows users to automatically save past broadcasts (VODs) for a limited retention period (7, 14 or days 60 days, depending on account type). So, you can directly download these clips for re-watching later. But before getting started, there are some things you should be aware of.
- If any part of your stream is muted due to the "Audio Recognition" system flagging copyrighted music, you cannot download an unmuted version from Twitch.
- VODs streamed in 2K or vertical format will have those specific quality/format versions expire after 7 days, reverting to the standard 1080p/horizontal version for the remainder of the retention period.
Now, you can follow these steps to download VODs on Twitch.
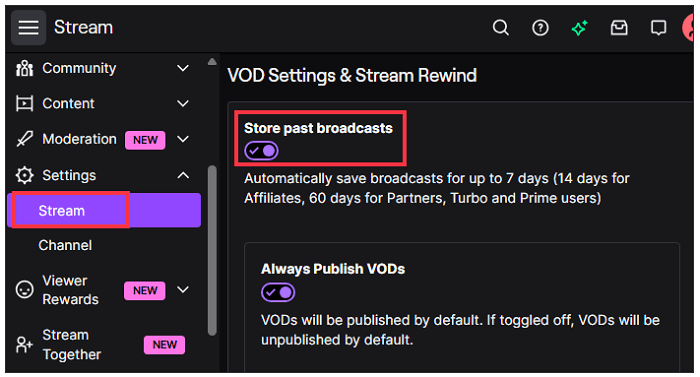
Step 1. Enable VOD storage.
- Click your profile icon on Twitch, and select Creator Dashboard.
- In the left sidebar, click Settings > Stream.
- Scroll to VOD settings and enable the "Store past broadcasts" option.
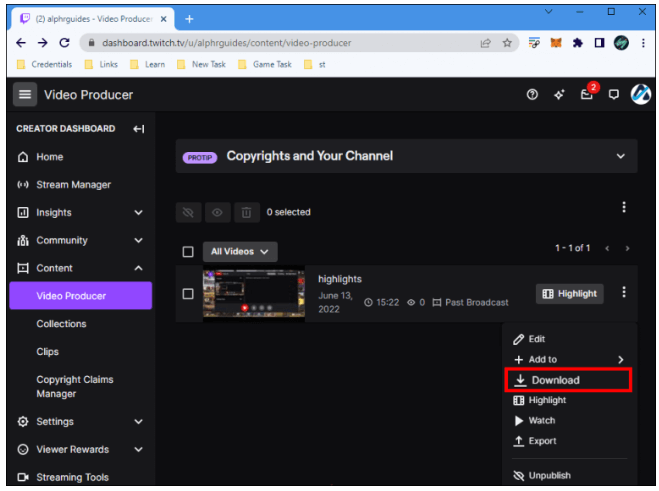
Step 2. Access the VODs you wish to download.
- In the Creator Dashboard, click Content > Video Producer.
- Find the VODs you wish to download.
Step 3. Save the VODs.
- Click the three dots next to the VODs you wish to download and select Download to save it on your computer.
- Wait for the download to finish.
- Save the broadcast to an external hard drive and upload it to YouTube.
How to Screen Record VODs on Twitch [Best Way]
If you unfortunately encounter "not downloading" issue or find the downloads have bad quality, recording Twitch VODs is the best alternative.
iTop Screen Recorder is recognized as an ideal Twitch VDD recorder for its ease of use and accessibility. It streamlines the screen recording procedure regardless of your tech knowledge. A clear layout provides simple access to necessary features like selecting recording regions, audio settings, video quality adjustment, and export settings. Whether you're a novice who are the first time to use such a tool or a seasoned maker who is looking for a quick, high-quality solution, the screen recorder will never disappoint you.
For more reasons why we recommend it, you can check the following feature list.
◆ Record VODs on Twitch Without Compromising Quality
iTop Screen Recorder seamlessly capture Twitch VODs with audio. It maintains original quality, not only ensuring crisp images and vivid colors but clear sound allowing you to have a good viewing experience on different devices.
◆ Capture Smooth, Lag–free Video at High Resolution
iTop Screen Recorder is able to record a video at 1080p/4K quality or high fps without stuttering or dropping frames. This is crucial for recording activities like gaming, social media, and presentations.
◆ Record Twitch VODs Without Black Screen
It comes with an Enhanced Mode, designed to bypass DRM/protection that cause black screens in other recorders. So, you can perfectly record encrypted Twitch VODs or screen record protected videos with no flaws from other platforms.
◆ Screen Record VODs on Twitch as Long as Possible
iTop Screen Recorder is a free screen recorder with no time limit. Despite the length of a past broadcast, it helps save the whole content as a video file. It is also perfect for recording live streams on Twitch.
◆ Editing Tools to Polish Your Recordings
The built in video editor allows you to polish the video clips by attaching background music and video filters, thus you can get your videos more attractive.
How to record VODs on Twitch using iTop Screen Recorder? Just follow these steps to do it.
Step 1. Free download iTop Screen Recorder and install it on your PC.
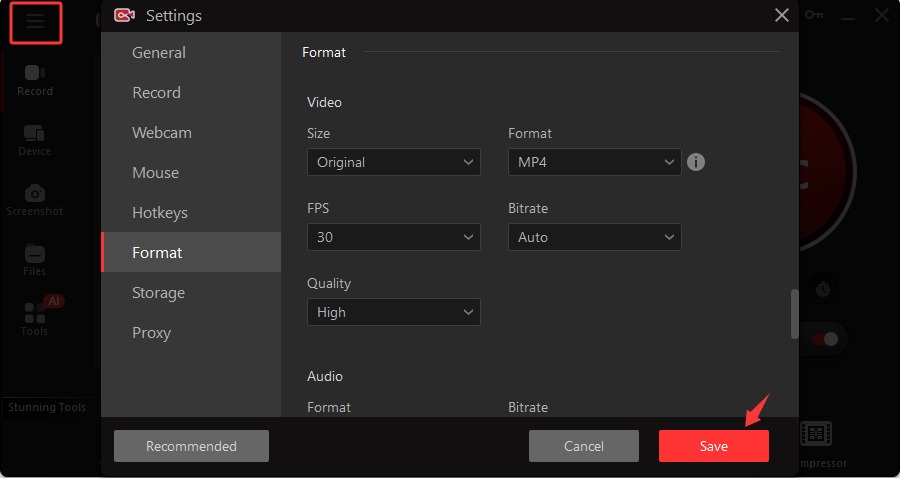
Step 2. Customize the settings.
- Click the settings icon to personalize the settings.
- Click Format to choose video size, FPS, quality, etc. Or you can click Storage to set desired output storage place.
- Once set, click "Save" to proceed.
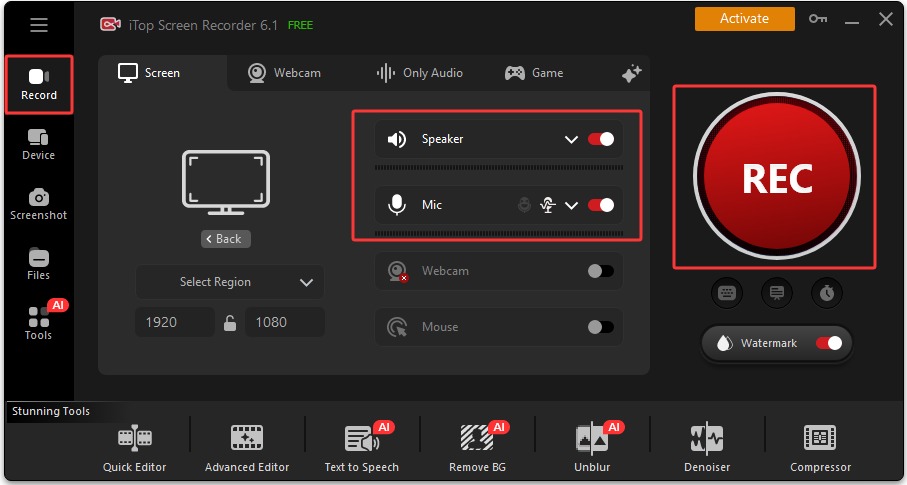
Step 3. Start recording.
- Open the Twitch VOD you want to record.
- Click "Record" from the left menu bar in iTop Screen Recorder.
- Choose the recording area and enable "Speaker" to record Twitch VODs with audio.
- Click "REC" to start recording.
Step 4. Stop recording.
- On the mini control bar, you can use drawing tools to add annotations and highlight key points.
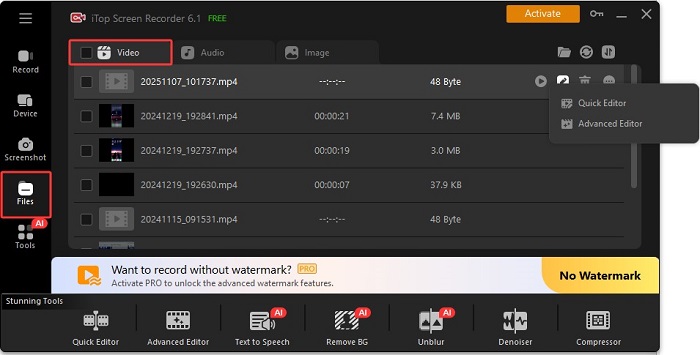
- When it finishes, click the Done button to stop recording.
- Your recordings will be automatically saved under Files > Video. You can edit it to your preference.
How to Record VODs on Twitch Using OBS Studio
OBS (Open Broadcaster Software) is an open-source tool that lets you capture VODs on Twitch. It is widely compatible with Windows, Mac, and Linux and comes with a wide variety of features like creating custom scenes, mixing audio/video sources, and exporting high-quality files. Here’s how to record Twitch VODs using OBS studio.
Step 1. Download and launch OBS on your computer.
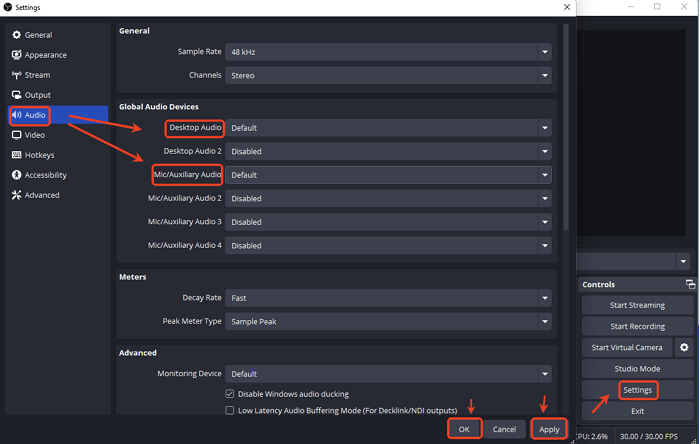
Step 2. Head to Settings to configure output format, storage path, and other options.
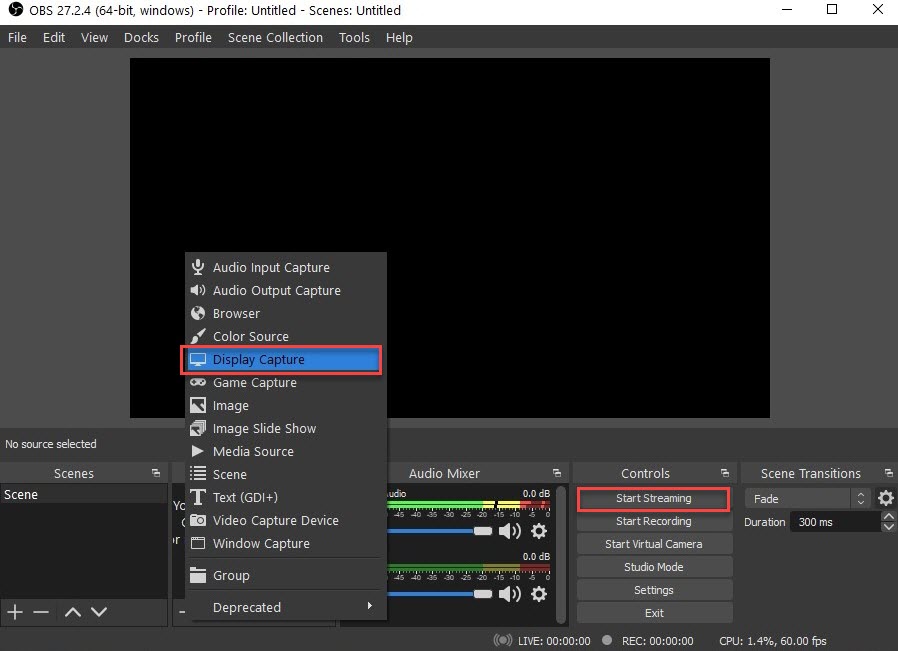
Step 3. Go back to the home screen of OBS Studio and click "+" under the Source tab, then select "Display Capture" > "OK" > Choose the screen you wish to capture, then click OK to proceed.
Step 4. Click "Start Recording" to capture Twitch VODs, and click “Stop Recording” to end the recording process. Then, the recordings will be stored on your computer.
How to Record VODs on Twitch Using Xbox Game Bar
Xbox Game Bar, a built-in screen recording tool in Windows 10 and 11, can also help to record Twitch VODs easily and quickly. But note that Xbox Game Bar doesn't allow you to record the general Windows Desktop or File Explorer. Here are the simple steps.
Step 1. Open Windows Settings > Gaming > Xbox Game Bar. Ensure the toggle switch for "Enable Xbox Game Bar" is set to ON.
Step 2. In the Settings > Captures, set the Max recording length ( up to 4 hours is available as an option, which is suitable for VODs).
Step 3. Open your browser and navigate to the Twitch VOD you wish to record.
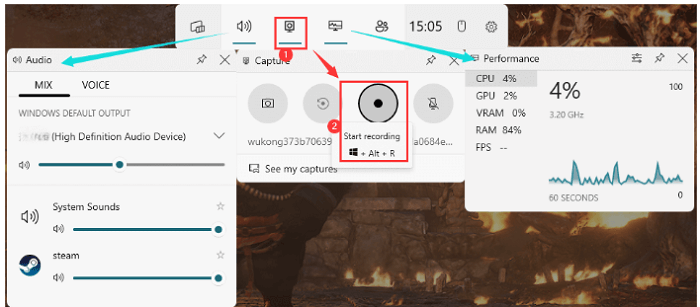
Step 4. Press the Windows key + G on your keyboard to launch the Xbox Game Bar.
Step 5. In the Game Bar's Capture window (usually top-left), click the Start recording button (a red circle icon).
Step 6. Start playing the Twitch VOD in your browser. Ensure the correct window remains the active one.
Step 7. When you are finished, click the Stop recording button (a blue square icon) on the small recording bar.
Also Read: Xbox Game Bar not Working? How to Fix >>
The Bottom Line
How to record VODs on Twitch? We've explored various tool with the power of saving memorable broadcasts. Among these options, Top Screen Recorder is highly recommended for its user-friendly interface and robust capabilities. It simplifies the process of capturing and sharing your favorite Twitch content. Using it, you can record smooth, high-resolution videos and manage recordings efficiently.

Record Live and Streaming Videos in One Click
- Record TV shows, movies, live sports from any site.
- Record videos and live streams without quality loss.
- Record from YouTube, Netflix etc., without black screen.
- Record with mic/webcam to create reaction videos.