

When you create presentations, gameplay videos, or product tutorials, the mouse pointer can become a distraction. Viewers might unintentionally focus on the cursor instead of the content you want to highlight. Fortunately, many screen recording tools let you disable the cursor or hide mouse-click indicators through their settings. In this blog, let’s explore how to screen record without cursor on Windows and Mac with several recommended tools.
Screen Record Without Cursor in Xbox Game Bar Windows 11/10
Xbox Game Bar is a built-in Windows screen recorder that lets you capture your computer activity and take screenshots of your gameplay. For users who don’t want to install additional software, Xbox Game Bar is a great option to screen record without cursor. Just adjust the relevant Windows capture settings before starting your recording, and that’s it.
How to screen record without cursor on Windows
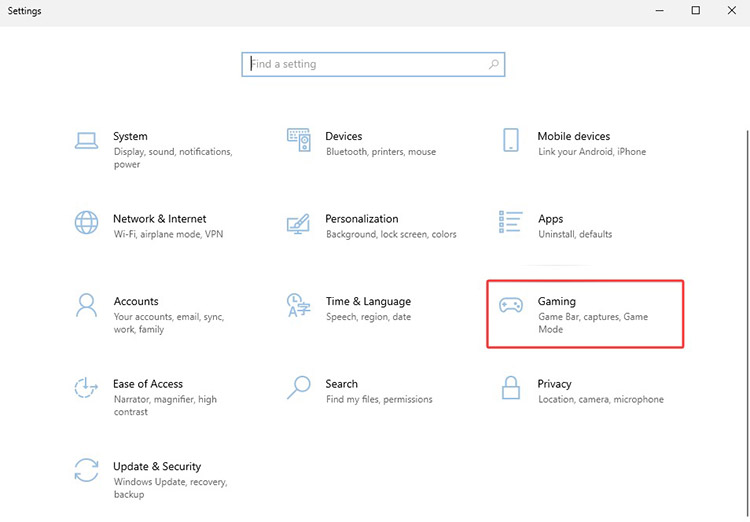
Step 1. Search for Settings on your Windows PC and go to the Gaming option.
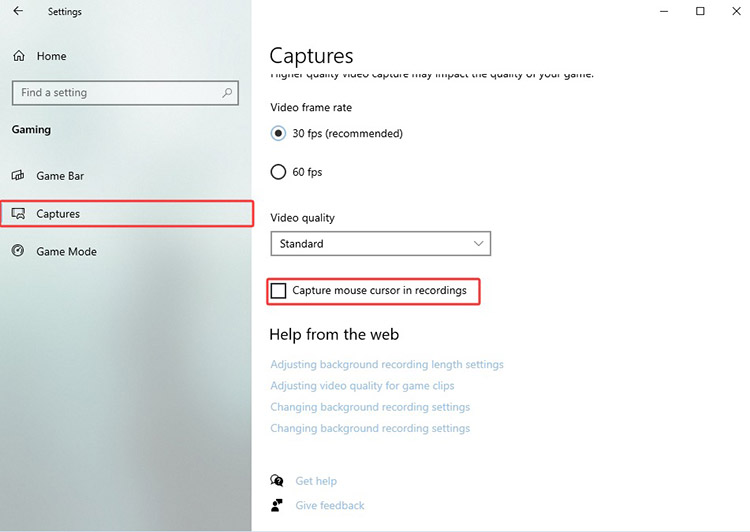
Step 2. Select Captures from the left and untick the box for “Capture mouse cursor in recordings.”
Step 3. Press Windows + G to open the Xbox Game Bar. Start a recording. Check the video and see if the cursor is visible.
Xbox Game Bar short review: Xbox Game Bar is a solid choice to screen record without mouse on Windows. However, it lacks advanced recording controls and customization options available in dedicated screen recording software.
Pros:
-Preinstalled with Windows 10 and 11
Cons:
-Increases CPU and memory load during recording
-May cause minor frame-rate drops in games
-Few options for advanced cursor control
-Potential problems with recording or audio capture
Screen Record Without Cursor with OBS Studio
How to hide mouse cursor in screen recording Windows 11/10? OBS Studio is a popular free and open-source screen recorder designed for recording gaming, streaming, tutorials, and other content. It provides extensive control over recording sources and settings. You can configure the settings to record mouse clicks or not.
How to Screen Record without Cursor with OBS
Step 1. Open OBS Studio and add a Display Capture, Window Capture, or Game Capture source.
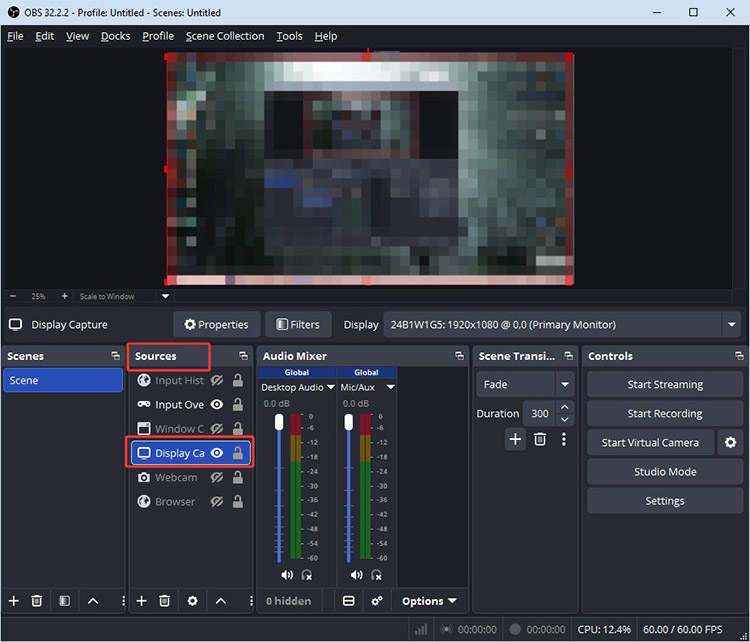
Step 2. Double-click the capture source, for instance, Display Capture, in the Sources panel.
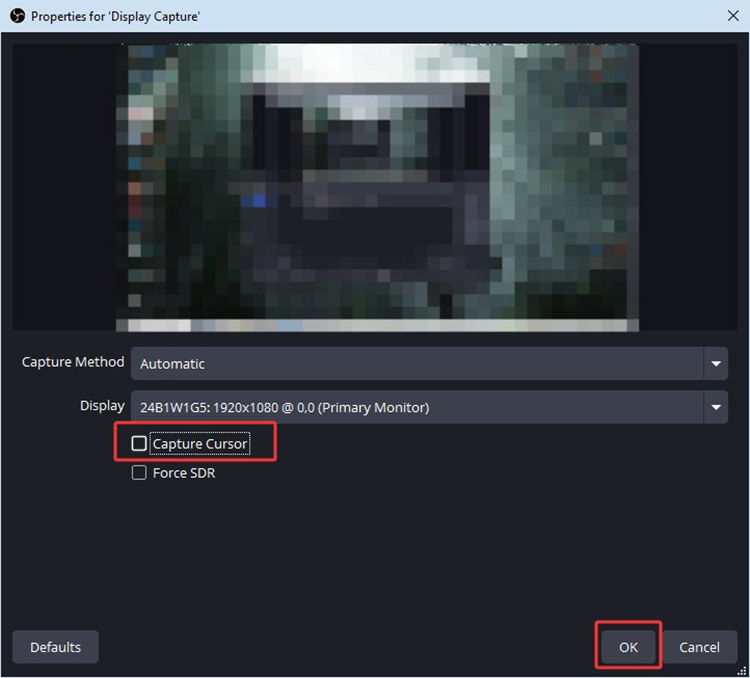
Step 3. Uncheck “Capture Cursor”, then click OK to save the setting.
OBS Studio short review: OBS lets you easily capture clean footage with plenty of customization. But beginners may need some time to get familiar with its interface, and it can not screen record protected videos natively.
Pro:
-Extensive control over scenes, sources, audio, and encoding.
-Free and open source; no subscription is required.
-Capture options for display, window, game, webcam, and other sources.
Cons:
-Steep learning curve for beginners.
-High-quality recording can consume CPU and GPU resources.
-You need to configure sources and recording settings before recording.
-Focuses on recording and streaming, not video editing
Screen Record Without Cursor Using iTop Screen Recorder
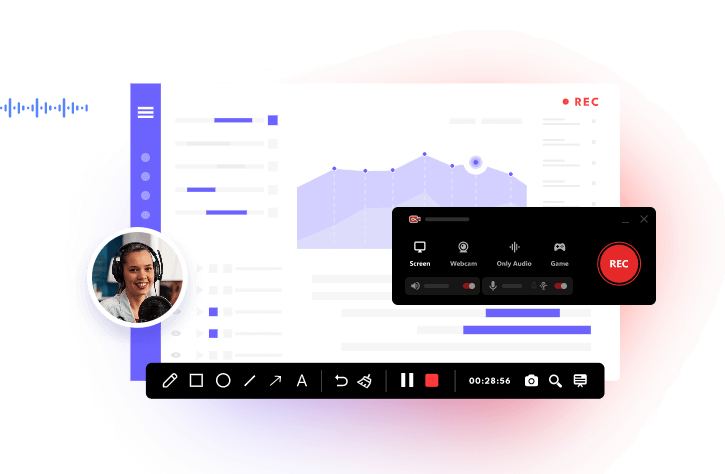
iTop Screen Recorder is a handy tool for capturing desktop activity with minimal setup. You can turn off the cursor before recording to get a cleaner look, or record screen with mouse click sound effect as you see fit. It supports recording in up to 4K resolution, with system sound and microphone audio captured simultaneously. You can also add a webcam overlay and record yourself reading a book easily.
How to Screen Record without Cursor with iTop Screen Recorder
Step 1. Download and install iTop Screen Recorder on your Windows PC.
Step 2. Launch the recorder, choose the recording mode as Screen on top. Select the recording area and toggle off the Mouse option.
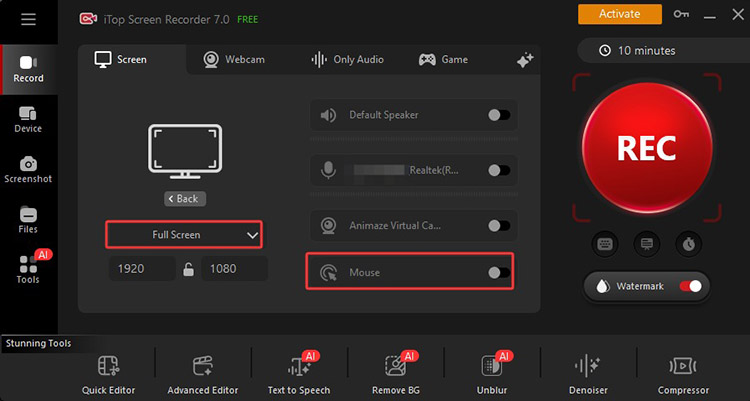
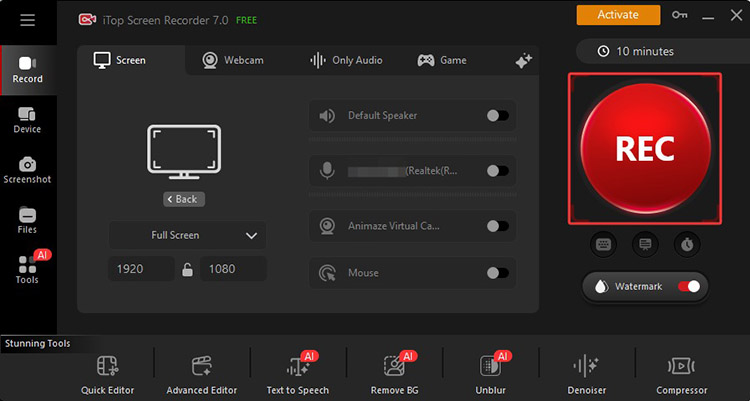
Step 3. Click on the Record icon to screen record without a cursor.
Tip: iTop Screen Recorder suits all kinds of recording tasks, from tutorials to creative workflows. Just check out how to record Photoshop process to learn more.
iTop Screen Recorder short review: iTop Screen Recorder provides a simple way to capture clean footage. Its multiple capture modes, audio sources, webcam overlays, and basic editing also suit a wide range of everyday recording needs. For those who are currently using Logitech Capture, this is also one of the best alternatives available.
Pros:
-Flexible options for different recording regions.
-Capture your screen, webcam, and audio based on your needs.
-Record system sound and microphone input simultaneously.
-Trim, cut, and apply basic edits directly after recording.
Cons:
-No advanced editing for complex video production
Screen Record Without Cursor: Hide Mouse Cursor with QuickTime
Want to screen record without cursor Mac? QuickTime is a reliable tool for basic captures on Mac. However, it does not offer advanced controls that professional recorders offer, for instance, custom bitrate, encoder selection, frame-rate control, or detailed recording profiles. It’s excellent for quick screen captures, yet less suitable for users who need precise control over recording quality and performance.
For users who need to hide the cursor on Mac, you will need to install the Mouse Hider app first. It lets you hide the cursor with a keyboard shortcut. Once the cursor is hidden, you can use QuickTime to record your screen without the mouse appearing in the footage.
How to Hide Mouse in QuickTime Screen Recording
Step 1. Open the Mouse Hider app. Press Control + Option + Command to hide the cursor.
Step 2. Open QuickTime Player and choose File > New Screen Recording.
Step 3. Select the recording area using the toolbar at the bottom, then click the Record button to screen record without cursor Mac.
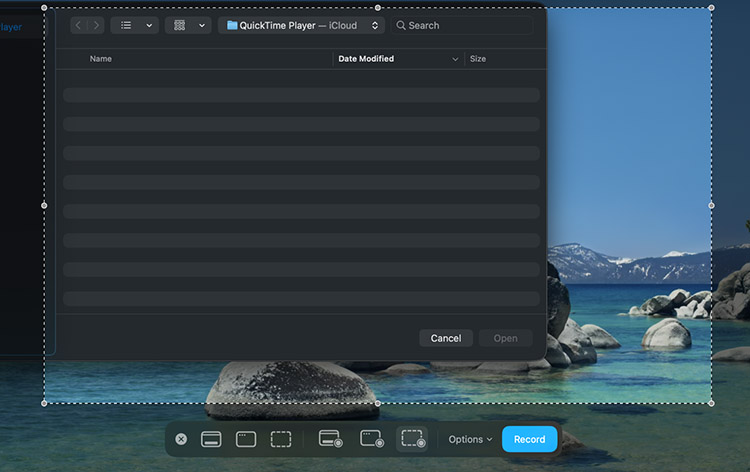
QuickTime short review: QuickTime is a convenient option for basic screen recording on Mac, especially when you want a simple and free solution. However, you need to pair it with a third-party tool to screen record without cursor.
Pros:
-Free and easy recorder built into macOS
Cons:
-QuickTime is available only on macOS
-Limited options for adjusting recording quality and performance
-Built-in editing is limited to simple trimming
-No advanced audio and recording controls
How to Screen Record Without Cursor: Nvidia GeForce Experience
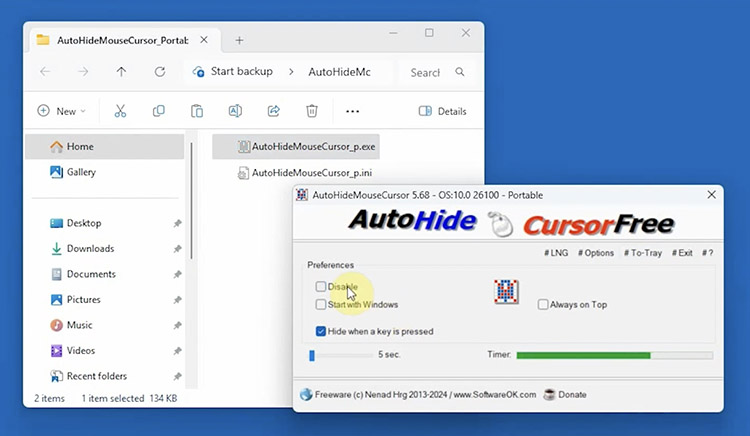
Nvidia GeForce Experience(now called the NVIDIA App) does not offer a direct setting to hide the mouse cursor. If you need clean footage without the pointer, you will need to pair the NVIDIA App with AutoHideMouseCursor. This free tool can auto-hide the mouse cursor Windows 11/10 after a set period of inactivity, which is rather useful for gameplay and desktop recordings.
How to Screen Record without Cursor with NVIDIA App
Step 1. Download AutoHideMouseCursor from the MajorGeeks website. Extract the ZIP file and run the executable.
Step 2. In the program window, adjust the timer slider. Optionally enable “Hide when a key is pressed,” or choose “Start with Windows.” Leave the utility running in the background.
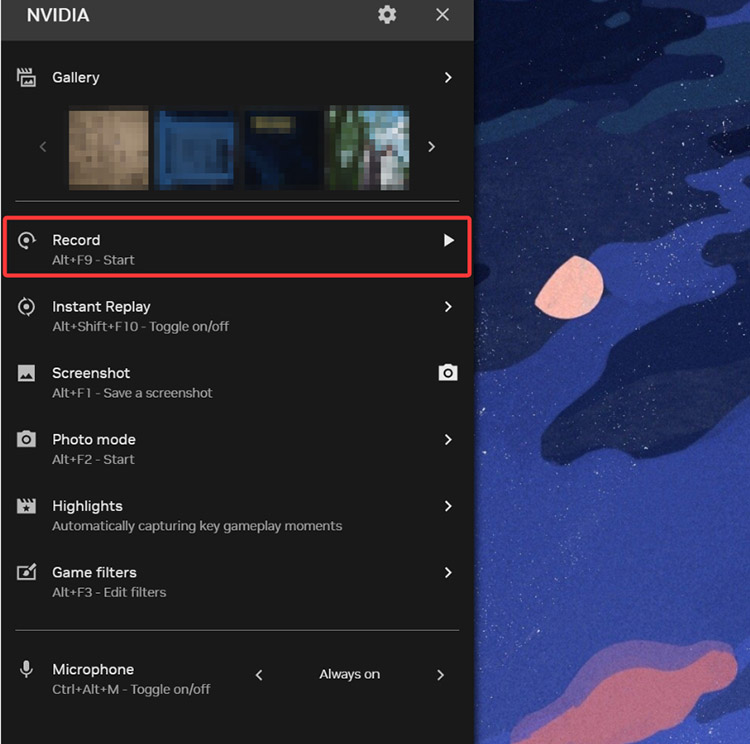
Step 3. Open the NVIDIA App overlay. Click Record or use the shortcut to screen record without cursor.
NVIDIA GeForce Experience brief review: With smooth performance and easy access to recording features through its in-game overlay, NVIDIA App is great for easy gameplay recording without cursor.
Pro:
-Designed for convenient game capture on supported NVIDIA hardware
Cons:
-Requires compatible NVIDIA graphics hardware
-Fewer recording and customization options
-The NVIDIA App can cause more background resource usage
-Core features have moved to the newer NVIDIA App
Conclusion
How to screen record without cursor? This guide has provided 5 useful methods for Windows and Mac. If you are looking for a simple solution with built-in cursor controls, iTop Screen Recorder is worth considering. It supports flexible screen capture, audio recording, webcam overlays, and basic editing all in one place. Download iTop Screen Recorder and create clean and professional screen recordings today!