FaceTime is an exclusive app that can only be used on iOS and macOS devices. It is a communication service that lets iPhone users connect via a secure line. As one of the most widely used online communication service, some people want to screen record FaceTime with audio so that they can turn a call into a memory.

However, in most cases, the sound of the recordings are just disappeared with only a video left, despite the face that the microphone already on after mant times retry and tests. How to record facetime with audio? This post provide 3 ways deserve a try.
- Contents
- How to Recover Temporarily Deleted Data from Laptop
-
How to Recover the Permanently Deleted Data from Laptop
- Recover the Deleted Data from Laptop with Data Recovery Software
- Recover the Deleted Data from Laptop with File History on Windows 11/10
- Recover the Deleted Data from Laptop Using Backup and Restore
Can You Screen Record FaceTime with Sound?
"Tried recording a Facetime call and everything works fine - except the audio. The time leading up to it, from when I hit record and can hear myself or other sounds playing but once the person answers the call, there is no sound." user @vanwyngarden18 asked this question on Apple Support Community, and 5926 people clicked "Me too". It is a commonly seen question among FaceTime users thus making people wonder: can I screen record FaceTime with sound?
The answer is definitely yes. The reason for no sound when recording FaceTime might be attributed to wire-tapping laws around the world, thus making it hard to capture the voice with the built-in screen recorder when using any form of communication service like FaceTime, Skype, or WeChat. There are still ways to record FaceTime sound, just follow the 3 parts below to record FaceTime audio on iPhone, Mac, and Windows.
How to Record FaceTime with Audio on iPhone?
You will be able to record your FaceTime call along with sound up to iOS version 13.3. Further versions have applied restrictions to record the audio for the FaceTime call. So make sure of your iPhone for its iOS version before trying to go forward with the process.
After that, the iPhone provides you with a built-in screen recorder tool that lets you screen record FaceTime with audio whenever you want. Here’s how to screen record with audio on FaceTime using your iPhone.
Step 1. Restore the old version of FaceTime from App Store>My Purchase. Or download one online.
Step 2. First of all, you need to start a FaceTime call that you want to record.
Step 3. Swipe your phone from below and it will bring up the control center.

Step 4. Find the “Screen Recorder” option from this menu, click and hold it until you see an option that lets you allow access to your microphone.

Step 5. Turn on the microphone option and return back and then click on the screen recorder again to start recording your call.

Step 6. Click on the red recording status in the upper left corner to stop recording when you are done with the call.
Step 7. You can find the recording in your gallery.
This is how to screen record FaceTime on an iPhone with sound using the built-in screen recorder.
How to Screen Record FaceTime with Audio on Mac
If things aren't going well on your iPhone, or you are using FaceTime on Mac, there are apps to record FaceTime with audio too. This answer assures you to screen record FaceTime with audio with clearer audio and inputs from a microphone. You can do that by utilizing a screen record FaceTime with audio app like RecordIt for your Mac as well as iPhone.
RecordIt is a multi-purpose video recording app that can record games and live sports in addition to calls. Here is how you can use the RecordIt app on your Mac to screen record FaceTime with audio.
Step 1. Download & install the app
First of all, go to the App Store and search for the RecordIt app. Once it shows up in the results, download and install it.
Step 2. Launch the application
Launch the application, and allow access to the microphone and storage of your phone. Now, you can start the FaceTime call.
Step 3. Record FaceTime with audio
After clicking on the “Record” button, you will see a “Start Broadcast” option. Click on this option to start recording. Right underneath this option, you will see a microphone option that you can turn on and off at any time.

Once you are done with the call, click on the stop button and your FaceTime recording will be saved in the Gallery.
Screen Record FaceTime with Audio Professionally
If you have tried the above two methods to screen record FaceTime with audio and you are not getting the results you want, you can choose the third method which is to use a professional tool like iTop Screen Recorder to record FaceTime calls with clear audio. Need to operate on a Windows system.
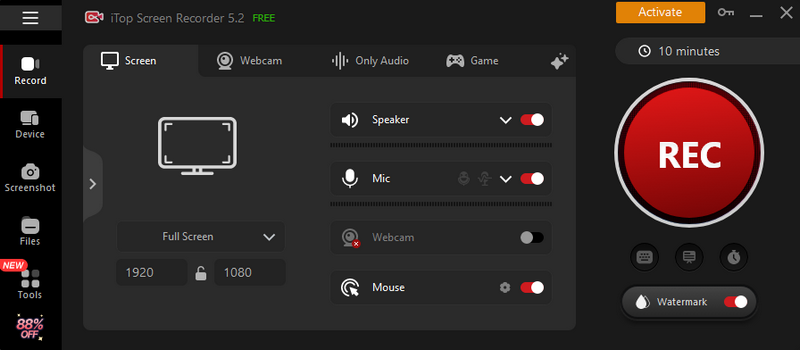
This tool is a professionally built software that can help you record FaceTime with audio for screen recorder Windows 10. It comes with many inherent features and some of them are listed here.
- The tool records every sound that comes from microphones and lets you choose whether you want to include the audio or exclude it.
- It even lets you add any sound or audio timeline to the recording to make the final results even better for you.
- It can record videos in high-quality formats with high-quality audio.
- You can record part of screen you preferred.
So, if you want to record FaceTime with clear audio on Windows, iTop Screen Recorder is the best screen recorder. Before getting to know how you can screen record FaceTime with audio using iTop Screen Recorder, you first need to know how you can use FaceTime on Windows.
How to use FaceTime on Windows
Ask the host of the FaceTime calls to send you a link to the call. After receiving the link, you can open the link in any browser in Windows, enter your name, and join the call. When the host approves your request, you will be included in the FaceTime call.
When you have joined the call, here is how you can screen record FaceTime with audio using iTop Screen Recorder.
Step 1. Download & install iTop Screen Recorder
Step 2. Set your preferences. Set up your preferences. Choose the area of the screen you want to record with a pre-set screen size. Allow the audio from the microphone if you want to include the audio.

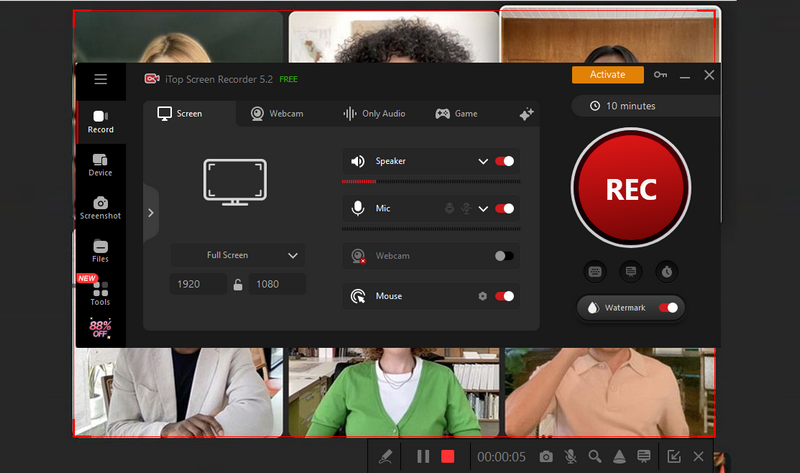
Step 3. Start recording. Now, start the FaceTime call and click on the recording button. You can edit, cut, trim, or add new audio to the recording using its editing tool.

Also Read: How to Screen Record on Fambase >>
Final Words
So, not being able to screen record FaceTime with audio is a problem that many iPhone users face. If you also have this problem and you want a better option, you can choose an alternative way which is to use RecordIt on your Mac. If the problem still exists then iTop Screen Recorder is the best professional free screen recorder that is guaranteed to provide the results you want. You can include high-quality and clear audio from the microphone with this software. So, download and install iTop Screen Recorder on your computer now.
 Vidnoz AI creates engaging videos with realistic AI avatars. Free, fast and easy-to-use.


