


Windows Media Player is a powerful player that allows users to play and watch videos, audio, and images. It is quite a good media playback application thanks to its diverse functionalities. But for people who want to record Windows Media Player screen for creating tutorials, sharing gameplay, or documenting software issues, it seems that not very user-friendly since it doesn’t offer built-in recording capabilities. If you want to record on Windows Media Player, the following five effective methods may help you a lot.
Record on Windows Media Player Using Xbox Game Bar
Xbox GameBar is an inherent overlay tool of Windows 10 and 11, designed for screen recording, audio capture, and screenshots. Thanks to its powerful functionalities, the Xbox Game Bar can also be used to record Windows Media Player. But before getting started, there are some things you should be aware of:
- Make sure you’re using a Windows computer that is running Windows 10 and 11.
- Ensure the Game Bar is enabled. If you’re not sure, just go to Settings > Gaming > Xbox Game Bar and enable it.
- Make sure Windows Media Player is in full-screen mode, or the Game Bar might work improperly.
- Close other applications to improve performance and reduce the chance of lag during recording.
If you’re ready, follow these steps to record Windows Media Player with Game Bar.
Step 1. Open Windows Media Player and the video or audio you wish to record.
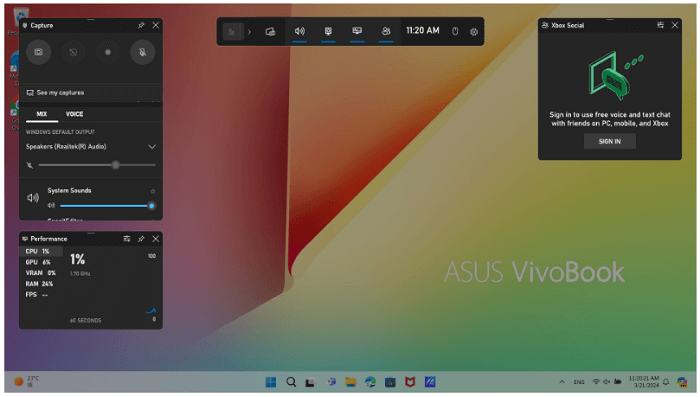
Step 2. Press the Windows key + G to open Xbox Game Bar.
Step 3. On the Xbox Game Bar, click the red circle icon to begin recording (or press Windows key + Alt + R). Don’t forget to open your desired video or audio with Media Player and start playing.
Step 4. Click on the red circle icon again to stop recording (Or press Windows key + Alt + R).
How to Record Windows Media Player Using Bandicam
As introduced earlier, the Xbox Game Bar doesn’t support recording the entire desktop or specific apps, which makes it less flexible. Given that, you can consider another option - Bandicam, which allows you to selectively record a specific window or apps like Windows Media Player.
There are two recording modes available for choosing: Game Recording mode and Screen Recording mode. The latter option applies to most situations, including recording Windows Media Player. Here are the steps to record Windows Media Player using Bandicam.
Step 1. Launch Bandicam and choose the "Rectangle on a screen" mode.
Step 2. Open the video or audio you wish to record in Windows Media Player.
Step 3. Click on the REC button on Bandicam to start recording (or press the F12 function key).
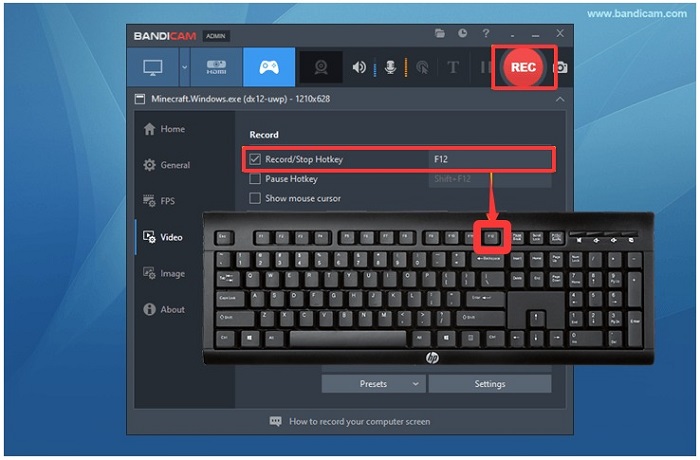
Step 4. Click on the button again to stop recording.
Step 5. The recorded video will be stored in the Home > Videos. From there, you can play, edit, or upload it to social media platforms.
Everything has two sides, Bandicam is no exception. Bandicam is easy to use and convenient harvest a lot of users. But on the downside, its lack of editing tools also deters some people. If you want a tool with both a screen recorder and a video recorder, this screen recorder for Windows 10 is a good option.
How to Record on Windows Media Player Using iTop Screen Recorder
Though the above-introduced two methods are easy to follow, they’re not enough for people who prefer more features, customization, and higher-quality recording options. If you want a more robust and feature-rich recording experience, just go for this professional screen recorder - iTop Screen Recorder. With it, you can do things like:
Record Windows Media Player in up to 4K
iTop Screen Recorder allows for capturing up to 4K videos and playback from Windows Media Player, ensuring that every detail of your screen is captured. This feature is popular and applies to any recording situation, such as recording on Firestick.
Record System Sounds and Microphone Input Simultaneously
Namely, this feature enables you to record both system sounds and microphone input at the same time. Whether to record Zoom meeting or an online presentation, you can ensure that both audio from your computer and your voice are captured.
Edit Your Recordings with Its Built-in Video Editor
iTop Screen Recorder includes a built-in video editor that allows users to make quick edits to their recordings. You can trim unwanted sections, add text, and apply effects without needing to switch to a separate editing software, streamlining the workflow
Export Recordings in Multiple Formats
With iTop Screen Recorder, users can export their recordings in various formats to suit different needs and preferences. Whether you need MP4, AVI, or other formats, this flexibility ensures compatibility with a wide range of devices and platforms.
Record Long Sessions without Worrying about Time Constraints
iTop Screen Recorder allows users to record extended sessions with time limits. This is perfect for capturing lengthy videos. For example, to record on Peacock. Thus, you can focus on your content without interruptions.
If you want to use it to record on Windows Media Player, here are the steps.
Step 1. Free download and launch iTop Screen Recorder on your Windows computer.
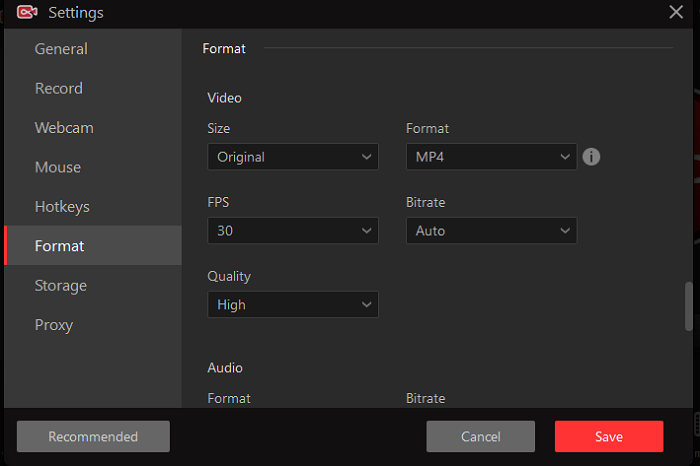
Step 2. Go to Settings to make your customization. You can set size, format, frame rate, bit rate, and quality.
Step 3. Launch Windows Media Player and prepare for the video or audio you wish to record. Go back to iTop Screen Recorder and choose Record > Screen, and select the area you wish to record. Then, play the video and click REC to start recording.
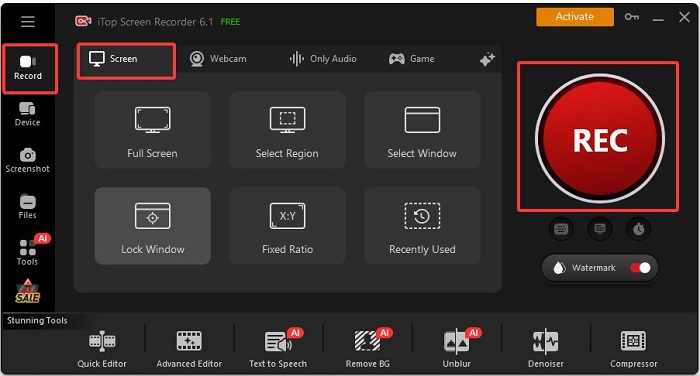
Step 4. When you finish recording, just click Done, a red square-shaped icon, to stop recording. Your recordings will be saved in Files > Video. Click Edit button to edit it.
Record on Windows Media Player Using OBS Studio
OBS is another tool available for recording on Windows Media Player. It is free of charge but has a steep learning curve due to its complex interface. Moreover, OBS can consume significant system resources, which might lead to performance issues on a lower-end PC. If you still prefer this method, follow these steps to record Windows Media Player.
Step 1. Download and install OBS Studio if you haven’t had it installed.
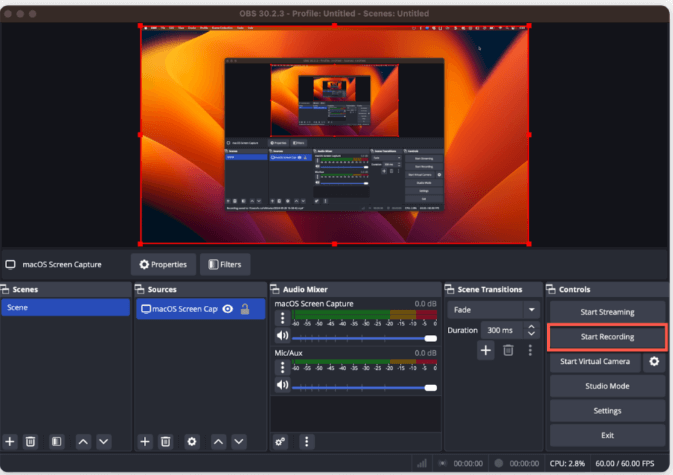
Step 2. Launch OBS and create a new scene by clicking on the “+” button under Scenes.
Step 3. Under the Sources window, click on the “+” button. Select Display Capture to capture the entire screen.
Step 4. Head to Settings > Output to set your recording path, select the video file types.
Step 5. Go back to the main window and click Start Recording to start the recording process. Open your Windows Media Player and start playing the video or audio you wish to record.
Step 6. To stop recording, you can click Stop Recording to end the recording process.
Record Windows Media Player with an Online Screen Recorder
If you don’t want to install any software on your computer, then you can try this online screen recorder - iTop Online Screen Recorder. Its ease of use, flexible recording options, high-quality recording, and cloud storage will impress you. Here are the steps.
Step 1. Open the iTop Online Screen Recorder on your computer.
Step 2. Open the video or audio you wish to record in Windows Media Player.
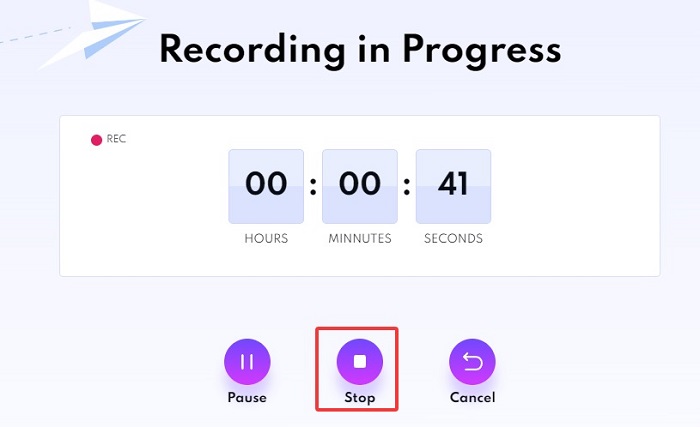
Step 3. Go back to iTop Online Screen Recorder, select Screen, and click Start Recording.
Step 4. Select the area you wish to record. You can select a tab, a window, or full screen.
Step 5. When you want to finish, click on the iTop Online Screen Recorder page and click on the Stop icon.
Step 6. Later, you can choose a suitable output quality and format. Then, click Download to save your recording on your computer.
FAQ about Recording Windows Media Player
Does Windows Media Player Record Screen?
No, Windows Media Player does not have built-in recording capabilities. It is primarily a media playback software designed to play audio and video files, but it does not support recording audio or video.
Is there a difference between a media player and a Windows Media Player?
Yes, there is a difference. A media player is a kind of software that allows you to play audio and video on a device. Such media players can be easily found online, and some typical options include VLC Media Player and QuickTime Player. Windows Media Player is a kind of software that allows playing multimedia files specifically on the Windows operating system.
How to record audio on Windows Media Player?
Since Windows Media Player does not support recording audio directly, you can use alternative methods: using the Voice Recorder app on Windows or third-party software.
The Bottom Line
All possible methods to record Windows Media Player have been listed above. You can choose one method from the above-listed options depending on your needs. If you want a cost-effective and hassle-free screen recorder for PC, iTop Screen Recorder is exactly what you need. It is equipped with various tools, ranging from a screen recorder, an audio recorder, a video editor, to AI tools. Everything you need can be found in this software. Now, download it and give it a try!


