In today's digital age, the need to record audio from desktop has become increasingly important. Whether you're a content creator, gamer, or a professional looking to record meetings and webinars, you need a reliable solution to record audio from your desktop. However, finding the best method to record system or computer audio can be a daunting task. With so many options available, it's easy to get lost in the sea of information.

But worry not! This blog post will introduce you to five tested methods that will allow you to record audio from desktop effortlessly. These methods are suitable for different scenarios, so whether you need to record music, game sound effects, or system audio, you'll find a solution that works for you. By the end of this article, you'll be equipped with the knowledge and tools to record audio from your desktop like a pro. So, sit back, relax, and let's dive in!
How to Record Audio from Desktop: Use Audio Recorder
The first tested and recommended way to record audio from desktop is to use a third-party tool - iTop Screen Recorder. iTop Screen Recorder is an intuitive and powerful screen recording software that offers a simple solution to record desktop audio. With iTop Screen Recorder, you can record your computer system sound, microphone, or both simultaneously.
The reason why iTop Screen Recorder outperforms other competitors in this blog is its easiness. It only needs three simple steps. Here’s the record audio desktop Windows guide in three simple steps:
Step 1. Click the Download button to get iTop Screen Recorder on your computer.
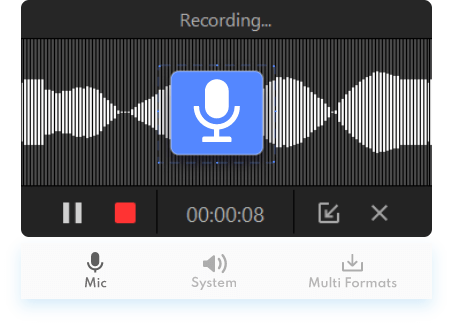
Step 2. Choose the Record Audio mode. You can then choose “System Sound” or “Microphone” as per your need.

Step 3. Click the “REC” button to start recording. Once done, click the “Stop” button to save the recorded audio file on your computer.

See, with iTop Screen Recorder, you can easily record any audio playing on your computer. Give it a try and see how it works for you. Besides helping you in how to record audio from desktop, iTop Screen Recorder is also a powerful software with multiple features:
- Free desktop audio recording: With this Screen Recorder, you can record system audio on your computer for free. This tool captures high-quality audio from your desktop and ensures that all the sounds are captured, making it perfect for recording webinars, podcasts, and more.
- Lossless audio quality: iTop Screen Recorder promises a lossless audio recording, which means that the sound quality of your recording will be exactly the same as what you hear on your computer. Plus, the built-in denoiser helps to remove background noise from your recordings, ensuring that your audio is crystal-clear. All these features make it the bset choice for recording music on computer.
- Audio editor: After recording audio with iTop Screen Recorder, you can use the built-in audio editor to trim or cut parts of your recording, adjust the volume, and add effects like fade-in and fade-out. This makes it easy to fine-tune your recordings and create professional-quality audio files.
So, if you want to record audio from desktop, iTop Screen Recorder is a great tool to use. It's free, easy-to-use, and offers lossless audio quality and editing capabilities. Download iTop Screen Recorder today and start capturing high-quality audio from your computer!
How to Record Audio from Desktop: Use Voice Recorder for Windows
If you're a Windows user, you might be surprised to learn that your computer comes with a built-in tool for recording audio: Voice Recorder. This tool is easy to use and can capture system audio, making it a great option for those looking to screen record Windows 10. This section will walk you through how to record audio from your desktop using Voice Recorder.
Step 1. Open the Voice Recorder app on your Windows 10/11 PC.
Step 2. Click on the Microphone icon to start recording.

Step 3. Click on the Stop button to end the recording.

After seeing how Voice Recorder helps you in audio recording, you should note that this method is not perfect. It also has its pros and cons. Keep reading to learn about the pros and cons of this method, as well as other options you might want to consider.
Pros:
- Voice Recorder is free and already installed on your Windows computer.
- It's easy to use and requires no additional software.
- You can record high-quality audio in WAV format.
Cons:
- You can't edit your recordings within Voice Recorder.
- There is no option to schedule recordings.
- It may not be suitable for more advanced recording needs.
How to Record Audio from Desktop: Use VLC
The third method recommended here is to use VLC to record screen. VLC is another free tool that can help you record audio from desktop. This method is suitable for Windows users who are looking for a simple and easy-to-use solution.
Follow these steps to see how to record desktop audio Windows 10 using ALC:
Step 1. Download and install VLC on your computer.
Step 2. Open the application, switch to Capture Device, and select "Desktop" as the audio source.
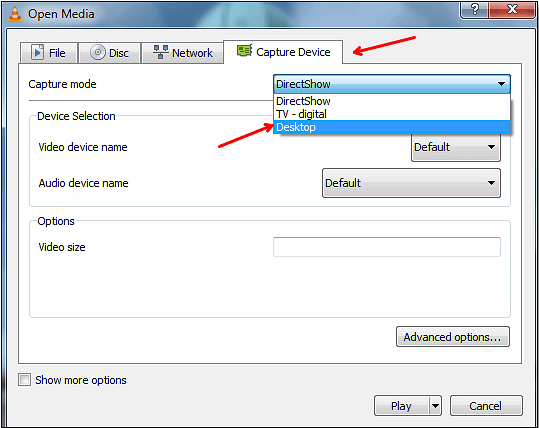
Step 3. Click on the red "Record" button to start recording the audio.
Step 4. When you're done, click on the "Stop" button to end the recording.
Pros:
- VLC is a free and lightweight tool that doesn't require much space on your computer.
- The interface is simple and easy to use, even for beginners.
- You can select the audio source you want to record, including your microphone and system audio.
Cons:
- VLC may not be as powerful as other tools in terms of advanced features and editing capabilities.
- The audio quality may not be as high as some other tools, especially if you're recording from a low-quality source.
Now you know how to record audio from desktop easily with VLC without spending any money or dealing with complicated settings. However, if you're looking for more advanced features and higher audio quality, you may want to consider other options.
Using Audacity to Record Audio from Desktop
In this section, you will know how to record audio desktop Windows using a free and open-source audio recording and editing software - Audacity. Audacity is a versatile tool that can be used for a variety of audio-related tasks, and recording desktop audio is just one of them.
Here's a step-by-step guide on how to record audio from desktop use Audacity:
Step 1. Download and install Audacity on your computer. It’s available for free on its official website.
Step 2. Open Audacity and select the input device.
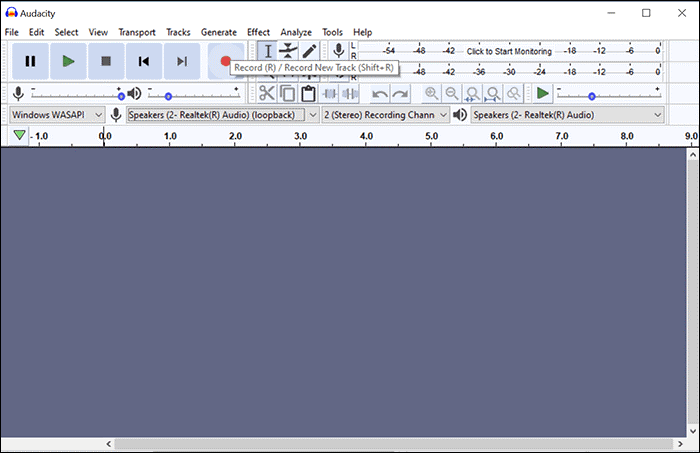
Step 3. Click on the record button (red circle) to start recording. When you see the sound waves appearing on the track, the recording progresses. Click the stop button when you’re done.
Step 4. Export the recording audio by selecting “Export Audio” in the File menu. You can customize the file format and location.
Pros:
- Audacity is a free and open-source software.
- It offers a wide range of editing features that can be used to fine-tune your recordings.
- You can record multiple channels simultaneously, which is useful for recording gameplay or live performances.
Cons:
- The interface can be overwhelming for new users.
- There can be latency issues when recording system audio, depending on your system.
- The software can be resource-intensive and may slow down your computer if you have a lot of tracks open.
Using OBS to Record Audio from Desktop
The last method about how to record audio from desktop is to use another free and open-source tool - OBS. It is a popular tool used for live streaming and recording videos. While it's mainly used for video recording, it's also capable of capturing desktop audio.
Here are the steps to follow:
Step 1. Download and install OBS on your computer.
Step 2. Open OBS and click on the "+" icon under the "Sources" section.
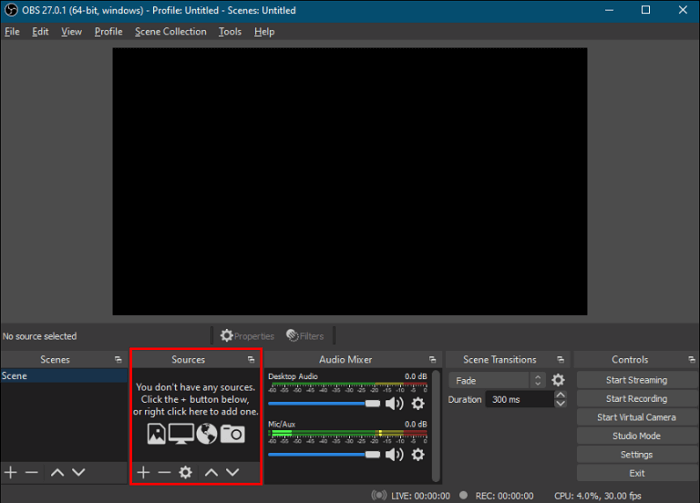
Step 3. Select "Audio Output Capture" and click "OK."
Step 4. In the "Properties" window, select "Desktop Audio" as the "Audio Device."
Step 5. Click on "Start Recording" to begin recording your desktop audio.
Pros:
- OBS is a free and open-source software.
- It provides more advanced recording options, such as live streaming and video recording.
- You can record not only audio but also video.
Cons:
- OBS can be complicated for beginners to use.
- It requires more resources from your computer, which can slow down your system.
- Sometimes OBS may not record desktop audio due to system settings.
Bonus Tip:
- Why Does OBS Not Record Desktop Audio?
One common issue that users face with OBS is that it may not capture desktop audio. This can happen for a variety of reasons, such as incorrect audio settings or issues with the audio device itself.
To resolve this issue, try the following:
- Check that the audio input is not muted or that the audio levels are not too low.
- Ensure that you have selected the correct audio device in OBS.
- Check that your computer's audio settings are configured correctly.
- Try restarting OBS and your computer.
Conclusion
In conclusion, recording audio from desktop is no longer a challenge with the 5 introduced methods here. While each method has its pros and cons, iTop Screen Recorder stands out as the best choice for its user-friendly interface, high-quality audio recording, and additional audio editing features. It is highly recommended giving it a try and download iTop Screen Recorder to record audio from desktop hassle-free.