There is no doubt that the COVID-19 pandemic has changed our world, especially reshaping education and businesses. Students started to take online classes, watch instructional videos and attend webinars from home. At the same time, employees have been asked to work from home with the assistance of web conferencing and video calls.

However, what if you are unable to stay tuned all the time or you want to refer to the live content later? If you are a Mac user, the demand to record the Mac screen to have a copy of what's happening is very essential. A complete and clear recording can help you stay on track and improve your efficiency.
In this article, we will introduce 3 ways to tell you how to record your screen on MacBook Pro for free with step-by-step guides.
How to Record Your Screen on MacBook Pro with System Screen Recorder
Fortunately, you don't have to install any third-party tools, programs, or extensions to have the ability to record your MacBook Pro screen. When macOS 10.14 Mojave was launched in 2018, Apple introduced a built-in screen recorder for Mac, called Screenshot, to help users save a video and audio of their Mac screen. If you are running macOS Mojave, Catalina, Big Sur, or Monterey (coming this fall), you will be able to access this feature.
Quick Guide on How to record your screen on MacBook Pro
Step 1: Press Shift + Command + 5 keys simultaneously to bring up the Screenshot control bar. The control bar can be opened through Launchpad > Other folder > Screenshot as well.

Step 2: Click "Record Entire Screen" or "Record Selected Portion". If you select "Record Selected Portion", your cursor will become an axis, and you need to drag it to decide what area you want to record on your screen. You can record part of screen or the whole screen. Before recording, you can adjust recording settings by clicking on Options.

Step 3: Click on "Record" on the control bar to start recording. If you have chosen the timer, you will see a countdown on the screen. If not, the recording will begin right away.

Step 4: Stop recording by clicking the square button in the upper right of the menu bar or pressing Command + Control + Esc keys together.
A thumbnail of the recording will automatically appear at the lower right corner of your screen and then the recording will be saved to your MacBook Pro desktop.

How to Do a Screen Capture on MacBook Pro Using QuickTime Player
QuickTime Player is the only option to record your screen on Mac if you get an old model of MacBook Pro or haven't update the operating system to macOS 10.14 or later. You must be familiar with QuickTime Player as the default video player on a Mac machine, but it is also an easy and convenient app to capture and edit screen recordings on Mac.
Quick Guide on How to Screen Record on MacBook Pro with QuickTime
Step 1: Go to Finder > Applications > QuickTime Player, right-click it, and open it.

Step 2: Click on "File" in the upper left corner of the menu bar and select "New Screen Recording".
If you are using a MacBook Pro with macOS 10.14 or later, you will see the same onscreen control bar as the Screenshot app control bar. If you are using a MacBook Pro that runs macOS 10.13 or earlier, you will see a control bar below.

Step 3: Click the red dot button in the middle to start recording. You can also change the recording settings by clicking the arrow beside the recording button.
Step 4: Stop recording by clicking the square button in the upper right of the menu bar or pressing Command + Control + Esc keys together.

How to record screen on MacBook Pro with audio? Keep reading.
How to Record Screen on MacBook Pro with Audio by Online Screen Recorder Mac
Mac built-in apps are very handy if you need quick screen capturing, but the capturing options are limited compared with online screen recorders and desktop screen recorders. For example, the Screenshot app and QuickTime Player app can only record Mac screen free in MOV format.
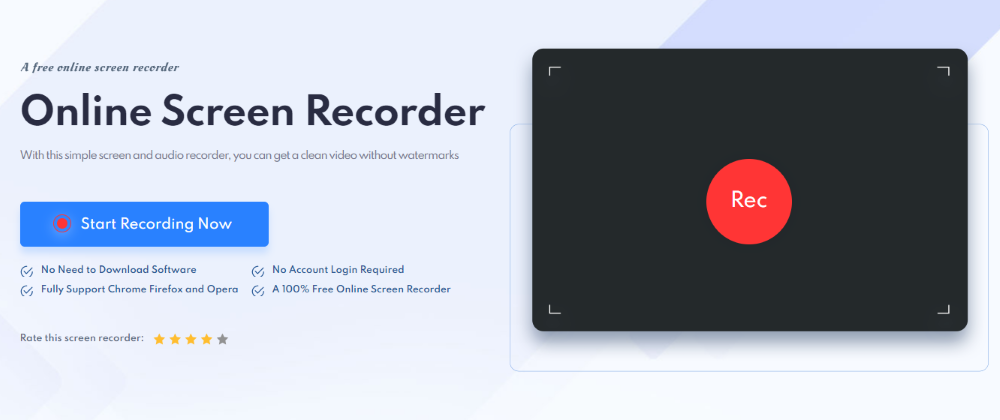
Online Screen Recorder is a free web-based screen recording tool that provides diverse recording modes and exporting format options. It offers an out-of-the-box recording experience - no downloading, no installation, no login, and no commitment. It is fully compatible with mainstream browsers like Chrome and Firefox.
Quick Guide on How to Do a Screen Capture on MacBook Pro Free
Step 1: Go to the web page of this recording tool.
Step 2: Click on "Start Recording Now".
Step 3: Follow the onscreen settings to decide if you want to record audio, the entire screen, a web window, etc., and then click "Share" to confirm.

Step 4: Click the "Rec" button on the screen to start recording.
Step 5: Stop the recording using the same button and download the recording in WebM format.
Online Screen Recorder also has a Windows version you can install on your PC for screen recording. Compared with the Windows built-in screen recording feature, iTop Screen Recorder offers more capturing ability. For example, it supports recording a facecam. It comes with a light video editor and allows users to upload the video to video channels directly. This versatile PC screen recorder also has various recording modes and video formats.
Quick Guide on How to Use iTop Screen Recorder to Record PC Screen
Step 1: Download, install, and open the application on the PC following the onscreen wizard. It is a powerful screen recorder for Windows 10, 8, 7 and is fully compatible with the latest Windows 11.

Step 3: Click on "REC" to start recording.
Step 4: Stop recording using the overlay and find your recording in "My Creation" > "Video".

The Bottom Line
The MacBook Pro is a beautiful and durable laptop for study or work. Recording Mac screen video and audio is natural for making a tutorial, recording a live stream, or other events. Among all the techniques we introduced above, it is advisable that you use iTop's online HD screen recorder to record Mac screen on MacBook Pro for free. It supports more customizations without any software installation. If you are a Windows user, download iTop Screen Recorder to record the PC screen for free.
Powered by Froala Editor