Need to record a presentation and show your face at the same time? Maybe you're preparing an online lesson, a product demo, or a report for your team. To do it right, you’ll need a screen recorder. But here’s what trips people up: you can’t just record the slides. You also need to capture your voice, system sound, and webcam simultaneously. The software you pick makes a difference. So, how to record a presentation with your face the right way? Learn right now.

How to Record a Presentation with Your Face on Laptop/Desktop
If you're planning to record a PowerPoint presentation with your face included - maybe for a class, a pitch, or a tutorial- you’ll want it to look and sound professional. That’s where iTop Screen Recorder comes in. It captures your screen, webcam, microphone, and system audio in high quality, all at once, without lag, watermarks, or time limits. Before you start, make sure your slides and camera setup are ready. This is how to video record yourself presenting a PowerPoint on laptop with iTop Screen Recorder.
Step 1. Download, install , and launch the free screen recorder on your laptop. On the main dashboard, select Full Screen, Fixed Ratio, or Custom Region, depending on how you want to capture your presentation window.
Step 2. Go to Record > Webcam, toggle on the Microphone, Speaker, adjust brightness. This ensures that your voice, any in-slide audio, and your face are all recorded clearly.

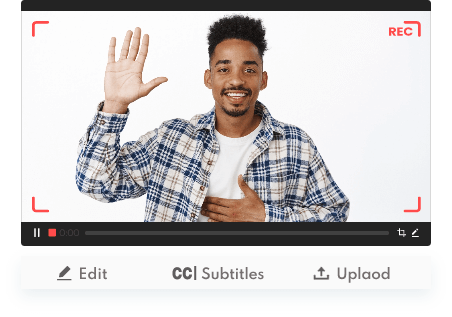
Step 3. Open your PowerPoint presentation and switch to Slide Show mode. In iTop, click the REC button to start recording.

Step 4. Once you’re done, click the Stop button. You can trim, preview, or export your video in a few clicks and no editing experience is needed.
Pros of Using Screen Recording Software:
- Full control over video quality, audio, and layout.
- Easy to add your face to any presentation without needing Zoom, Teams, or a live call.
- High-quality recording (up to 4K UHD) without lag.
- Built-in video editor, noise removal, compressor, and teleprompter feature.
Cons
- Only works on Windows, though screen mirroring is supported.
Need help staying on script without sounding robotic? iTop Screen Recorder’s teleprompter feature enables you to record PowerPoint presentation with webcam and display your talking points while recording, so you can stay focused and confident. No more flipping between notes and slides while learning how to record a presentation with your face.
How to Record a Presentation with Your Face on Phone/iPad?
How to record a presentation with your face if you're working on the go or simply prefer using your phone or iPad? You can still record a professional-looking presentation with your face included on mobile devices. One of the easiest tools to use is Mobizen Screen Recorder, a popular presentation recorder app available on iOS, iPadOS, and Android. It lets you record your screen along with your voice and face using the front camera in up to 2K QHD. Here’s how to video record yourself presenting a PowerPoint on phone/iPad.
Step 1. Get the app to record presentation with face from the App Store, install and open it. Make sure you grant camera and microphone access when prompted. To add your face, enable the FaceCam option.

Step 2. Open your PowerPoint presentation and get everything ready on your screen. Then, switch back to the app. Click the aircircle and tap the record button.

Step 3. While recording, your screen is captured along with your audio. Once you're done, stop the recording.
Pros of Using Mobile Apps for Face-in-Presentation Recording:
- Super convenient—you can record anywhere, anytime.
- Good for quick updates or lessons on the go.
Cons:
- Limited editing tools compared to desktop software.
- Lower quality on some devices, especially older models.
- May drain battery quickly during longer recordings.
How to Record a Presentation with Your Face on Google Slides?
How to record Google Slides? When presenting directly from Google Slides and want your face to show up while recording, using a Chrome extension is one of the simplest solutions. A great pick is Screencastify, a free and beginner-friendly screen recorder that runs right in your browser. It captures your screen, your voice, and your webcam at the same time—no extra software needed. Screencastify also lets you edit the recording directly from your browser and share it easily. Learn how to record a presentation with your face Google Slides using the Screencastify extension.
Step 1. Install Screencastify from the Chrome Web Store and pin it to your toolbar. Open the extension and sign in with your Google account.

Step 2. Give it permission to access your microphone and webcam. Then click the Screencastify icon, select Browser tab recording or Webcam recording for just your webcam, and turn on the embed webcam so your face appears in the corner during the recording.
Step 3. Open your Google Slides presentation in a new tab. Go back to the extension and click Record. Start presenting in full screen when the countdown ends.

Step 4. Once you’re done, click the Screencastify icon again to stop the recording. Your video will be saved automatically, and you can trim, download, or share it directly from your browser. That’s all about how to record a presentation with your face Google Slides.
Pros of Using a Chrome Extension
- Easy to use with Google Slides and other web apps.
- Built-in webcam overlay for face-in-screen recording.
- Fast editing, export, and sharing options
Cons:
- May lag on low-end devices or slow networks.
- Fewer editing tools than desktop apps.
How to Record a Presentation with Your Face on Zoom?
How to record a video with PowerPoint in the background Zoom? Zoom is a nice tool for online presentations, but recording presentations with your face and audio properly can be trickier than expected. While Zoom does offer a built-in recording feature, it has a few big limitations. You need host permission to record, and in some cases, your audio or webcam may not be captured clearly, especially if you’re just a participant. So, how to record a presentation on Zoom in the most efficient way?
If you want full control and no restrictions, a better option is to use iTop Screen Recorder. It helps record your PowerPoint presentation during a Zoom call, with your webcam and audio included, needless of any permissions from the meeting host. Use the following steps to learn how to record a presentation with your face.
Step 1. Launch iTop Screen Recorder on your computer before your Zoom meeting starts.
Step 2. Open your PowerPoint slides and join your Zoom meeting. In iTop, click on Select Region, then choose the Zoom meeting window or your entire screen if you want to include the presentation and webcam layout.
Step 3. Enable Speaker (for system sound), Microphone, and Webcam in iTop so everything is captured, including your slides, your voice, and your face.
Step 4. How to record a presentation with your face? Simply click the REC button to start recording. When you’re done presenting, click the stop icon, and your video will be saved automatically.

Also read: How to record audio on PowerPoint to add narration? >>
Conclusion
Figuring out how to record a presentation with your face doesn’t have to be complicated, be it on a phone, laptop, or using Google Slides. For smooth, high-quality results with screen, sound, and webcam all in sync, iTop Screen Recorder is a smart pick. Test it out, your presentations will feel professional yet friendly.