


Screen recording used to feel like a task reserved for dedicated apps, but Microsoft has quietly folded that capability into Clipchamp, its capable, browser-based video toolkit. Beyond trimming clips and adding effects, Clipchamp hides a surprisingly robust screen capture tool that works for tutorials, gameplay, lessons, or quick presentation recordings.
If you’ve been hunting for an easy way to record and edit footage in one place, Clipchamp Screen Recorder deserves a closer look. In this guide, you’ll learn how to record your screen with Clipchamp and make the most of its built-in features.
What is Clipchamp Screen Recorder
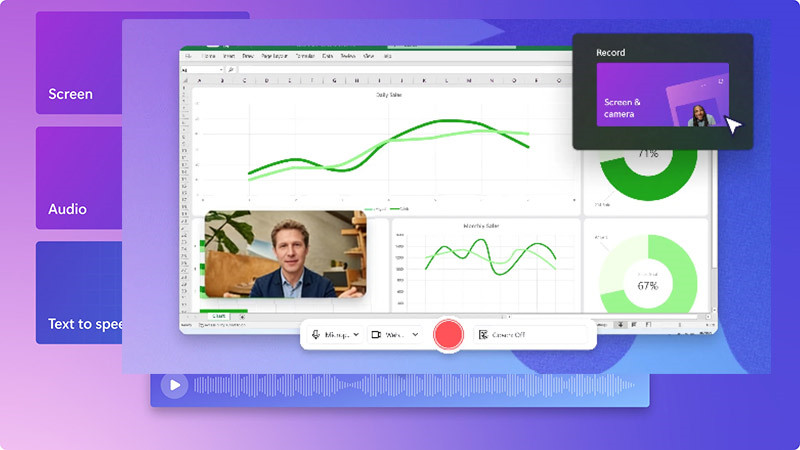
Microsoft Clipchamp Screen Recorder is a flexible and user-friendly tool integrated within the broader Clipchamp video editing platform. Originally developed by Clipchamp and now maintained by Microsoft, it allows users on Windows or in modern web browsers to capture their screens without installing extra software. The combination of recording and editing in a single workflow makes it convenient for users who want to create polished content quickly.
Key highlights of Clipchamp Screen Recording include:
Flexible capture options: Record your entire screen, a single application window, or just a browser tab.
- High-quality output: Supports HD resolution for crisp and clear videos, ideal for tutorials and presentations.
- Integrated audio capture: Capture system audio, microphone input, or both simultaneously for commentary.
- Instant editing: Trim, crop, annotate, and add effects immediately after recording.
- Cross-platform convenience: Works seamlessly on Windows and major browsers without additional installations.
Clipchamp for screen recording is ideal in several cases:
- Educational tutorials: Teachers and online instructors can record lectures or software demonstrations while adding narration.
- Work presentations: Professionals can capture slide decks with voiceover and export refined content for meetings or training sessions.
- Gaming and creative content: Streamers and content creators can record gameplay or creative workflows and edit highlights directly within Clipchamp.
How to Use Clipchamp for Screen Recording
Microsoft Clipchamp Screen Recorder makes capturing your desktop, apps, or browser tabs simple and intuitive. Here’s a step-by-step guide using the screen recording option as an example.
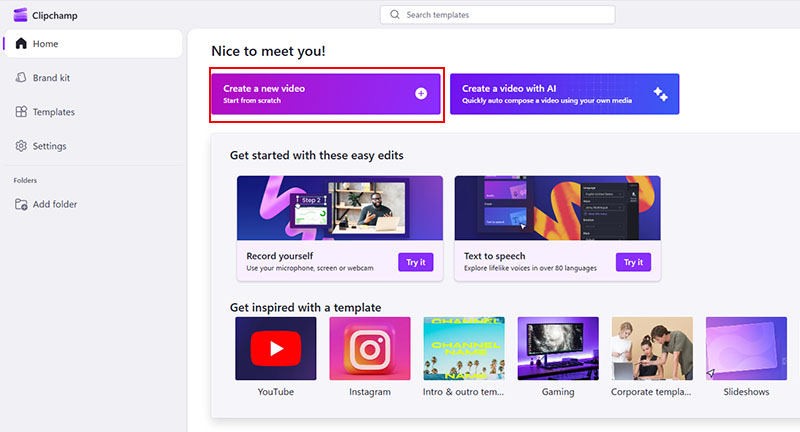
Step 1: Open Clipchamp Screen Recorder
Open Clipchamp screen and camera recorder through a supported web browser. From the main dashboard, click the “Create free screen recording” button to open the screen recording interface. Then select “Create a new video”.
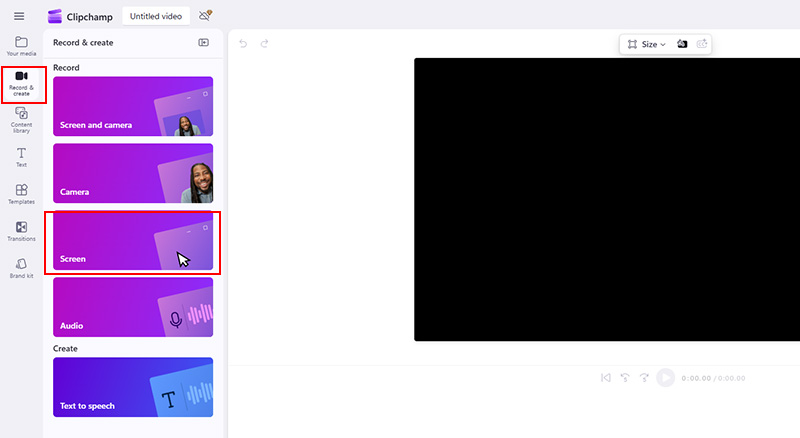
Step 2: Choose the Recording Option
Click “Record & create” at the left panel, then four recording options appear, including “Screen and camera”, “Camera”, “Screen”, and “audio”. Select the third option for screen capture. Clipchamp for screen recording will prompt you to enable your camera and microphone.
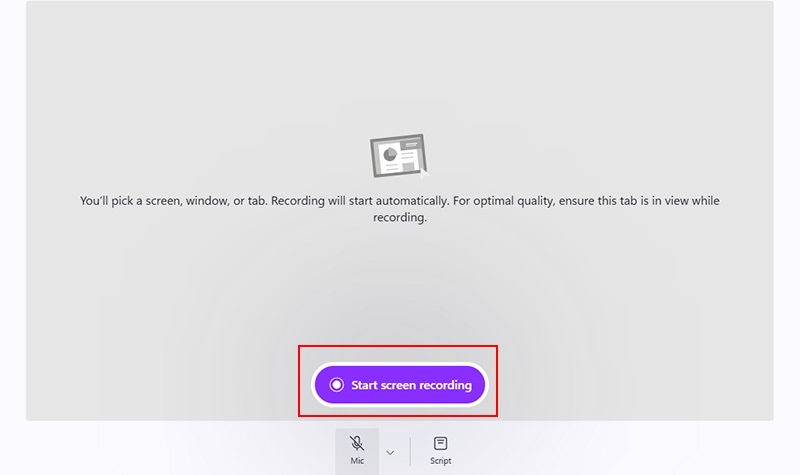
Step 3: Adjust Settings and Start Recording
Decide whether to record microphone input, click “Start screen recording”, then select Entire screen, Window, or Tab to record.
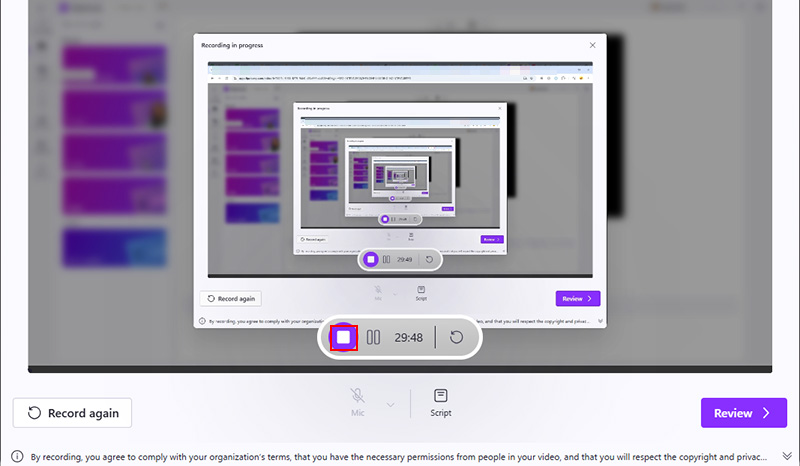
Step 4: Stop Recording and Save
Once finished, hit the “Stop” button or select “Review and Record Again.” After recording, you can edit in Clipchamp, adding text, transitions, annotations, and music.
Also Read: How to Screen Record Protected Videos Without Black Screen >>
Additional Tips to Use Clipchamp Screen Recorder for Better Results
To get the most out of Clipchamp Screen Recorder, small adjustments can make a big difference in the quality and efficiency of your recordings. Here are some useful tips to enhance your Clipchamp screen recording.
- Record and combine short sections. Instead of capturing a long session in one go, break the recording into manageable segments. This approach reduces file size, makes editing smoother, and allows you to remove mistakes without re-recording everything. Once done, you can merge these short clips within Clipchamp’s editor.
- Make use of keyboard shortcuts. Familiarizing yourself with Clipchamp’s shortcuts speeds up the recording process. For instance, quickly pausing, resuming, or stopping a capture with hotkeys prevents interruptions and keeps your workflow efficient.
- Select a suitable export option. After recording, choose an export format and resolution that fits your audience. Higher resolutions offer sharper visuals, but for online sharing, a compressed format like MP4 balances quality with file size.
Fixes to Clipchamp Screen Recorder Not Working
Even the most reliable tools can run into hiccups, and Clipchamp Screen Recorder is no exception. Some occasionally report issues ranging from failure to start recording to incomplete captures. Below are all the possible fixes to Clipchamp Screen Recorder not working errors.
Grant Screen and Audio Permissions
If Clipchamp Screen Recorder cannot start, check that your browser or Windows permissions allow screen, microphone, and system audio access. Granting these permissions usually resolves startup issues.
Split Long Recording Sessions
Recording for extended periods can hit Clipchamp’s built-in time limit. To avoid interruptions, break your session into shorter clips and combine them in the editor afterward.
Update and Relaunch
Unexpected freezes or crashes often happen due to outdated software, cached data, or conflicting programs. Updating Clipchamp, clearing browser cache, relaunching the app, switching browsers, and closing other apps that might access audio/video can fix most glitches.
Ensure OS Compatibility
Some features may not work on outdated or unsupported systems. Ensure your OS meets Clipchamp’s requirements, and test with Clipchamp to verify proper functionality.
Clipchamp Screen Recorder Alternative Without Limits
While Clipchamp Screen Recorder is convenient and integrated into its video editing suite, it has some limitations. Users often encounter time restrictions, limited export options, and occasional performance constraints. If you need unrestricted recording capabilities, iTop Screen Recorder offers a compelling alternative. It delivers a more flexible and professional screen capture experience, ensuring you can record without Clipchamp Screen Recorder time limit and interruptions while maintaining high-quality output.
Key advantages of iTop Screen Recorder include:
- High Windows compatibility: iTop Screen Recorder runs flawlessly on Windows 10 and 11 for a stable and smooth recording experience. Its optimized performance ensures minimal lag or stutter, even during resource-intensive tasks like 4K UHD gameplay capture.
- Customized recording options: You can capture exactly what you need with flexible modes, including full screen, specific application windows, webcam overlays, system sounds, microphone input, and audio only.
- Popular video and audio format export: Once recorded, your content can be exported in a wide range of formats like MP4, AVI, MOV, or MP3. This gives compatibility across devices, editing software, and sharing platforms.
- Screen recording without time limit: The screen recorder allows unlimited recording duration, so you can focus entirely on content without worrying about unexpected cutoffs.
- Stunning video editing capability: After recording, just enhance your recordings immediately within the app. You are free to trim, crop, add annotations, insert effects, all without leaving the tool.
How to Record Screen with iTop Screen Recorder
Learn how to use the Clipchamp Screen Recorder alternative to record screen on PC step by step.
Step 1. Download the Clipchamp Screen Recorder alternative, install, and launch the program on PC.
Step 2. Click Record, Select your target screen or application window. Enable audio recording if narration or system sound is needed.
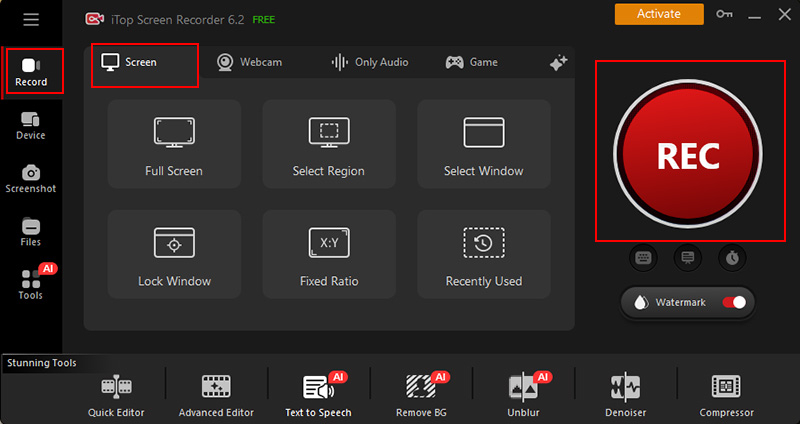
Step 3. Click the “REC” button to start your recording. You can pause anytime during the capture process.
Step 4. When finished, press the “Stop” button. Head to Files > Video, right click the recording to preview, or edit with iTop Screen Recorder on PC.

The Bottom Line
Clipchamp is an easy-to-use online video editor that covers basic editing, screen recording, and quick content creation. It works well for simple projects, but longer recordings and advanced features can feel limited or unreliable. If you’re limited by Clipchamp Screen Recorder download restrictions or need more robust recording features, iTop Screen Recorder is worth trying. Its flexibility, unlimited recording time, and built-in editing tools make it ideal for professionals, educators, and content creators alike.


