


After Windows 10, cool features were added, such as the pre-installed Xbox Game Bar. It’s convenient to use while recording games since all you need is to use the necessary shortcut to launch it, and you are good to go. There are, however, problems that arise as you record. The most annoying one is lagging and screen freezing. If your graphics card cannot support more tasks as you record, especially during gameplay, it will be problematic to use the game bar.

Can you record screen on Windows 10 without Xbox Game Bar to get rid of such troubles? Here, we will introduce three ways of how to screen record on Windows without Game Bar, and they don’t compromise your PC’s performance.
How to Screen Record on Windows Without Game Bar – Try iTop Screen Recorder
iTop Screen Recorder, a third-party free screen recorder for PC, is taken as one of the best alternatives to Game Bar. It is packed with a set of screen recording features that enables you to capture screen on Windows 11, 10, 8 and 7 with no effort. It breaks the limitations of Game Bar to offer advanced functionalities for helping you create screen recordings in a breeze.
What You Get from iTop Screen Recorder
The screen recorder for Windows 10 offers 4 recording modes including screen recording, audio recording, webcam recording to game recording. You can not only create training or tutorial videos by recoding screen or gameplay with webcam and your voice at the same time, but save live sports, music/podcasts while keeping original quality. Besides, it can delivers you better experience when you screen record on Windows 10.
- Flexible Recording: iTop Screen Recorder allows you to select any region to record. You can record part of screen, full screen, a window or region in fixed ratio.
- High-quality Recording: iTop Screen Recorder enables you to record 1080p/4k videos without compromising quality. You can also customize bit rate and frame rate to achieve better result.
- No-lag Recording: iTop Screen Recorder utilizes hardware acceleration of Intel, AMD and NVIDIA to record screen, streaming videos and gameplay with no lags, shutters and fps drops.
- Annotation on Recording: iTop Screen Recorder provides drawing tools, like text, arrow, shape etc., and magnifier to annotate and highlight important information during recording. Also, if make some mistakes when annotating, the eraser can help you erase the incorrect elements and draw agin.
- Video Editing: iTop Screen Recorder builds in a video editor to enhance your screen recording. You can trim, flip and rotate the footage; add text, image and special effects; as well as set a background music.
How to Use iTop Screen Recorder to Record Screen on PC Without Xbox Game Bar
Step 1: Download and install iTop Screen Recorder on PC.
Step 2: Launch iTop Screen Recorder and select recording area.
Go to Record > Screen and select what you want to record.

Step 3: Customize recording options if needed.
- Turn on Speaker to record screen with audio.
- Turn no Mic to record screen with your voice.
- Turn on Webcam to record screen with yourself.
- Turn on Mouse to capture mouse movement.
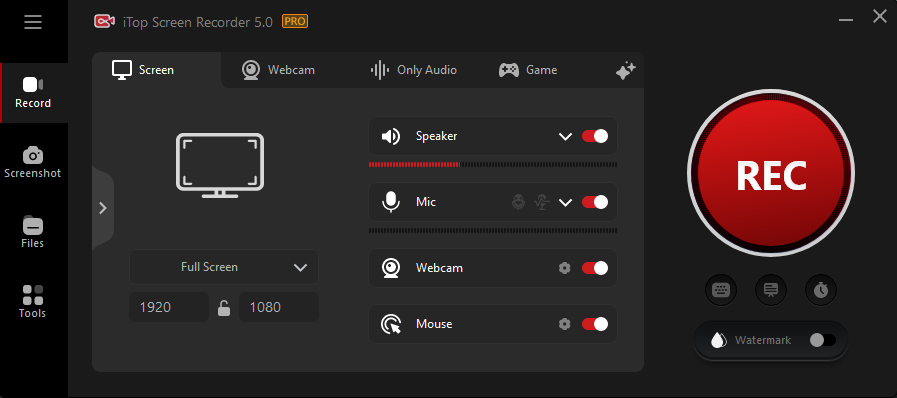
Step 4: After applying all the settings, click on the big REC button or use the F9 hotkey to start recording. Once you are done, click on the Stop button and access your recording via the Files tab.
How to Screen Record Windows 10 Without Xbox Game Bar – Use Microsoft PowerPoint
You can learn how to record screen on Windows 10 without Game Bar by utilizing Microsoft PowerPoint. You can use it to record the presentations, slideshows, and other screen proceedings. It’s also possible to add annotations and record the audio as well. Using PowerPoint to record is available on Microsoft Office 2013 and the later versions. So, you need to ensure that you have a recent Microsoft Office version.
By default, PowerPoint records the audio and the mouse cursor. So, if you don’t need them, you can disable the features before the recording begins. Here are the steps to get your PPT screen recordings.
How to Record Screen on Windows 10 Using Microsoft PowerPoint
Start by opening a new presentation or use an existing one. After that, perform the following steps to screen record Windows 10 without Game Bar:
Step 1: Visit the Insert tab and click on Screen Recording.

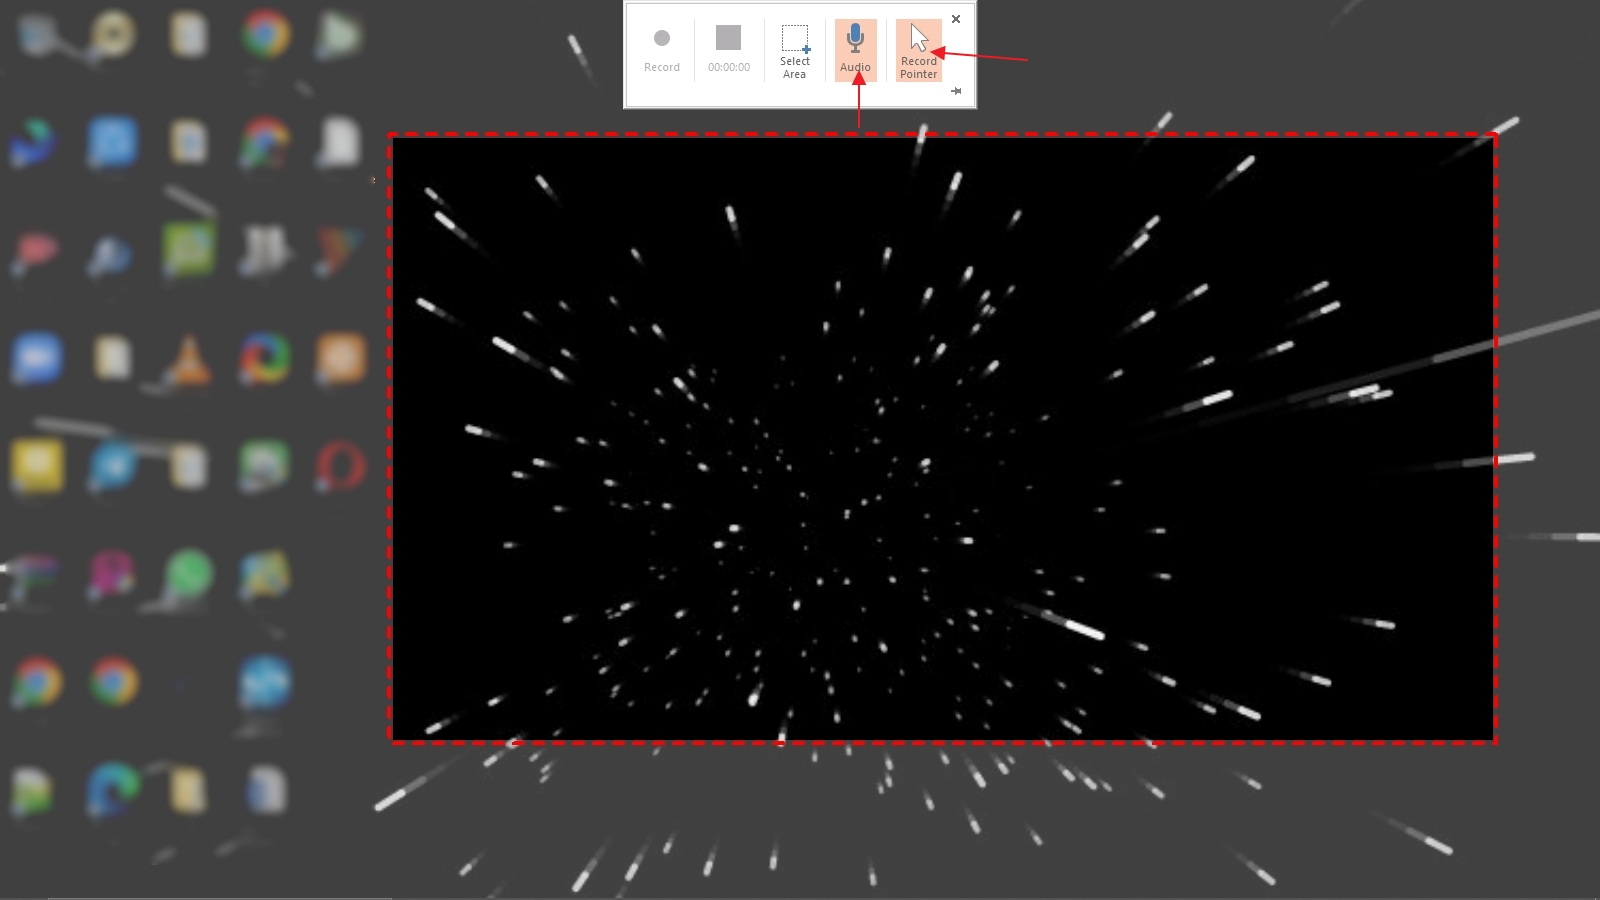
Step 2: A dock will appear. At this point, select the area to record or use the Windows key + Shift + A shortcut.

Step 3: Click and drag to capture the area to record using the crosshair tool. By default, PowerPoint will pick the cursor and the audio. Use the buttons on the dock to disable them if you don’t need to record.
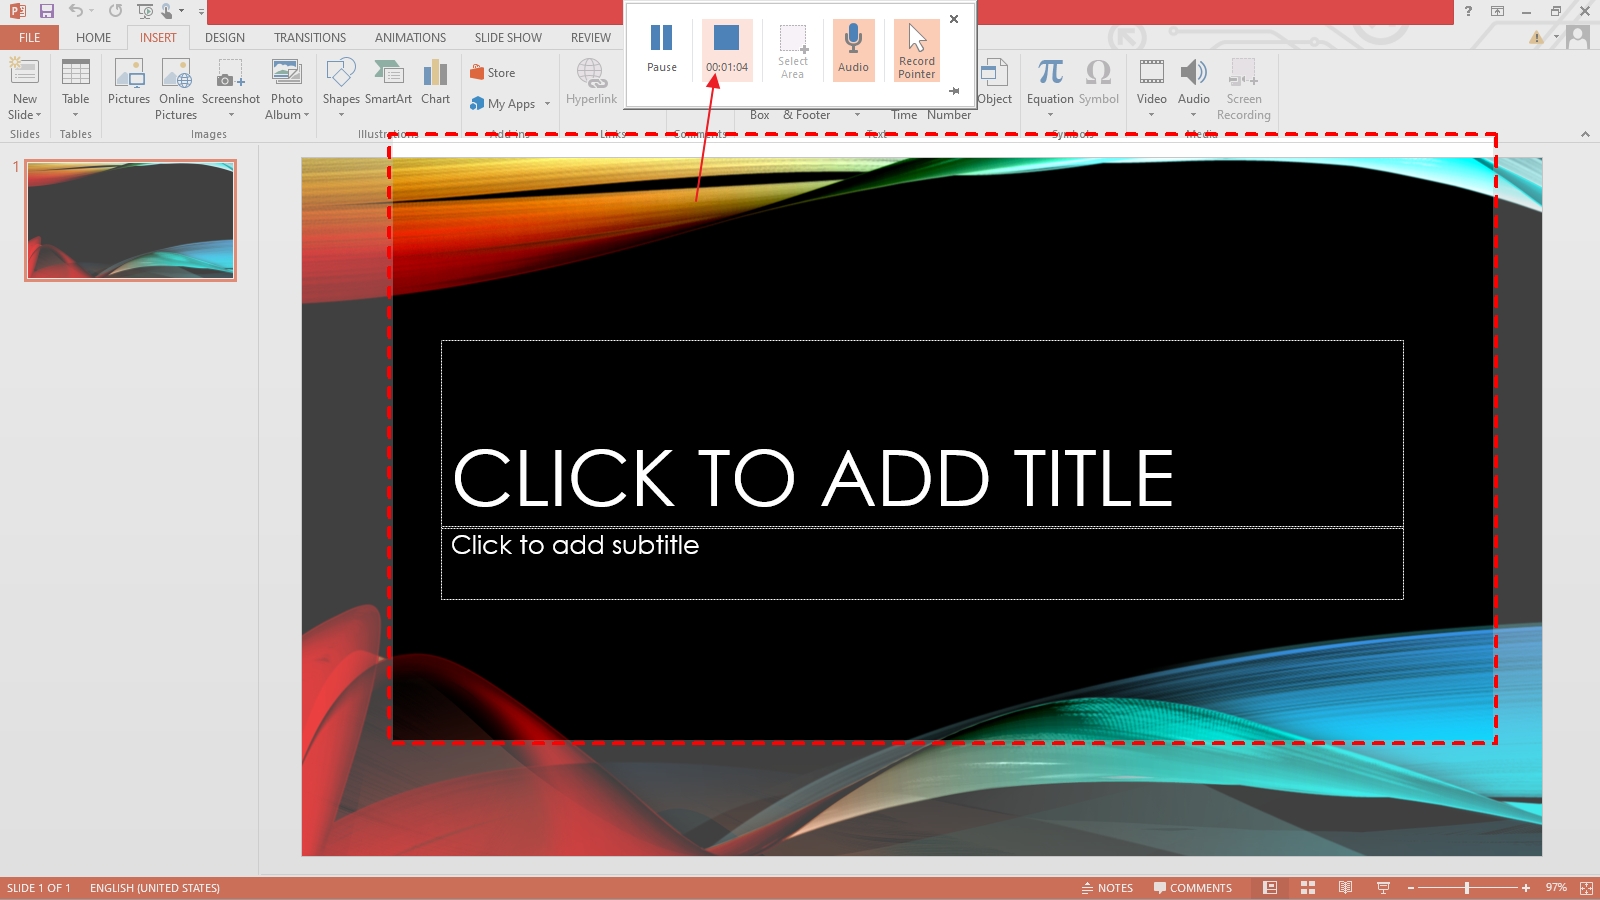
Step 4: Once ready, click on the record button or use the Windows key + Shift + R shortcut to start Windows 10 record screen without Game Bar. The same shortcut can pause and resume. You can switch to a different window when the recording begins, and PPT will still capture.

Step 5: You can pin the dock by clicking on the pic icon at the bottom right. When you finish recording, go to the dock and click on the stop button or use the Windows key + Shift + Q shortcut.
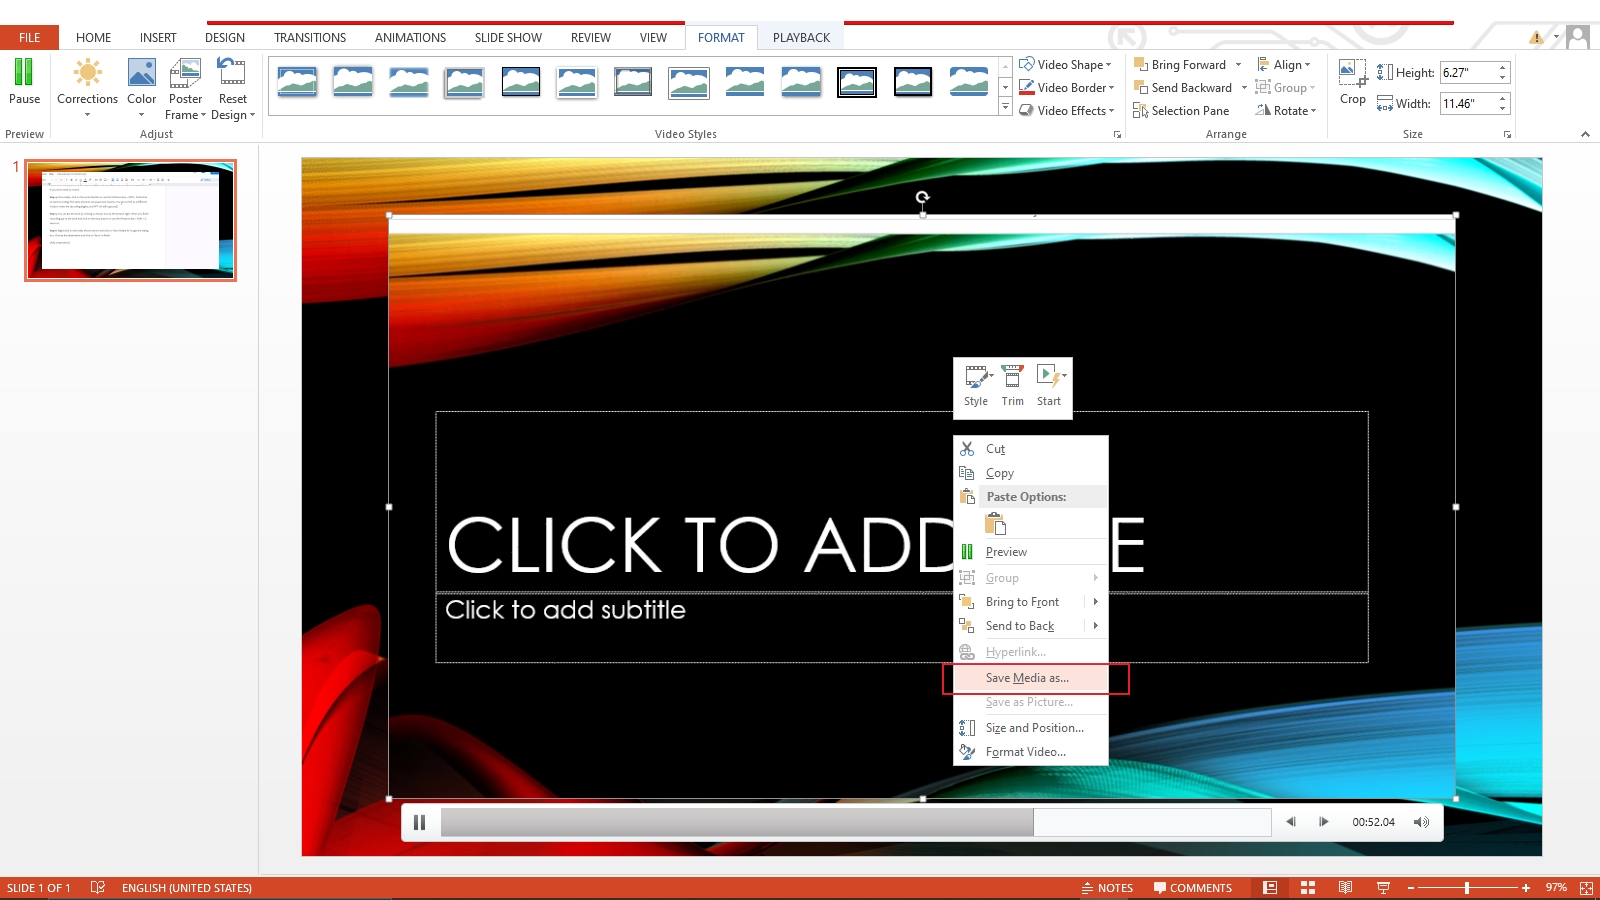
Step 6: Right-click on the video shot to save it and click on Save Media As to get the dialog box. Choose the destination and click on Save to finish.
How to Record Screen on Windows 10 Without Game Bar – with VLC
Besides PowerPoint, how to screen record on Windows 10 without Game Bar? You can record screen on Windows 10 without Xbox using the VLC media player. It’s one of the favorite players to use on your PC since it's compatible with many operating system versions.
You can use it to record your screen and get a video. Here are the steps about how to use VLC to record screen. It's pretty tedious, but it works if you get it right.
Step 1: Launch the VLC media player on your PC. If you don't have it, visit the VLC website and download it for free since it's open source.

Step 2: There is a Capture Device option at the top left. Click to proceed.

Step 3: Select the capture mode and check for the Play button at the bottom right. Click on the small dropdown arrow and click on Convert in the displayed options.

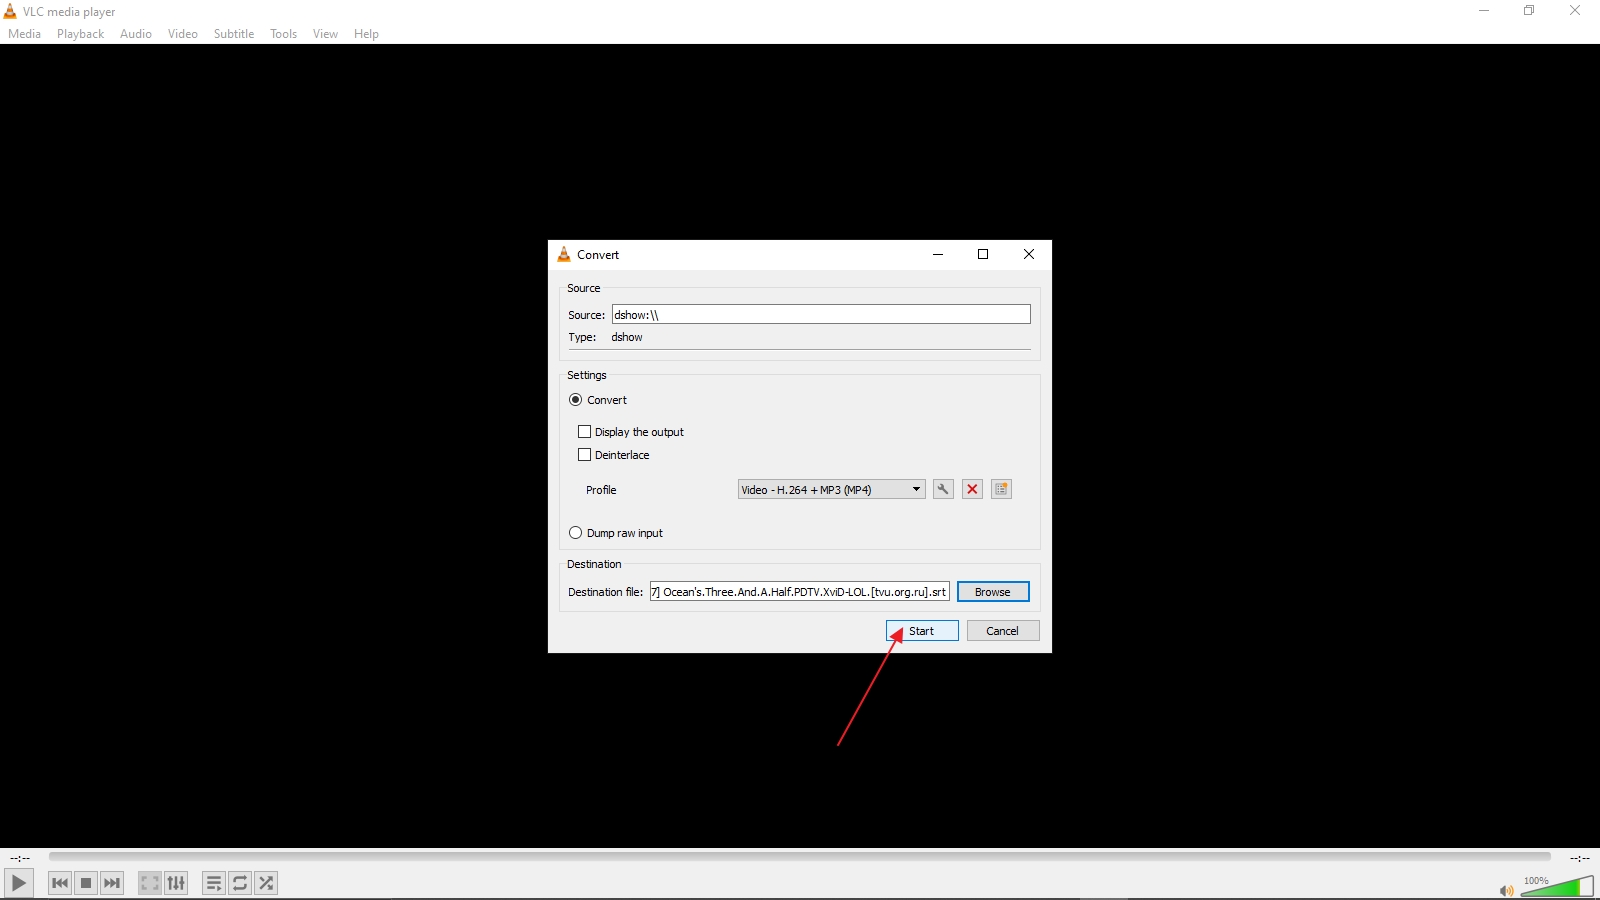
Step 4: Choose the destination folder and input the file name to be used when saving the video.

Step 5: Click Start button to begin recording. Once you are done, click on Stop Playback, and you are good to go. Access the video on the destination folder you specified in step 4.
The End
Xbox Game Bar is recognized as the most convenient screen recorder to capture desktop on Windows 10 because you don’t need to install another 3rd-party tool. However, its limitations and issues (not recording, no audio etc.) drive most people to find a way to record screen on Windows 10 PC without Xbox. How to screen record without Xbox Game Bar? iTop Screen Recorder is the best Xbox Game Bar alternative. It can flawlessly record any activity on PC in full screen or selected area. It also offers the best recording experience to capture 4K video, 1080P 60fps video without lagging.


