


When speaking of Chromebooks, you probably feel less familiar compared to Windows-based laptops or MacBooks. In fact, a Chromebook belongs to a type of tablet that runs the Linux-based Chrome OS operating system. For that reason, Chromebooks only accept web-based Chrome applications from the Chrome Web Store, while the app only compatible with Windows or Mac is not allowed to set up on a Chromebook.
When the first Chromebook hit the scene, it became great popularity in the market. With more and more Chromebook users in the world, how to screen record on Chromebook turns into a heated topic as screen recording has been used for multiple purposes such as recording class, meeting recording, or more. The need is becoming more urgent, especially during the global pandemic. This article introduces three ways to solve the problem, Chromebook screen recorder included. Keep reading and find the solutions in the following content.
- This is an Article Index.
- Do not insert any text in here.
- This index will be generated automatically when displayed on the front end.
- Of course we still love you.
Best Screen Recorder for Chromebook Free: Screencast-O-Matic
For Chromebook users who want to record screen without extension or a system built-in tool, they could choose to record screen with a professional recording app for Chromebook such as Screencast-O-Matic, Loom, Clapboard, etc.
Compared to Loom, and Clapboard, Screencast-O-Matic is a versatile recorder suitable for all-level users, requiring no technical knowledge background. Additionally, Screencast-O-Matic’s screen recorder for Chromebooks could record any area of the computer or web camera with audio or narration added in one quick click. You can choose webcam size, narration before recording, draw & annotate while recording, and edit after recording by adding overlays, animations, and effects. Moreover, it allows users to share and publish high-quality videos on Youtube in just one second.
Below is a detailed guide that shows you how to screen record on Chromebook with recording app Screencast-O-Matic step-by-step.
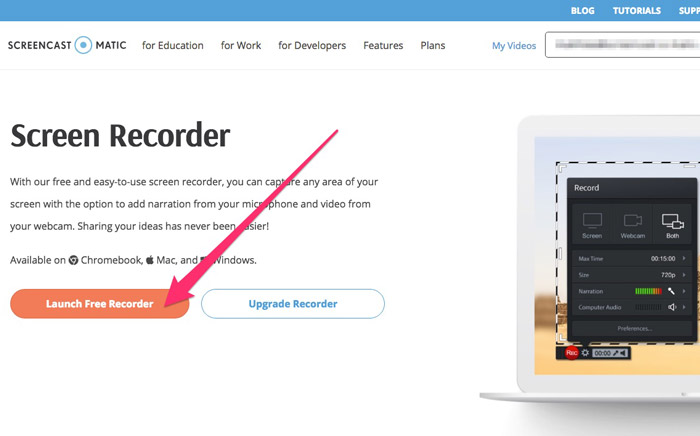
Step 1: Visit Screencast-O-Matic's official website and download its free video recorder for Chromebook. Then, launch the setup application and turn to the recording interface.
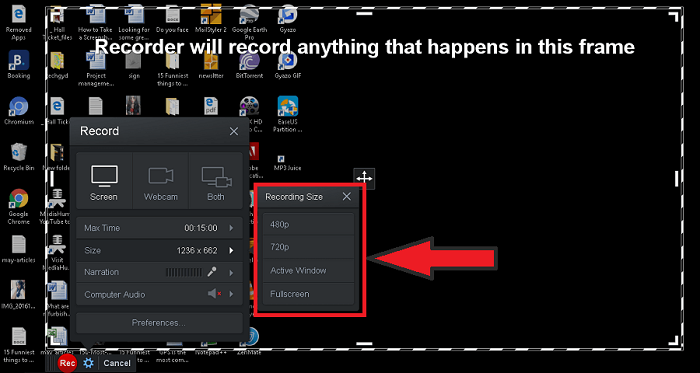
Step 2: Select the recording frame (You could adjust the frame to any size you want). Option the internal Chromebook microphone or the external microphone to add narration.
Step 3: Start to create your video and there is a three-to-one countdown to begin the recording.
Once finished, you can trim, add background music, adjust the video speed, or take other actions. Saving, sharing, and publishing your recording are totally free without any hidden expense.
Trusted by millions of people, Screencast-O-Matic is a great all-in-one video creation and sharing platform, where users can record as many videos as they can with its unlimited video recordings in the first 15 minutes. However, if you want to record a longer video or remove Screencast-O-Matic’s watermark, a better choice is to unlock more advanced features by choosing an upgraded plan for only $1.50 per month.
How to Screen Record on Chromebook Without Extension?
Considering the rising need for video recording, Chromebooks offer a built-in recording tool that makes it possible to record screens or capture screenshots for all-level users. This powerful and easy-to-use tool could be found in the Quick Setting Panel. Simply follow the below steps and you can learn how to screen record on Chromebook without extension.
Step 1: Open the quick setting panel, and click the “Screen Capture” icon.
Step 2: Before screen recording on your Chromebook, click the gear button and turn on the “Record Microphone” option to make sure the audio could be recorded as well.
Step 3: Select the video button for screening record on Chromebook. There are three modes options: “Full Screen”, “Partial Screen” and “Window”.

Step 4: Once finished, click the red icon on the left side of the shelf to stop the recording.
Note: Your video can be found in the “Downloads” folder and you could share this video with your friends or families.
Screen recording on Chromebook without extension is easy to master. The only problem appearing is the video file format. To be more specific, the built-in tool only supports recordings to be saved in WEBM, and video converters are required for other formats such as Flv, Avi, or Mp4.
How to Screen Record on Chromebook with Google Extension?
Screen recording on Chromebook could also be accomplished through Google extensions. There are several Google extensions available on the Chrome Web Store, among which, the most popular ones are Screencastify, Screen Recorder, and Nimbus.
Take Screencastify for instance for it is the NO.1 screen recorder for Chrome with millions of people using it worldwide. Designed friendly for all-level users, Screencastify is easy to master without professional technology knowledge. It allows people to record the partial screen, entire screen, or specific applications that are open on the desktop. Follow the below steps and you could learn how to screen record on a Chromebook with Google extension.
Step 1: Visit Screencastify's official website and click on the “Add to Chrome” button on the top of the right side.
Step 2:Continue by clicking on the “Add extension” button then you will be taken aromatically to the page for downloading.
Step 3: Once downloaded, the Screencastify extension would be systematically added to your chrome browser, where you could find it on the right side of the Chrome search bar.

Step 4: To begin the recording, click the Screencastify button and open what you want to record. (Remember to turn on the microphone toggle to capture your sound. )
Step 5: To end the recording, click the stop button in the drop-down menu and you will find your video saved in the “Download” file.
Screen recording on a Chromebook with Google extensions is fast, safe, but limited in functions. If you are looking for more comprehensive screen recorders, you need to turn to some professional recording tools to meet your needs.
Bonus: How to Screen Record on Windows & MacBook
If you are using Windows-based laptops or MacBooks rather than Chromebooks, there are still a number of ways for screen recording.
For Windows laptops, iTop Screen Recorder is a free and powerful tool that you could use to record screens on Windows 7, 8, 10. With a light video editor in it, it is easy to master and allows users to record their videos smoothly without time limitation and then edit the video directly. Even better, iTop Screen Recorder offers the function of facecam to include your face in the video!
Other features of iTop Screen Recorder:
1. Free and easy-to-use: only 3 steps, you could get HD recordings with sound, face and mouse mark. It’s totally free!
2. Several recording area: the entire screen, the selected portion or other specific frames, such as 16: 9, 4: 3.
3. Webcams recording supported.
4. No record time limitation: some screen recorders merely allow their users to record a 10 minutes video at a time, but iTop Screen Recorder provides unlimited recording time service. So you can record your favorite videos as long as you need.
5. Various video output formats including MP4, AVI, FLV, MKV, MOV, TS, and GIF.
How to screen record on Windows PC with iTop Screen Reocrder:
- 1. Free download iTop Screen Recorder.
- 2. Setting up before recording: select a region, voice, mouse, etc.

- 3. Click the red “REC” to record Windows PC. When it is finished, click the red square button to stop recording.

If you use MacBook, a built-in tool is a simple way to capture screens. Enable the Screenshot toolbar by pressing “Shift” + “Command” + “5” at the same time, and then you can make a video recording of the entire screen or the selected portion. Other recommended video recording apps for MacBooks include Snagit, Camtasia, CleanShot X, etc.

Conclusion
In the past, people had no idea on how to screen record on Chromebook. Thanks to emerging technologies, screen record on a Chromebook has now become a reality. Whether choosing Chromebook in-built tools, Google extensions, or using a professional screen recorder for Chromebook, users are given more options to access the screen recording world. The recording video makes communication easier and gives people another way to share ideas. No matter you want to record videos for tutorials, lectures, meetings, demos, or games, using a good screen recorder would definitely help you make professional recordings more easily, and iTop Screen Recorder is a multi-functional screen recorder that we strongly recommend you to try.
Powered by Froala Editor


