As one of the highly practical software, voice recorders have been widely used in many aspects of life, from podcast, meeting, and speech recordings, to interview, lecture, and audiobook recordings. These handy tools can serve as your personal voice notebook, capturing your voice, recording your conversation, and reminding you of important details. However, do you know how to record your voice on Windows 10? This article collects five simple ways to help you record sounds on PC effortlessly!
- Contents
- How to Recover Temporarily Deleted Data from Laptop
-
How to Recover the Permanently Deleted Data from Laptop
- Recover the Deleted Data from Laptop with Data Recovery Software
- Recover the Deleted Data from Laptop with File History on Windows 11/10
- Recover the Deleted Data from Laptop Using Backup and Restore
How to Record Your Voice on Windows 10 with Built-in Voice Recorder
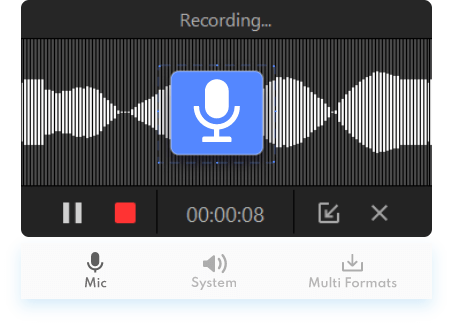
Previously known as Sound Recorder, Windows Voice Recorder is the simplest and quickies method to record yourself on Windows computers. Apart from recording audio for a maximum of three-hour, Windows Voice Recorder also supports adding makers (flags) midway to identify important moments, without interrupting the audio recording process.
Here is a guide on how to record your voice on Windows 10 with Windows Voice Recorder.
Step 1. Click Start and type Video Recorder in searching bar to locate the software. Then, launch the app on your Windows PC.
Step 2. Click the Record button to start recording your voice, and hit the flag button if you want to add a marker.

Step 3. Click the Pause button to stop recording your voice. The audio file will be saved automatically in m4a format under the "Sound recordings" folder.

The followings are the pros and cons of Windows Voice Recorder, respectively.
Pros:
- Free without additional download.
- Dead easy to use
- Instant sharing of audio recordings with others in just one click
Cons:
- Limited output format only in M4A
- Limited editing feature
- Not compatible with Windows 7/8.
Since the preinstalled software ships with all the necessary functionalities to record voice, it is an ideal option for people with basic voice recording needs.
How to Screen Record with Mic on Windows 10 with iTop Screen Recorder?
In addition to recording your voice with built-in Windows Voice Recorder, you can also turn to professional recording software. As one of the most popular recorders in 2023, iTop Screen Recorder is the best way to record voice on Windows 10. The versatile tool has four modes to satisfy different demands: screen recording, webcam recording, audio recording, and gameplay recording. Out of these options, the audio recording feature is particularly useful for recording voices on Windows.
So, how to record voice on Windows 10 with iTop Screen Recorder? Just follow the three steps below and get your voice captured easily!
Step 1. Download iTop Screen Recorder from the official website and install the software on your Windows PC.
Step 2. Select the audio recording mode. Toggle on the microphone if you want to record your voice only. Enable the speaker and microphone if you want to record your voice and system sounds simultaneously.
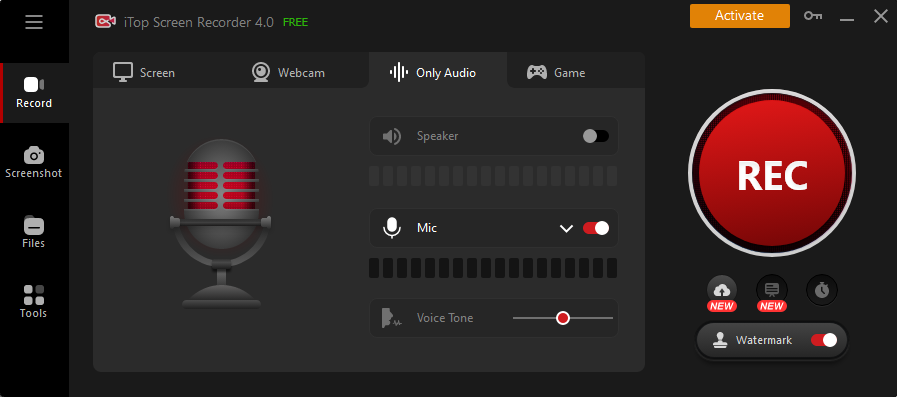
Step 3. Click the red Rec button to start recording your voice, and click the square red button when you finished. The audio file is available under the My Creations tab for further editing.

Capturing voice with iTop Screen Recorder Windows 10 is a straightforward process. Please refer to a list of advantages and disadvantages below to take a closer look at the product.
Pros:
- Dedicated audio recording mode
- Support screen record with voice
- Record both internal and microphone voice
- Export audio recording to MP3/AAC/AC3/FLAC/WMAV2
- Built-in denoiser to reduce background noise and improve audio quality
- Flexible configuration on bitrate, frequency, channels, and other audio settings
Cons:
- Only compatible with Windows PC
How to Record Your Voice on Windows 10 with OBS?
The third way to record your voice on Windows is via Open Broadcaster Software (OBS), a free yet professional screencasting and video streaming software widely used by podcasters, bloggers, and live streamers. Here is a complete guide on how to record voice on Windows 10 with OBS.
Step 1. Download the OBS app, install the software on your Windows PC, and allow OBS Studio to access your microphone.
Step 2. Launch the app and navigate to File>Settings> Audio. Enable the microphone device you want to record and keep other audio sources disabled. Then, head to the Output menu to modify output settings according to your own choice. Click OK to save the settings.

Step 3. Click the "+" icon in the Sources panel and choose the Audio Input Capture option to record your voice from your microphone. In the Control panels, click the start recording to start capturing sounds and click the stop recording when you are done. The file will be automatically saved in MKV format in the video folder.

Let’s check out the advantages and disadvantages of using the OBS Screen Recorder.
Pros:
- Easy to setup
- Compatible with Windows, macOS, and Linux
- High-quality soundtracks
Cons:
- The complex interface is not good for beginners
- Unable to output audio formats directly.
How to Record Your Microphone on Windows 10 with Audacity?
Similar to OBS, Audacity is also a free cross-platform audio software to capture voices on Windows 10. Below is the step tutorial on how to record mp3 audio on Windows 10 with Audacity.
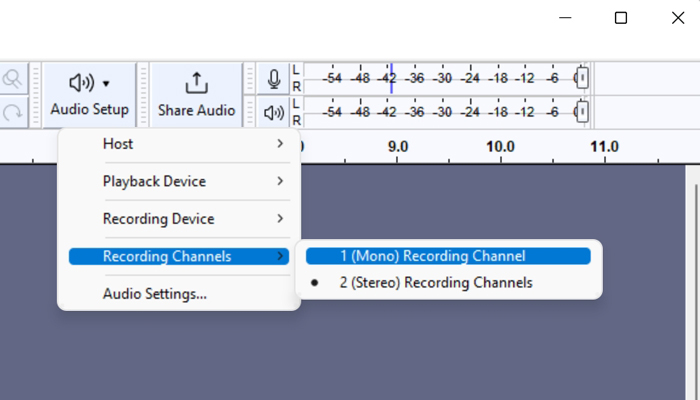
Step 1: Launch Audacity on your PC and select the recording device (microphone) you want to collect audio in the Audio Setup toolbar.

Step 2: Tweak audio settings like recording channels (mono/stereo), and recording quality if necessary.
Step 3: Click on the red circle button in the Transport toolbar and speak into the microphone to record your voice. Click the square button to end the audio recording. Now you can export the audio and save it as mp3 format on your local disk.
How to Record Your Microphone on Windows 10 with FL Studio?
The last approach how to record mic audio on Windows 10 is through FL Studio.
Step 1: Run FL Studio on your Windows PC and head to the System Preferences > Security & Privacy > Microphone to allow FL Studio to access your microphone.
Step 2: Choose the channel you wish to record. Next, select your audio input on the Mixer Track and get your microphone connected.

Step 3: Click the record button at the toolbar to start recording, and hit the stop button to end recording. The audio clip can be found in the Playlist for further editing before exporting.
Final Words
To sum up, the article discusses how to record your voice on Windows 10 using five different approaches. If you are seeking a professional recorder for high-quality audio recording, iTop Screen Recorder is your best choice. The multi-functional tool is an all-in-one solution for all your recording needs. The built-in denoiseer can significantly reduce background noise and improve audio quality. Download it now and capture your voice on Windows with ease.