Roblox, a leading online game platform, has attracted millions of active millions of game players and developers nowadays. It is popular and reputable due to not only providing diverse game types, varying from RPG to FPS, fighting games and so on, but also encouraging creative developers to launch their own works. If you are a Roblox fan, you have probably experienced lots of games and even tried to screen record on Roblox for sharing your skilled gameplay with friends or on SNS.

How to record on Roblox? If you are seeking for a method to record Roblox with voice easily, the following ways can give you a big hand. No matter which device you are using to play Roblox, you can get a great gameplay recording solution.
How to Record on Roblox with Built-in Recorder
Roblox features a native screen recorder that helps users to save game highlights or capture full gameplay without installing an app. It is an easy and efficient way for players to screen record Roblox videos. How to record videos using the built-in screen recorder for Roblox? Follow the tutorial.
Step 1. Start your game and click the menu button which is located in the upper-left corner.
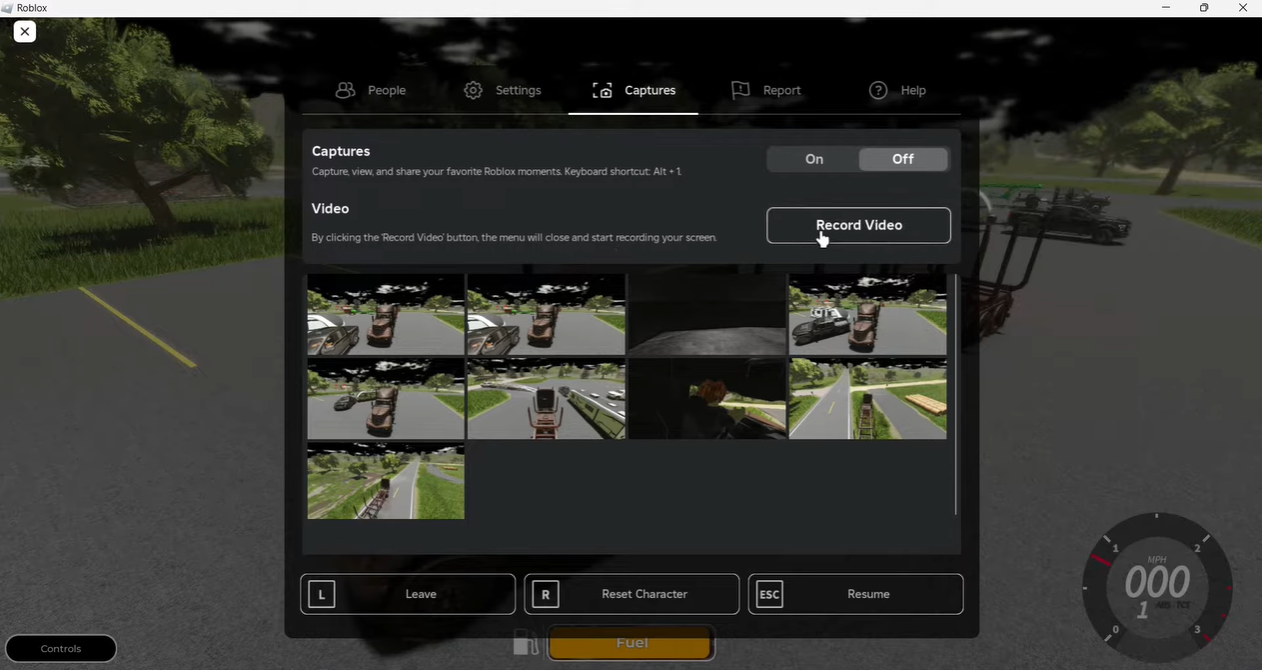
Step 2. Go to Captures > Record Video to make it start recording.
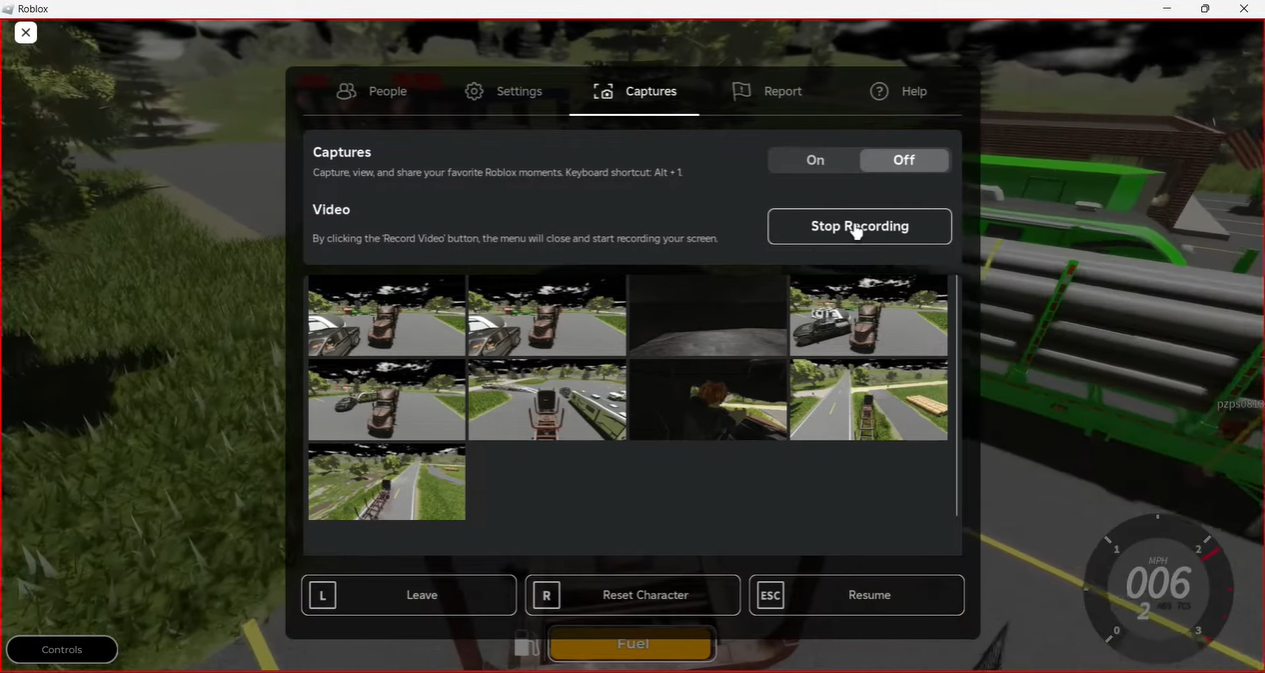
Step 3. When you want to end the screen recording, click the Menu again > Captures > Stop Recording.
Step 4. Click Open Folder in the notification that pops up to view your recording.
In fact, the native Roblox screen recorder introduces a convenient but limited solution to capture your gameplay.
- You are only allowed to record the entire screen.
- It can't record gameplay with yourself.
- Currently, the feature is only available on PC.
How to Record Yourself Playing Roblox on PC
The built-in recorder is recognized as the easiest way to screen record Roblox gameplay. However, the restricted functions can't really satisfy players who want to share a great gameplay footage on YouTube, Twitch etc. So, if you need a better solution to screen record Roblox with voice or webcam on PC, iTop Screen Recorder is the recommendation.
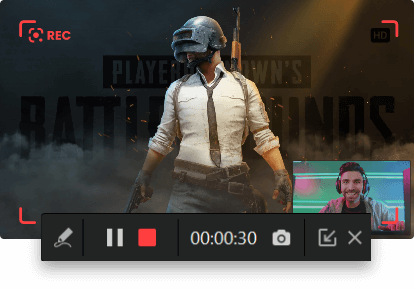
iTop Screen Recorder is free screen recording software for Windows 11/10 or lower that is able to record screen in HD. You can flexibly select the area to record, record video clips with your voice and face and so on. How superior it is for recording Roblox? The following features can explain.
- Game Mode: It detects the game you launch and drives you to start recording by simply clicking the REC button. You can choose to turn on Mic/Webcam option if you want to record Roblox gameplay with yourself and your voice.
- No Lag and no FPS Drop: The utilization of hardware acceleration makes it to be a powerful no-lag screen recorder. Even though you are playing a game that supports 4K or high frame rates, it brings a smooth screen recording experiences, no shuttering and no dropped frames.
- HD Recording: The image quality is important when sharing a gameplay video on SNS. iTop Screen Recorder can help you record on Roblox without compromising original video quality.
- No time limit: iTop Screen Recorder is a free screen recorder no time limit. You can record a long video and edit it later for creating a professional tutorial gameplay video.
- Capture Screen Flexibly: You can choose to record full screen, in fixed ratio (16:9/4:3), or a specific region with this best free screen recorder for Roblox.
- Multiple Output Formats: It enables you to record a video into MP4 or other mainstream formats. Therefore, you don’t need to convert the video format when sharing on YouTube or similar sites.
How to Record on Roblox with iTop Screen Recorder
At the beginning, please download and install iTop Screen Recorder on your PC. It is fully compatible with Windows 11, 10, 8 and 7.
Now, open your Roblox game and launch the screen recorder.
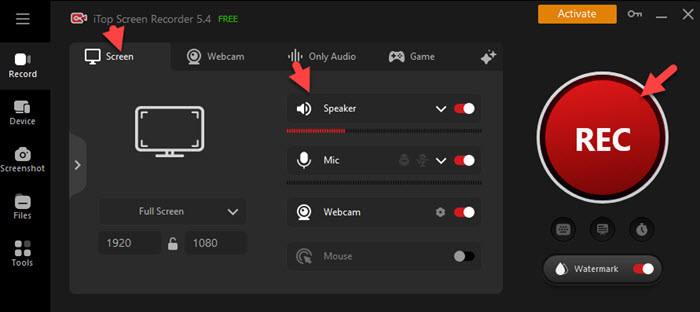
Case 1. Play Roblox game in browser
- Go to Record > Screen.
- Select the record region. You can record part of screen, full screen or only the Roblox window.
- Turn on Speaker, Mic and Webcam if you need to screen record Roblox with voice.
- Click REC button to start recording.
- 3-second countdown later, a mini control bar appears. Click on Done (the red square-shaped) button to stop recording.
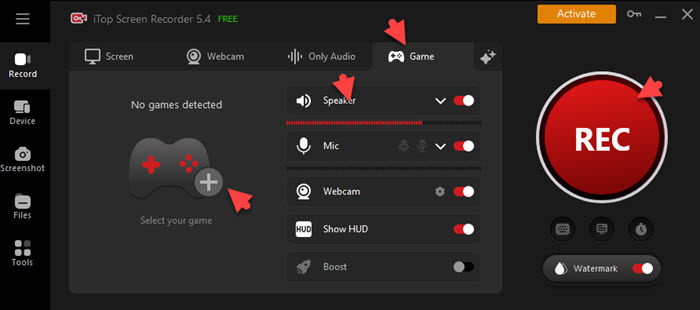
Case 2. Play Roblox game on Windows or Xbox
- Go to Record > Game.
- Click + button to add your game.
- Turn on Speaker, Mic and Webcam to record on Roblox with yourself.
- Click REC button to start recording.
- Click Done button on the mini control bar to stop recording.
The recorded Roblox gameplay video will be save to Files > Video. You can play, edit or upload the gameplay video immediately.
How to Screen Record Roblox on Mac
QuickTime player is the most ideal tool to record Roblox on Mac. It is an inbuilt video player for macOS Mojave or below. Besides decoding various formats for smooth playback, it also features capturing screen in mainstream formats for later sharing. Now, let's learn how to screen record for Roblox on Mac with QuickTime Player.
Step 1. Launch QuickTime Player on your Mac.
Step 2. Go to File menu and click New Screen Recording.

Step 3. Select the region your want to screen record on Roblox. Turn on microphone in Options if necessary and then click Record button to start.
Step 4. Press Command+Control+Esc keyboard shortcuts to stop recording. And, the recorded gameplay video will be automatically saved on desktop.
How to Record Roblox Gameplay on Chromebook
Chromebook is a considered as the best laptop for students because it is cheaper, slighter and safer. However, Chromebook users can hardly find a program to record screen. If you're trying to record Roblox on Chromebook, online screen recorder is the best choice. And, iTop online screen recorder can perfectly meet your requirements. It is simple to use and fully supports Chrome, Firebox and Opera. Also, it enables you to record screen without watermark.
The following guide can lead you to record Roblox gameplay on Chromebook easily and quickly.
Step 1. Open Roblox game on Chrome or other browsers on your Chromebook. And Go to the online screen recorder page: https://recorder.itopvpn.com/online-screen-recorder/.
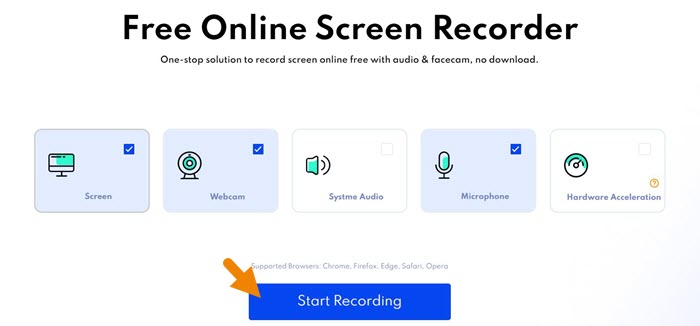
Step 2. Select recording options.
- You can choose screen and system audio to record Roblox gameplay with audio.
- Or, choose screen, microphone and webcam to capture game video with your voice and yourself.
Step 3. Click on Start Recording.
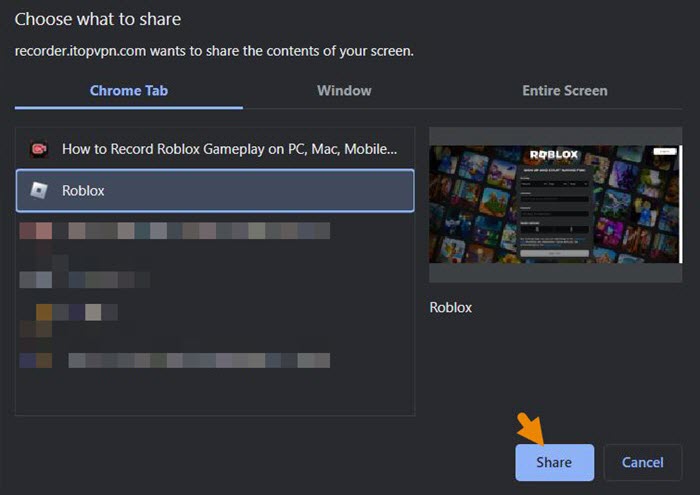
Step 4. You are asked to select recording area, a Chrome Tab, a window or entire screen. After select the recording area, click on Share.
Also, a prompt appears to ask using your microphone and webcam if you have chosen those options at the beginning. Click Allow and go to next step.
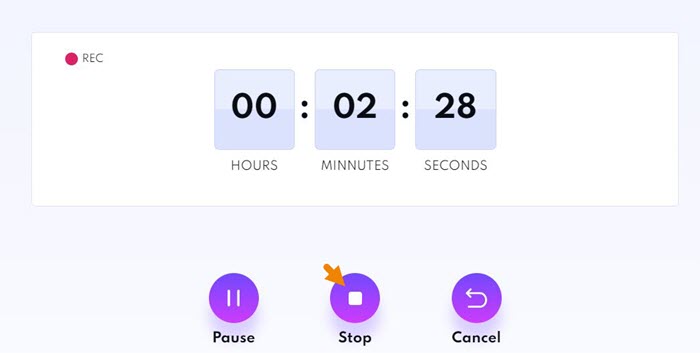
Step 5. Click on Stop button on the page to finish your recording.
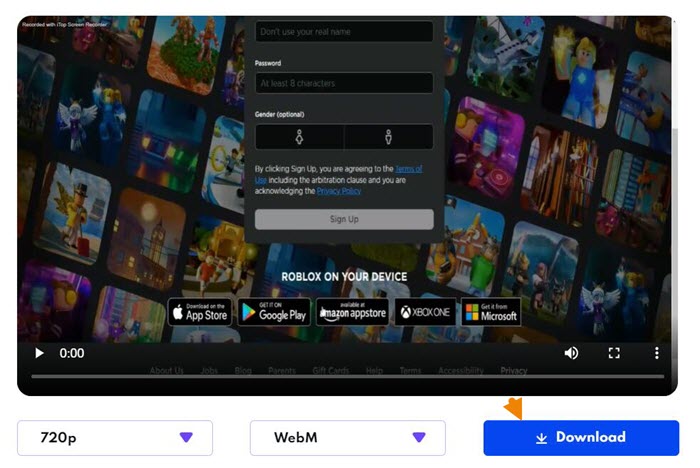
Step 6. Click Download button to save your Roblox gameplay video on hard drive. It is should be noticed that you can only save it as a 720p webm video.
How to Record Roblox on Phone [Android and iPhone]
Roblox is available to play on iOS 9 and greater, Android 5.0 and higher. Fortunately, almost all supported iOS and Android devices have inbuilt screen recording tool. So, you can easily record Roblox gameplay on mobiles.
Step 1. Open Roblox and play any game on it.
Step 2. Access to Control Center on iOS or Quick Settings Menu on Android.
Step 3. Click Record or Screen Recorder button to start recording your Roblox gameplay.

Step 4. Generally, the device will record Roblox with voice by default. Or, some devices allow you to set audio sources.
Step 5. Click stop recording and the video will be automatically saved to album or gallery. You can make some edits, for example, trimming or cropping screen recording.
Also Read: How to Screen Record with Audio on iPhone >>
Conclusion
Roblox brings game entertainment for millions of players. Every time you try to share amazing gameplay with others, you need to know how to record on Roblox at first. Varying from devices, you can get different but easy ways from here. And, iTop Screen Recorder is the best free screen recorder which enables to record yourself playing Roblox and your voice on PC with the support of capturing Mic and webcam.
Besides, it can give the best performance for you to record Roblox in HD without lags/FPS drop even on a low-end PC. If you are playing Roblox and any game you want to record on PC, download iTop Screen Recorder to get the recording done.
 Vidnoz AI creates engaging videos with realistic AI avatars. Free, fast and easy-to-use.


