Screen recording with sound on iPhone is a necessity. Some people try to screen record calls with sound on iPhone for keeping all details; some people need to share a guide of how to do something on iPhone with friends or families; some people hope to record videos from streaming sites for offline playback and so on. Well, how can you create a screen recording with audio on iPhone? In this article, we would like to introduce some effortless ways available to screen record on iPhone with sound. You can use all the solutions to record iPhone 11, 12, 13 and 14 with no hassle.

How to Screen Record with Sound on iPhone by Screen Recording Feature
The reason why iPhone can stand out in the world is that it always gives users the convenient experience to make everything easier. Not surprisingly, iOS devices provide users with a convenient solution to how to screen record with sound on iPhone. The built-in screen recording feature owns multiple functions so that it can meet almost all the daily needs. Besides high-quality video recording (almost original quality), iPhone makes it possible to record the sound from the system and microphone. Meanwhile, it is totally free for every user. Thus, it owns almost the largest number of users on iPhone compared to other screen recorder apps.
Here's the step-by-step guide of how to screen record on iPhone with audio using it.
Step 1. Enable the Function
Go to "Settings" and find “Control Center” and Click Green Plus to add Screen Recording into "Included Controls".
It is noteworthy that you should enable this function to record the screen with sound since it is switched off by default.

Step 2. Set Recording
Swipe up from the bottom of the screen to enter Control Center. (For iPhone X or iPhones after iPhone X, please swipe down from the right top of the screen) Tap the white circle for seconds. If you need to record your voice, please make sure the Microphone is on. Besides, the video recorded will be saved in Photos by default. You could adjust the place to save it.

Step 3. Start Recording
You can tap "Start Recording" on the last step interface to start it. Or you can swipe up the screen and click the white circle on the control center page. It will give 3 seconds for preparing. After that, everything will be recorded in the video. Besides, you can do the same and click the circle to end it. Then you can check the video you just recorded in your camera roll on your iPhone.

How to Screen Record with Sound on iPhone Using Feasible App
Besides the iOS build-in tool for screen record, there is another feasible solution to iPhone screen recording with sound. It is RECGO, one of the best apps to record your screen on iPhone that gets more than 4.5 points over 9K ratings on App Store.

RECGO not only allows you to record Instagram Story, TikTok live and other videos from SNS, but screen record games, apps, video demos with audio as well as screen record a phone call with sound on iPhone. After recording your screen, you can add Face Cam to make some video reactions to further enhance your recording. Moreover, RECGO also supports powerful video editing. Here are some main functions you can take to edit your videos:
- Crop and trim videos easily, even the newbie can start using it quickly.
- Hundreds of music and sound effects to make your video more interesting.
- Interesting voice changer function that can make your video funnier.
- Add gestures stickers to your video.
- Rotate your videos at 90-degree angles.
- Add text and stickers to rich your video.
- Select from several filters to enhance your videos.
- High video output resolution and share to social apps, like Facebook, YouTube, Instagram, etc.
How to Screen Record with Sound on iPhone Using RECGO
Step 1. Install the app on your iPhone and launch it.
Tip: Before recording, you can make adjustments to recording. For example, you can adjust the frame rate. Besides, you can set a time of recording or the recording orientation.

Step 2. Click "Start Recording". There will be a window. You need to tap "Continue" and Start Broadcast. Then the screen will be recorded for 3 seconds. You can tap anywhere white to go back system interface. Don't forget to switch on Microphone if you want to record your voice.

Step 3. Once you want to stop recording, please click the red box, where the time shows. And tap "Stop Broadcast" to stop the recording. The video saved can be found easily in the next interface. Then you can use it directly or make some adjustments via editing tools Screen Recorder + offers.

FAQs About iPhone Screen Recording with Audio
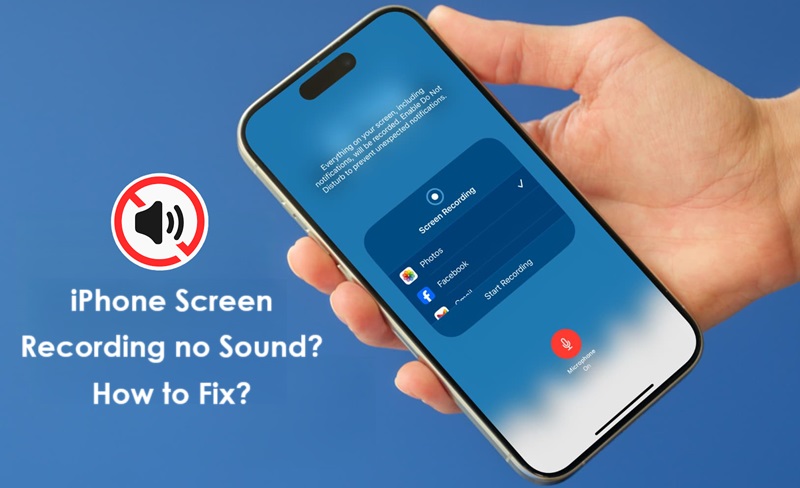
Why is there no sound when I record my iPhone screen and how to fix?
If there is no sound on your iPhone screen recorder, try turning on the microphone audio first.
- Swipe up to bring up the Control Center.
- Locate the Screen Record icon and press and hold it until the Microphone Audio option appears.
- Tap the Microphone icon to make it red.
Can you screen record a phone call with sound on iPhone?
Yes, you can. You can screen record a phone call with sound on iPhone using
- Voice Memos app;
- The built-in screen recording feature;
- Downloading a third-party call recorder.
How to screen record a phone call with sound on iPhone?
The steps to record a phone call with sound on iPhone are the same as the way to screen record on iPhone with audio. That is
- Enable the function by Settings>Control Center>add Screen Recording into Included Controls.
- Setting recording by wiping up from the bottom of the screen to enter Control Center and press the white circle button.
- Tap “Start Recording” and start the iPhone call.
Bonus: How to Screen Record with Sound on PC
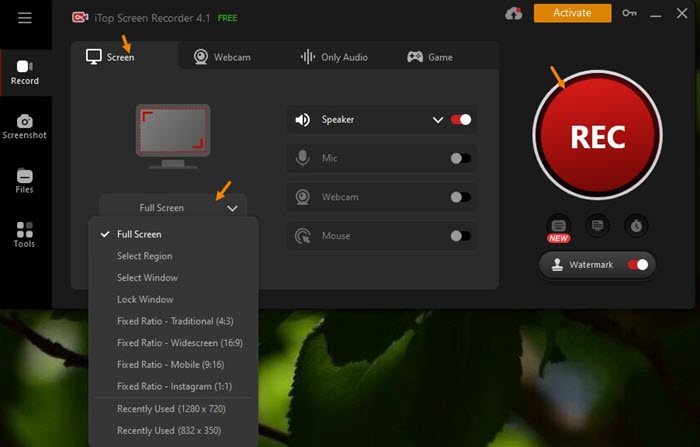
There are lots of professional screen recorders for PC in the market. iTop Screen Recorder is one of the best free and powerful tools to record on-screen activities on your Windows PC. It can record video calls, live streams, gameplay etc., with audio and webcam. It also allows you to record audio only and webcam video only for meeting more needs. It boast recording screen and videos with high quality, from 1080p to 4K up to 90pfs. Thanks to hardware acceleration, it can record HD videos with no lagging and no shuttering.
iTop Screen Recorder is pretty easy to use. Just in a few of clicks, you can create a high-quality screen recording file on PC.
1. Download and install iTop Screen Recorder on your computer. It is fully compatible with Windows 11, 10, 8 and 7.
2. Launch iTop Screen Recorder. Go to Record > Screen. Select recording area and turn on Speaker to screen record with audio. You can also turn on Mic and Webcam to record screen with your voice and yourself for making a tutorial or teaching video. Click REC to start recording.
3. Click Done button on the mini control bar to stop recording. The recorded video will be saved to Files > Video. From here, you can play, edit or compress the video at will.
Sum up
How to screen record with sound on iPhone? Both the native screen recording feature and third-party apps can help you finish the mission. With the solutions, you can not only record calls with audio on iPhone, but record streaming videos, games and any on-screen movements with no effort. Certainly, if you want to screen record with audio on other devices, for example PC, screen recorder software can be a good choice. iTop Screen Recorder is the best choice for Windows users. It delivers a smooth experience to record videos and audios on your Windows computer. And, it is friendly for everyone, both beginners and pros, because of the straightforward interface and advanced settings and tools.