


Procreate offers a handy feature - the built-in time-lapse recording. While Procreate's time-lapse recording is a convenient feature, it can feel limiting. The quality might be a bit rough, especially on older devices, and editing options are minimal. Frustrated with Procreate's time-lapse limitations? Choppy playback and a lack of editing options holding you back? Two free alternatives that bypass your time-lapse limits are also picked here. Prepare to break free from the constraints and show your creative Procreate process with stunning time-lapse that will leave viewers in awe. Here comes the ultimate guide on how to record on Procreate.
Part 1. Record on Procreate Two Ways
How to record on Procreate? You’d better know more about the two mainstream ways to record Procreate drawings to help you choose the most suitable method for your creative endeavors.
Time-lapse feature
Procreate's time-lapse feature is a straightforward way for those who are looking for a guide on how to record on Procreate. With a simple one-click setup, you can effortlessly record your creative drawing process directly within the app.
However, this convenience comes with certain limitations that should be considered. The maximum recording length may vary depending on your iPad model, potentially limiting the duration of your time-lapse. 4K UHD recording is only available on iPad Air 2 and iPad Pro models.
Due to compression, the final time-lapse video may appear less crisp and detailed. Procreate's time-lapse feature does not record the screen and your talking simultaneously. You might encounter Procreate time lapse not working errors like recordings not starting, choppy playback, or export problems.
iOS built-in screen recorder
How to record in procreate on iPad? The iOS screen recorder offers a more versatile approach to capturing your Procreate drawings. It records your entire creative process, not just the Procreate canvas, including any reference materials or other apps you use alongside it.
However, despite its versatility, the iOS screen recorder has some limitations. The recorded video may be limited to your device's basic screen resolution, which might not be as high as your Procreate canvas resolution. The iOS screen recorder cannot capture sounds originating within Procreate itself, such as brushstrokes or tool interactions.
If you want to record on Mac, refer to how to record your screen on Macbook Pro.
Part 2. How to Record on Procreate with Its Time Lapse Feature?
Procreate lets you record a time-lapse of your work – it's a great way to share your Procreate drawing process with the world. Here's a step-by-step guide on how to record on Procreate to make explainer video.
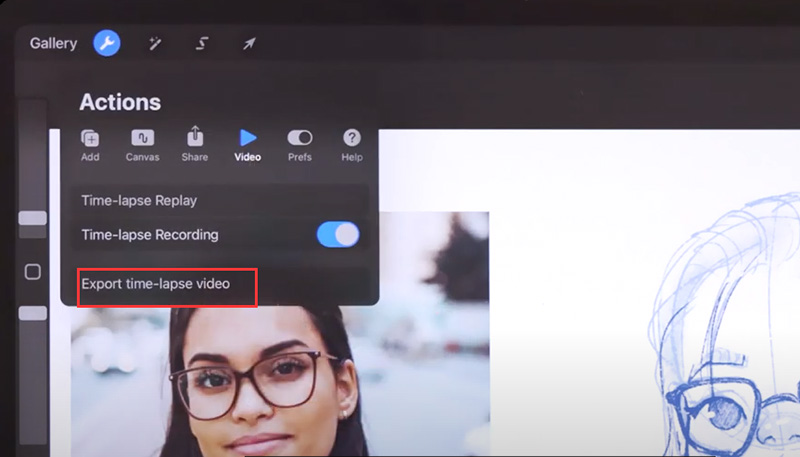
Step 1. Enable time-lapse recording. Open Procreate and tap on the Actions icon (the wrench symbol) in the top left corner.
Step 2. Access time-lapse settings. Within the Actions menu, navigate to the Video section.
Step 3. Turn on “Time-lapse Recording”. How to record Procreate drawing? In the Video section, locate the Time-lapse Recording option. Make sure the toggle switch next to it is turned on. This ensures Procreate captures everything you do on the canvas from this point forward.
It doesn’t matter if you forget this step. Procreate cleverly starts recording even if you enable time-lapse later. It will capture your actions from the moment you switch it on.
Step 4. View and export your time-lapse recording. Once you've finished your artwork and want to view or share the time-lapse recording, simply go back to Actions > Video and select Time-lapse Replay. Ready to share your time-lapse? Tap the wrench icon (Actions) and choose "Video" > "Export Time-Lapse Video". Pick between the full recording or a quick 30-second version.
Part 3. How to Record on Procreate? Default iOS Feature
While Procreate has a simple built-in time-lapse feature, you can also use the screen recording function on your iOS device to record Procreate. Here's how to record drawing on Procreate on iPad with iOS feature.
Step 1. Access the Control Center. Swipe down from the top right corner of your iOS device’s screen to open the Control Center.
Step 2. Locate screen recording. Look for the screen recording icon (it usually resembles a circle with a dot inside).
Step 3. Start recording. Tap and hold the screen recording icon. If you want to include audio commentary, firmly press (3D Touch) the icon and choose "Microphone on" before starting the recording.
Step 4. Switch to Procreate and record. Now, tap "Start Recording" in the pop-up notification. Minimize the Control Center and switch to Procreate. The screen recording will capture every drawing step. 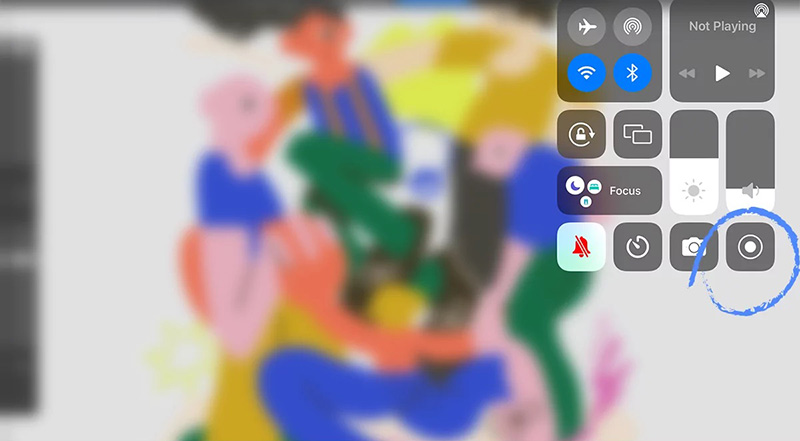
Once you've finished your Procreate recording, swipe down from the top right corner again to open the Control Center. Tap the red screen recording icon to stop capturing. Your recording will be saved in your Photos app.
Part 4. Looking for Higher Resolutions and Effects? 3rd Party Recorders
How to record in procreate with higher resolution? While the built-in screen recording gets the job done, for higher resolution output, try third-party apps like AZ Recorder. The app can record Procreate in stunning detail with high-resolution output, add polish with built-in editing tools, and narrate your creative drawing with simultaneous microphone recording – all within the app itself. Here’s how to record on Procreate on iPad with AZ Recorder.
Step 1. Download and install AZ Recorder from the App Store. 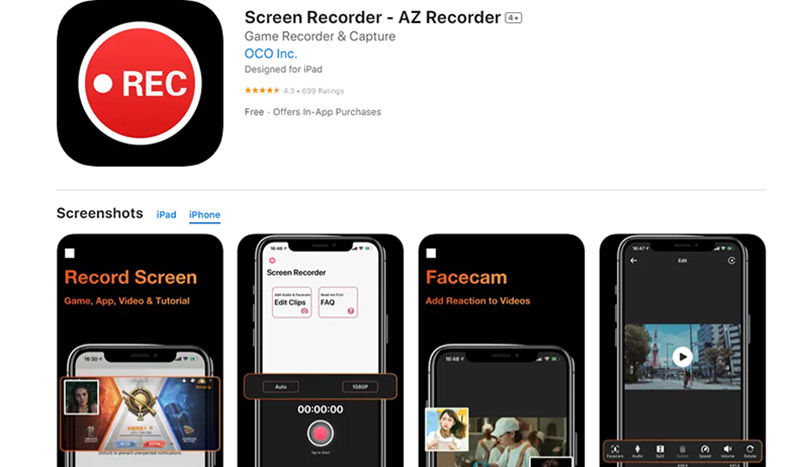
Step 2. Once installed, open the AZ recorder, and configure recording settings. Ensure the microphone option is enabled to record your voice while you create.
Step 3. Start recording. With your settings configured, go back to AZ Recorder and tap the big red "Record" button. A short countdown will initiate the recording. Now, switch back to Procreate and start your creation. AZ Recorder will capture both your screen activity and your voice narration.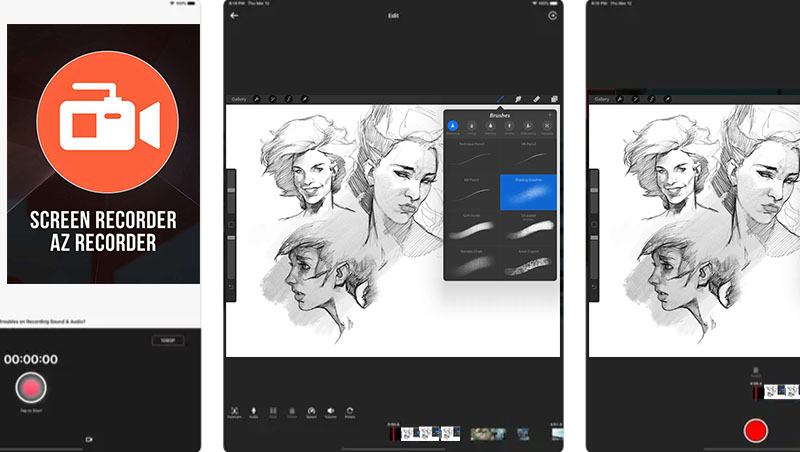
Step 4. Once you've finished creating, return to AZ Recorder and tap the red square button to stop recording. The app will offer basic editing tools for trimming or adding effects to your recording. Finally, you can easily share your artwork creation video directly from AZ Recorder to social media or other platforms.
Also read: how to screen record and talk at the same time >>>
Part 5. Bonus Tip: Free Screen Recorder & Video Editor for Your Drawing Videos
Your Procreate recordings might not be ideal for sharing on platforms like YouTube or TikTok. To truly captivate your audience, try extra editing and enhancement. iTop Screen Recorder does more than screen capture – it boasts a built-in video editor that lets you enhance your Procreate drawing recordings. Think cool effects, artistic filters, smooth transitions, and even background music. And of course, you can add subtitle to video, trim unwanted parts and merge clips for a smooth final video. Ready to edit? Here's a quick guide.
Step 1. Free download iTop Screen Recorder and follow the on-screen instructions for installation.
Step 2. Launch iTop Screen Recorder and go to the "Tools" section. Select "Advanced Editor". You'll then be able to choose between starting a new project and opening an existing screen recording. Simply drag and drop your video clips onto the timeline for editing.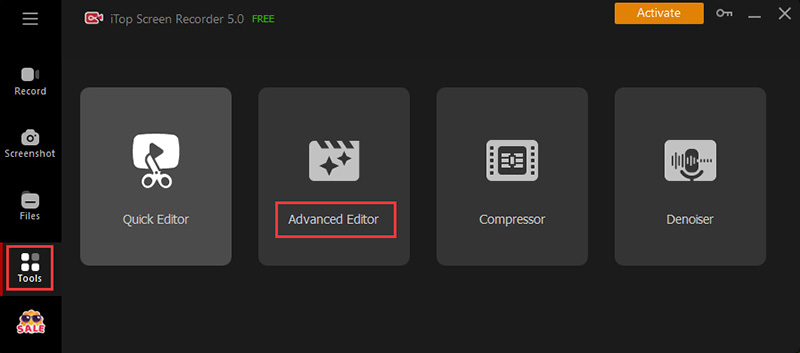
Step 3. It offers a variety of features to enhance your Procreate videos. Refine your footage by merging clips, cutting out unwanted sections, or trimming the beginning and end. Add personality with text, effects, filters, and music to spice up your videos.
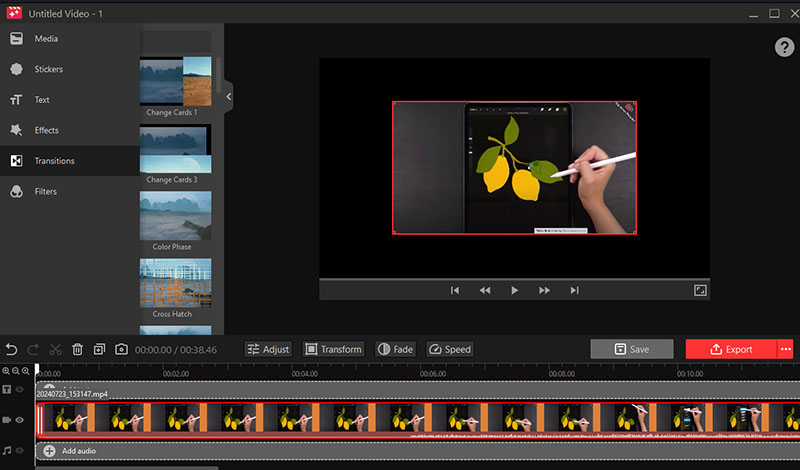
Step 4. Once you've polished your video to perfection, export it in a format compatible with your chosen sharing platform.
Tips: iTop Screen Recorder also has a web-based online webcam recorder to record via a browser without extra software installation.
Part 6. Conclusion
How to record on Procreate? You have several ways to do the job - Procreate time lapse feature, iOS recording feature, and third-party recording app for iPad. After capturing your Procreate drawing, edit it with iTop Screen Recorder. iTop Screen Recorder helps you add transitions for a professional flow, text overlays to highlight key moments, and effects for a unique style. Visit iTop Screen Recorder to download the program and get started.


