DStv, short for Digital Satellite Television, is a major Sub-Saharan Africa satellite TV service that offers various TV and radio channels through satellite dishes and decoders. Known for extensive entertainment offerings, DStv brings people a great deal of joy in their leisure time. Especially its recording feature, which allows people to catch up on missed episodes or watch content at their convenience. Do you want to know how to record on DStv? If you do, this guide gets you covered. Now, let’s explore these simple tips.
Method 1. How to Record on Dstv Explora
The Explora is a PVR (Personal Video Recorder) and set-top box designed for DStv satellite TV subscribers. It offers features like pausing/rewinding live TV, recording shows, and more. Here, we will mainly focus on its recording feature. Before using this feature, you should be aware that:
- Explora Decoder only allows recording up to 220 hours of content. If it exceeds, you’ll fail to record TV shows.
- Only when you connect your Explora decoder to the internet can you unlock features like Remote Recordings and Catch Up Plus.
- Verify your installation is correct, and you have a good signal for reliable recording.
Now, let’s see how to record on DStv from phone or TV using the Explora Decoder.
Step 1. Connect your Explora decoder to the internet for features like remote recording.
Step 2. Go to the TV Guide on your decoder or the DStv Now app.
Step 3. Select the show and press the “I” (Info) button on your remote.
Step 4. Look for the record icon and select “Record” for recording an episode or “Record Series/Season” for recording all future episodes.
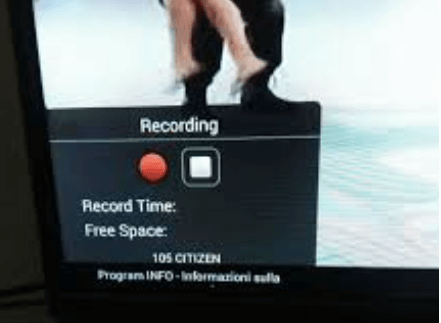
Step 5. Press “OK” to schedule the recording.
Step 6. All recorded shows and series will be stored in your Playlist for access.
Method 2. How to Record on DStv Stream via DStv Stream App
How to record on DStv stream? For users who want to record a DStv stream they can also do it by utilizing its newly added Cloud PVR (Personal Video Recorder) feature in the DStv stream app. This feature allows users to record live TV and save it for up to 30 days in the “My Stuff” section. Before getting started, ensure your app is updated to the latest version for Cloud PVR features. Then, you can follow us to see how to record on the DStv stream.
Step 1. Launch the DStv Stream app on your device.

Step 2. Go to the Live TV section or browse the TV Guide for a show you want to save.
Step 3. Tap the "Record" icon (a circle or square) next to the show or within the player.
Step 4. Choose the options (episode, series, etc.) to record to the cloud.
Step 5. Recordings are saved to the "My Stuff" section for up to 30 days.
Method 3. How to Record on DStv Using iTop Screen Recorder
Whether you choose Explora Decoder or DStv Stream, you have to face problems like limited storage space or limited storage time for recordings. If you want to get rid of these troubles, just consider using iTop Screen Recorder to capture your favorite TV shows instead.

Record Live and Streaming Videos in One Click
- Record TV shows, movies, live sports from any site.
- Record videos and live streams without quality loss.
- Record from YouTube, Netflix etc., without black screen.
- Record with mic/webcam to create reaction videos.
Here are the reasons why we picked it for DStv recording.
- Flexible Capture Modes to Record On-demand TV Shows Without Black Screen
It allows you to record your entire screen, just the DStv app/browser window, or a custom region. What’s best is that it will enable you to record on-demand TV shows without a black screen. Thus, you can use it to screen record protected videos without black screen or other shows.
- Capture Lengthy TV Shows Without Time Restrictions
You can screen record as long TV shows as you want without any time restrictions. Also, no watermarks. This feature also applies to recording TikTok live.
- Records DStv Stream in 4K or 1080P Without Lag
Thanks to GPU acceleration, you can capture live TV in 4K or 1080p without lag. Whether to screen record Instagram DM or other shows, you can get a crystal clear recording.
- Schedule Recordings for Specific TV Shows
Its scheduling feature allows you to set an automatic recording for a specific time and screen region, which you can use to capture TV shows playing on your computer easily. Also, you can schedule record Zoom meeting without the need to manually start recording.
Here are the steps on how to record on DStv using iTop Screen Recorder.
Step 1. Download iTop Screen Recorder on your computer and launch it.
Step 2. Launch the DStv app or go to the DStv website in your browser and start playing the show or movie you want to record.
Step 3. Open the iTop Screen recorder and select the recording area. You can either choose “Select window” to capture the entire DStv player screen or select “Region” and draw a box around the video player.
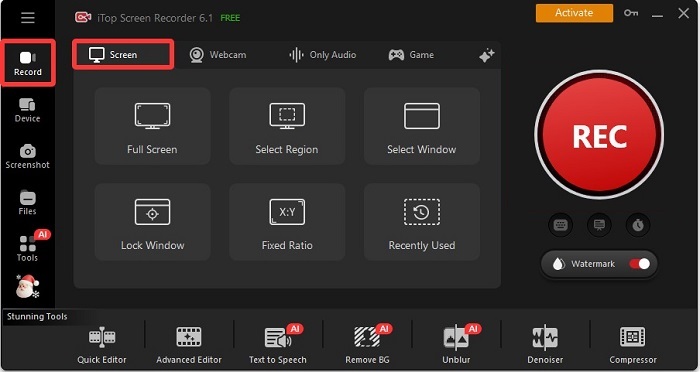
Step 4. Ensure the speaker/system audio icon is turned on to capture the sound from DStv. Then, click on the red "REC" button or press the F9 key to start recording.
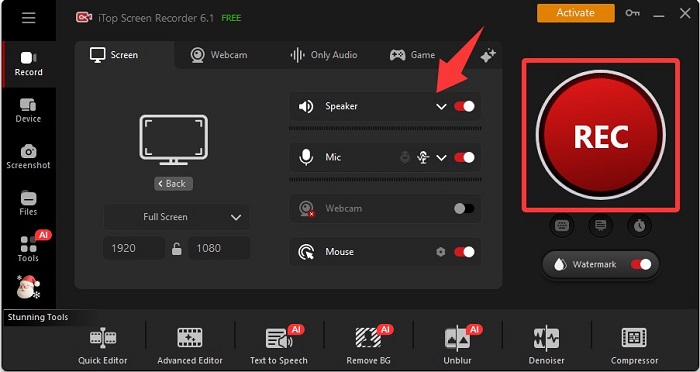
Step 5. Click on the stop button on the recording toolbar or press F9 again when the recording finishes. Your recordings will be saved in your desired location as an MP4 or other format.
How to Clear Recordings on DStv?
As mentioned above, the Explora Decoder offers limited storage space, so you may need to clear recordings stored on DStv occasionally. Besides that, people often clear DStv recordings to prevent problems like “hard drive full” errors and more. If you also want to clear recordings on DStv, just follow these steps.
Delete Individual Recordings (Explora)
Step 1. Press the DStv (Blue Logo) button or Menu on your remote.
Step 2. Navigate to Recordings or Playlist and press OK.
Step 3. Highlight the specific recording you want to delete and press OK.
Step 4. Select Delete from the options that appear and confirm.
Delete Scheduled Recordings (Series)
Step 1. Press the DStv (Blue Logo) button or Menu.
Step 2. Go to Settings > System Settings > Manage Recordings.
Step 3. Find the series you want to stop recording and press the Red Button to cancel.
Enable Auto Delete for Space Management
Step 1. Press the DStv (Blue Logo) button.
Step 2. Go to Settings > User Preferences > Recordings.
Step 3. Set Auto Delete to On to have the decoder automatically remove older recordings when space is needed.
If you want to erase all recordings at once, then you can try a factory reset. All you need is to press the DStv button, go to Settings > System Settings > Reset Decoder Settings. Then, select Reset to factory default and format the hard drive. Confirm the action to erase everything.
The Bottom Line
In this guide, we explored three effective methods on how to record on DStv: using the Explora Decoder, the DStv Stream App, and iTop Screen Recorder. Each method offers its own advantages depending on your needs. For the most flexibility and quality in your recordings, we advice you to download iTop Screen Recorder. With its powerful features, you can easily capture your favorite shows and moments. Also, you can use it as a screen recorder for WhatsApp view once, and record your WhatsApp message as you will. Get started today!