Canvas Studio is a multimedia tool embedded in Canvas that allows people to watch, record, manage, and share videos. It benefits everyone, from individuals to large enterprises, especially educators, by leveraging AI for lesson planning and enabling student collaboration. That’s why many people record on Canvas Studio to create professional-looking learning videos. If you also want to learn how to record on Canvas Studio, this guide provides detailed steps.
How to Record on Canvas Studio?
How to record a video on Canvas Studio? As mentioned earlier, Canvas Studio is integrated within Canvas, eliminating the need for extra login steps and making media management easy within the LMS. It allows you to record your webcam, your screen, or both simultaneously. Meanwhile, you can add interactive questions to your recordings for student engagement. Sounds perfect, right?
However, there are no perfect tools; Canvas Studio is no exception. It has some limitations, such as:
- The video recording feature is not accessible for screen reader users.
- The maximum resolution of recorded video it supports is 1080P; anything higher may impact performance.
- Lastly, Canvas Studio capture for Chrome and Edge browsers only.
If you’re clear on these points, follow the steps below to learn how to record in Canvas Studio.
Step 1. Log in to your Canvas course.
Step 2. Find the Studio icon (blue octopus) on the course navigation, or global navigation, and click it.
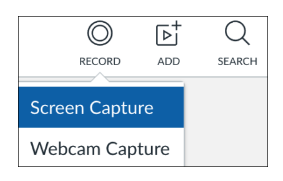
Step 3. In the top right corner, select Screen Capture or Webcam Capture.
Step 4. If this is the first time you are using Studio, you’ll be asked to install the Screen Capture app. Follow the on-screen prompts to download it.

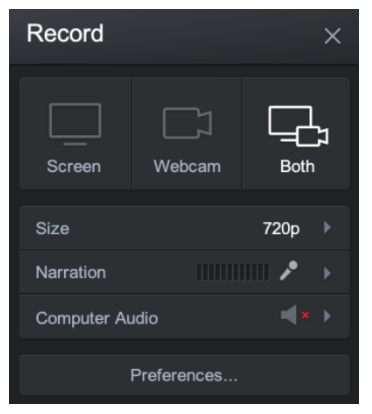
Step 5. After installing, you can open it manually. Select Screen, Webcam, or Both from the Record window. Choose the option based on your needs.
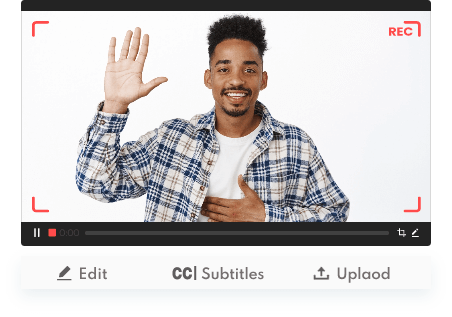
Step 6. You can click the red REC button to start recording your screen. Then, click the Pause button to stop recording. After that, you can preview and upload your recordings.
Canva Studio Recording Issues and Troubleshooting Tips
While Canvas Studio is a simple and convenient tool for students, it may also impose certain limitations. Sometimes, Canvas Studio may stop working due to system issues or improper operation. Aside from that, many other factors may stop you from using Canvas Studio, including:
- Operating system permission issues (Mainly for Mac users)
- Your browser needs updates/cache clearing
- The recorder is taking a minute to fully load
- Your device is short on storage space
To tackle these issues, you can try these solutions: grant permission on your Mac, update your browser, clear browser caches, try a different browser, or free up more storage space on your device. Or, more simply, use a more professional 1080P screen recorder to record on Canvas Studio instead.
How to Record on Canvas Studio Using iTop Screen Recorder?
How to screen record on Canvas Studio with more advanced options? If you want more powerful and rich features, such as enhanced annotation, advanced editing, and 4K screen recording that might exceed Canvas’s built-in tools, then you can try iTop Screen Recorder. It gives you more control over recording regions, mouse highlights, and watermarks. You just need to take an extra step to upload your recordings to Canvas after recording, and it’s done.
Want to learn more about iTop Screen Recorder? Here are some of its key features.
- Comprehensive Control Over Your Recording Settings. It allows you to customize recording regions, highlight your mouse movements, and add watermarks to your recordings. That makes it easier for viewers to follow your tutorials and ensure your content remains identifiable.
- Capture in 4K Ultra HD for Superior Clarity. With iTop Screen Recorder, you can record in stunning 4K Ultra HD resolution, ensuring that your videos are crystal clear and highly detailed. Whether you’re creating tutorials, recording Zoom meetings, or recording gameplay, the high-definition output enhances the viewer's experience.
- Draw Directly on Your Screen While Recording. It allows you to draw directly on your screen during recording. This is particularly useful for educational videos or presentations, as you can mark important points, highlight specific areas, or add annotations in real-time. For example, you can use it to demonstrate how to screen record Instagram DMs.
- Built-in Editor Allows for Polishing Your Recordings. After recording, you can enhance your videos with the built-in editor. This tool allows you to trim unwanted sections, add transitions, insert text, and perform various other edits, giving your recordings a polished finish. For example, you can record TikTok live and edit it to make it perfect.
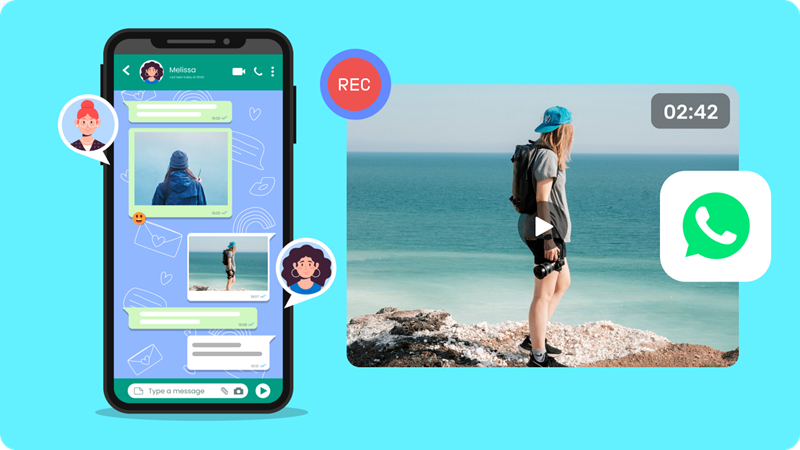
- Specialized Modes for Gaming, Music, or Screen Recording. iTop Screen Recorder caters to different recording needs with specialized modes. Whether you're gaming, capturing audio for music, or recording your screen for educational content, you can switch between modes easily. It even serves as a screen recorder for WhatsApp view once, which allows you to capture WhatsApp easily.
Below is how to record in Canvas Studio using iTop Screen Recorder.
Step 1. Download and launch iTop Screen Recorder on your Windows 11, 10, 8, and 7.
Step 2. Open the Canvas Studio video or page you want to record in your browser.
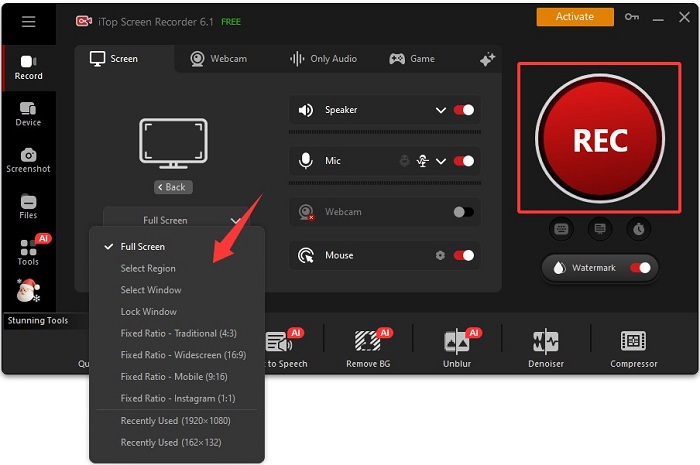
Step 3. Choose the area you wish to record and then enable the Speaker, Mic, Webcam, or Mouse, depending on your needs. Then, click the Record button to start recording.
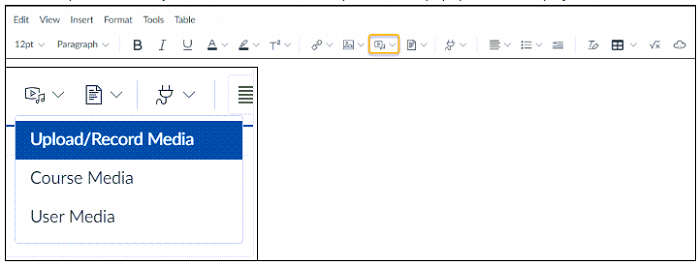
Step 4. Once finished recording, click the stop icon to stop recording. Go back to Canvas Studio, click the dropdown arrow next to the Record/Upload Media icon. In the dropdown, click Upload/Record Media and select the recordings you just recorded.
How to Record on Canvas Studio with a Safari or Firefox Browser?
As mentioned earlier, Canvas Studio only works in Chrome and Edge browsers. So what if you want to use it on other browsers? Canvas also provides a solution: using Screencast-o-Matic (also known as ScreenPal), a third-party screen capture application supported in Canvas, to record your screen. Here are the steps on how to use Canvas Studio to record videos.
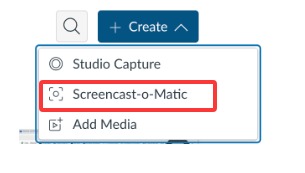
Step 1. Log in to Canvas, go to Studio in the Global Navigation, and click the + Create button.
Step 2. Choose Screencast-o-Matic.
Step 3. If it's your first time, download and install the Screen-o-Matic app when prompted.
Step 4. Click the recorder button again to launch Screen-o-Matic.
Step 5. Adjust the Settings you prefer and click the red Rec button to start.
Step 6. Then, click “Done” when finished recording.
Step 7. In the preview window, add a title, make basic edits, and click Upload or Save to send your recording to Canvas Studio.
The Bottom Line
In this guide on how to record on Canvas Studio Windows 10, we outlined 3 effective methods to achieve your recording needs. Every method has its advantages and disadvantages. For the best experience, we recommend that you download iTop Screen Recorder to take advantage of its powerful features and flexibility. Elevate your recording process and start creating engaging content today!