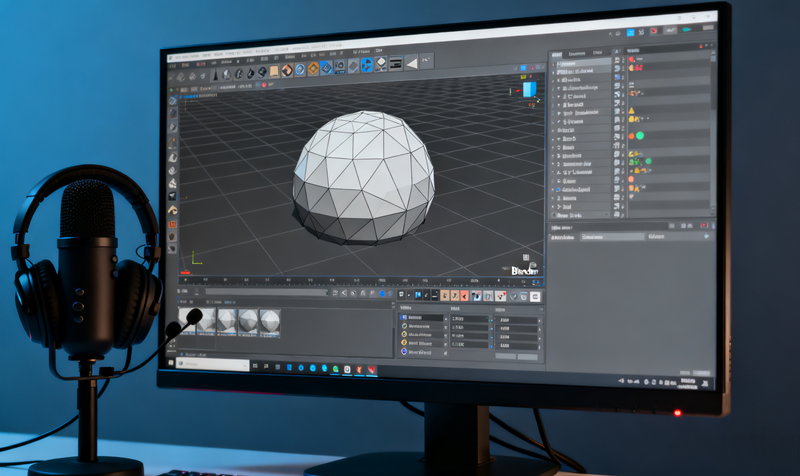
Blender is a big name in 3D modeling field. The free and open-source program gives everyone a golden chance to create and distribute 3D artworks. In addition to enjoying the native features, users also need a solution to screen record Blender. In this article, we would like to introduce the best way of how to record in Blender helping you capture a video whether you're building a 3D model or designing animation, VFX, etc.
Why Do You Need to Record in Blender
Recording in Blender helps create video clips for multiple purposes. Check the common use cases of Blender screen recording.
- Demonstration: Record the art process of a project - from the start to the end - in Blender, to showcase your thoughts and techniques of designing 3D animation, visual effects etc.
- Education/Training: Screen record Blender to create in-depth tutorials of how to generate 3D scenes with different features or tools. And, make explaining and training videos about Blender’s Python API for advanced users.
- Troubleshooting: Capture the screen to show the issue you encounter for help. In turn, record a support video helping the questioner completely solve the problem.
- Self-check & Feedback: Beginners and learners record the entire workflow in Blender for later reviewing or getting feedback from others.
Can You Screen Record Blender
Blender has a screencast feature to record your actions as a video or sequence of image files with the hotkey - Alt+F3. By default, it captures a screencast consisting of a series of PNG images. To record a video in Blender, you should set the output as AVI or other supported video format before activating the feature.
Unfortunately, screencast can only help record a single window and does not support audio. If you have more recording needs, a professional 3rd party screen recorder is the better choice.
What's the Best Solution to Record in Blender
iTop Screen Recorder, a leading free screen recorder for PC, ensures seamless screen recording experience. It captures any activity on your screen and generate a high-quality video perfect for watching and sharing. It helps you record whatever you want in Blender with no effort.
Screen record Blender flexibly
iTop Screen Recorder enables you to customize the recording area, full screen, a part of screen, a window and more. You can exactly capture the content you need in Blender without extra distractions.
Record in Blender with audio and webcam
With the support of speaker/microphone and webcam, iTop Screen Recorder allows you to screen record Blender with yourself and make engaging tutorial or explainer videos. Also, an auto-roll teleprompter helps you narrate as a pro.
Record in Blender with high quality
iTop Screen Recorder delivers clear images and vibrant color of the result file. You can also personalize the resolution (up to 4K), frame rate (up to 120fps) and other parameters for special needs.
Record a video in Blender with no time limit
iTop Screen Recorder breaks the time limit while recording. You can capture the whole workflow of making a 3D project without worrying about a sudden end.
Record in Blender smoothly
Thanks to hardware acceleration, the screen recording tool guarantees a smooth recording process. You can capture the video while creating 3D scenes with no lags or shutters.
Annotate on the Blender screen recording
Annotation tools enable you to add arrow, shape, text, etc., to explain/mark some content while recording. Use the spotlight or magnifier tool to highlight important information if you want.
Moreover, iTop Screen Recorder is not only able to capture your actions in Blender and other design programs, but save streaming videos and audios with no quality loss. An Enhanced Mode helps you screen record protected videos from any website or app without black screen for offline watching.
Tip: For Mac user, QuickTime Player, the pre-installed program in macOS, can screen record Blender in an easy and effective way.
How to Record a Video in Blender
It is not a hard task to record a video in Blender. Follow the tutorials, you can make a screen recording and customize it to fit your need.
How to Screen Record Blender on PC with iTop Screen Recorder?
Step 1. Download and install the latest version of iTop Screen Recorder on your PC.
Step 2. Open Blender and launch iTop Screen Recorder.
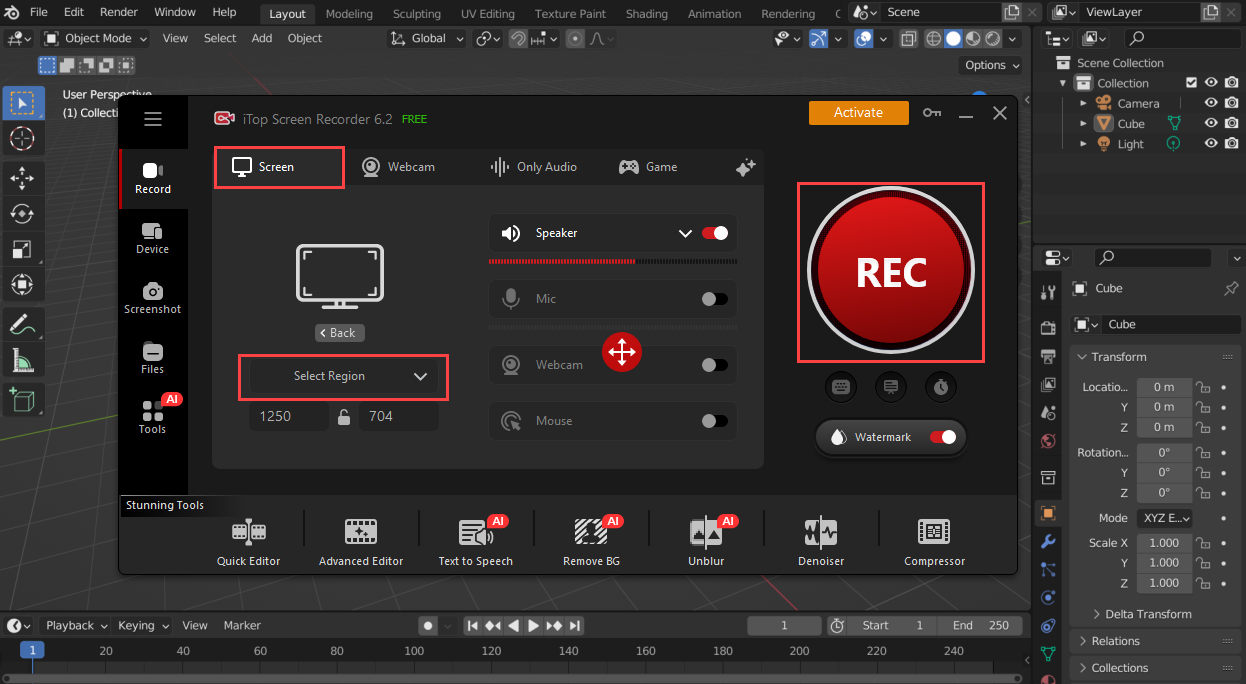
Go to Record > Screen. Select the recording area. You can record the Blender window only, or full screen, or any selected region.
Turn on Speaker to record in Blender with audio. Turn on Mic and Webcam to screen record Blender with yourself if needed.
Step 3. Click REC button to start recording. Now, design any content in Blender. iTop Screen Recorder will record the process until you click the Done button on the mini control bar.
Step 4. The recorded file is saved to Files > Video. Click the pen icon to invoke the video editor to trim, crop the screen recording or make other editing at will.
How to Screen Record Blender on Mac with QuickTime Player?
Step 1. Find QuickTime Player in the application folder and open it.
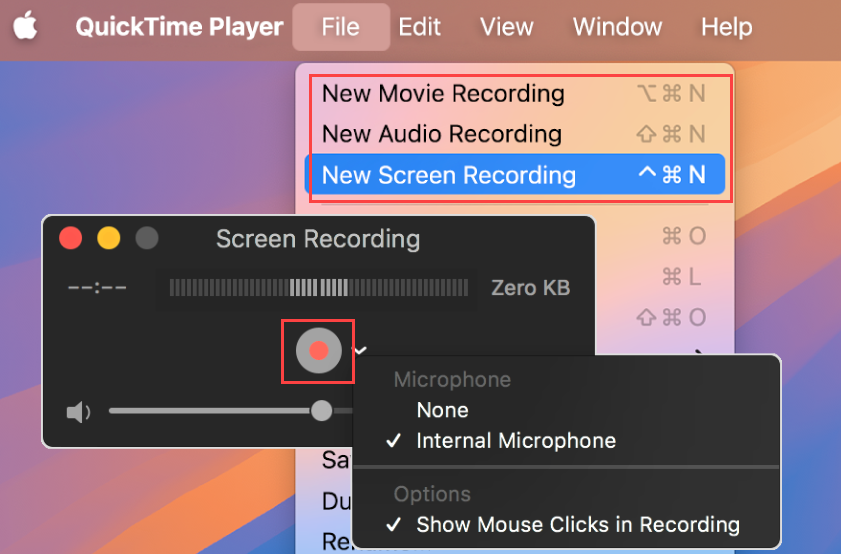
Step 2. Choose File > New Screen Recording. If you want to record a video with webcam, please choose New Movie Recording.
Step 3. After the control bar appears, click the arrow next to the Record button and choose a Microphone to record your voice or other audio. For movie recording, you also need to choose a camera.
Step 4. Click the Record button. Drag to select a recording area or click anywhere for recording the entire screen. Next, click Start Recording.
Step 5. Click the Stop button in the menu bar to stop recording. QuickTime Player will open the resulting file automatically. You can play, edit and share it at will.
What's More - How to Take a Screenshot in Blender
Sometimes, users hope to capture a screenshot in Blender for instant sharing. Luckily, the keyboard shortcut - Ctrl+F3 - is available to natively screenshot the active area where your mouse is located as a picture in Blender.
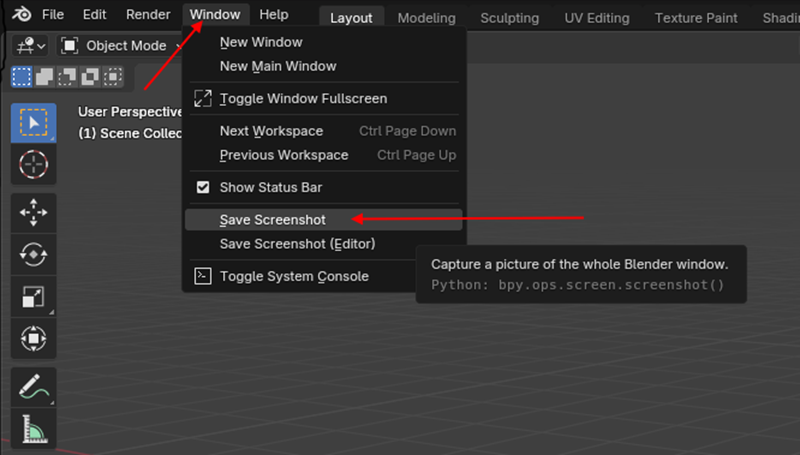
To customize the screenshot, head to Window > Save Screenshot and then set the output format and color depth. If you want to take a screenshot of entire screen, check Full Screen option.
Also, you can use the screenshot tool in iTop Screen Recorder for advanced needs.
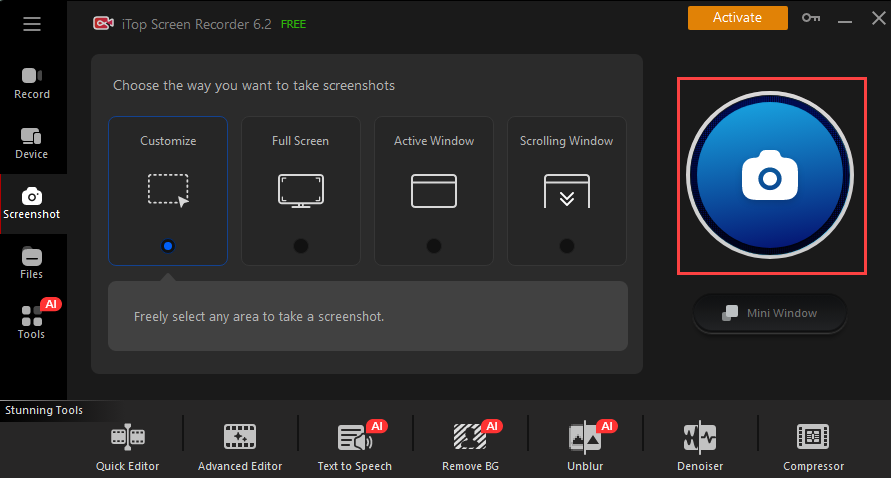
1. Launch iTop Screen Recorder > Screenshot.
2. Choose the way you want to take screenshots.
- Customize: Flexibly screenshot the selected area.
- Full Screen: Take a screenshot of entire screen.
- Active Window: Capture the Blender window only.
- Scrolling Window: Take a long screenshot of whole webpage.
3. Click the Screenshot button and select the screenshot area.
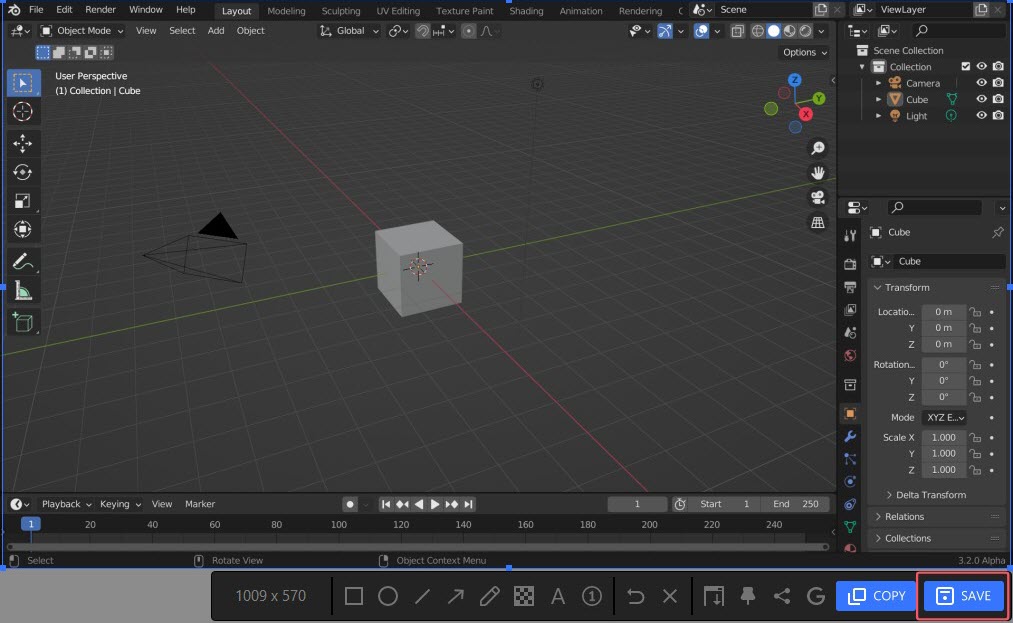
4. Use tools to annotate the screenshot in the toolbar if needed. Click Save to save the screenshot to your drive.
Conclusion
How to record in Blender? iTop Screen Recorder enables users to easily and quickly capture everything what you are doing in the Blender video editor. It helps you create various videos and clips for different cases with no effort. And, the included screenshot utility can capture the scene in Blender as an image for quick sending. Download iTop Screen Recorder and experience the smooth performance to capture animation and 3D scenes in Blender. But, if you are using a Mac computer, QuickTime Player can complete the task without installing extra programs.