BlueStacks is a free Android emulator that lets you install Android apps on your computer, allowing you to enjoy Android-exclusive apps on a larger screen. Whether you’re a gamer who is looking for an improved gaming experience on a bigger display or a professional who wants to avoid switching between your phone and computer for work information, BlueStacks can make it possible. More than that, it even makes screen recording easier than before. Thus, you can share everything that happens on BlueStack with your friends. If this is what you want, check this guide to learn how to record BlueStacks.

Method 1. How to Record BlueStacks 5 with the Built-in Screen Recorder
How to record on BlueStacks? Actually, you can record BlueStacks directly with its built-in screen recording feature. If you, fortunately, have the latest version of BlueStacks installed, you can even enjoy its editing tools. These tools are enough for basic editing. If you want more advanced recording and editing options, just consider using a professional screen recorder.
Now, let’s see how to record BlueStacks gameplay.
Step 1. Launch BlueStacks and the game you wish to record.
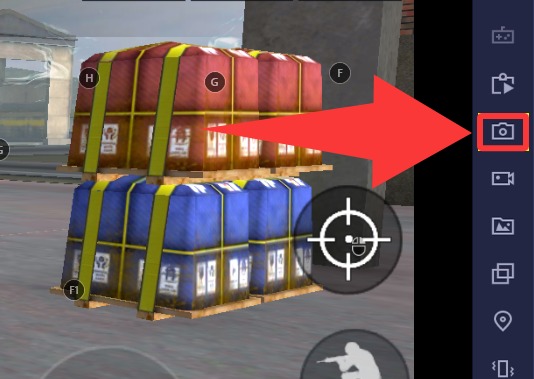
Step 2. Click the Screen Recording icon, which looks like a camera in the Side Toolbar.
Step 3. Click Start Recording, and you will see the recording icon from the top bar. If you want to finish recording, just click on the Stop icon on the top bar.
Step 4. That’s done! After knowing how to record screen in BlueStacks 5, then you can find your recordings on your computer.
Method 2. How to Record BlueStacks 5 with the Moments Mode
For gamers who want to avoid distractions while blueStacks record video, there's a less intrusive option: using the Moments Mode. Unlike the previous method, this feature allows you to record only the last 60 seconds of gameplay. Keep in mind that you'll need to enable this feature beforehand. Additionally, this feature is only available in BlueStacks version 5.13.200 or later. If you're ready, follow these steps on how to screen record on BlueStacks!
Step 1. Launch BlueStacks and open the game you wish to record.
Step 2. In the Side toolbar, click the “Screen Recording” icon, which looks like a video camera.
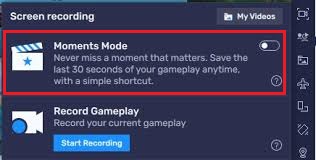
Step 3. In the recording panel, find the toggle for “Moments Mode” and switch it to the ON position.
Step 4. Then, play the game you wish to play and press Ctrl + M to save the last 30-60 seconds of your game as a clip.
Method 3. The Best Solution to Record BlueStacks on PC - Using iTop Screen Recorder
No matter which method you choose, each comes with its own limitations. The first method offers limited recording and editing features, while the second method imposes a time limit. If you're looking for the most comprehensive screen recording solution, consider using iTop Screen Recorder. It allows you to record any screen activity and customize both the recording area and mode. Plus, you'll benefit from the following advantages:
Flexibly Capture Any Area of Your BlueStacks Screen
iTop Screen Recorder allows you to easily capture any portion of your BlueStacks screen. This flexibility is perfect for those who want to screen record protected videos or specific app sections.
Capture Smooth Gameplay in HD or 4K Without Lag
With iTop Screen Recorder, you can record your gameplay in stunning HD or 4K resolution. This high-quality output ensures that your recordings are smooth and detailed, making it an excellent choice for sharing epic gaming moments or live streams.
Record Gameplay in BlueStacks with No Time Limit
One of the standout advantages of iTop Screen Recorder is the ability to record without any time constraints. You can record Zoom meetings or long gaming sessions without worrying about interruptions.
Polish Your Recordings Using Its Built-in Editor
After recording, you can enhance your videos with the built-in editor. This functionality is particularly useful for creating polished presentations or engaging content for social media platforms, such as when you need to screen record Instagram DMs or share your findings effectively.
Easy to Use with Customizable Hotkeys
iTop Screen Recorder is designed for convenience, featuring an intuitive interface that simplifies the recording process. You can set customizable hotkeys for starting and stopping recordings, making it easy to know how to record one time video on WhatsApp.
With these powerful features, you can capture high-quality recordings, whether for gaming, meetings, or social media sharing. Now, let’s see how to record in BlueStacks using iTop Screen Recorder.
Step 1. Download and install both iTop Screen Recorder and BlueStacks on your computer.
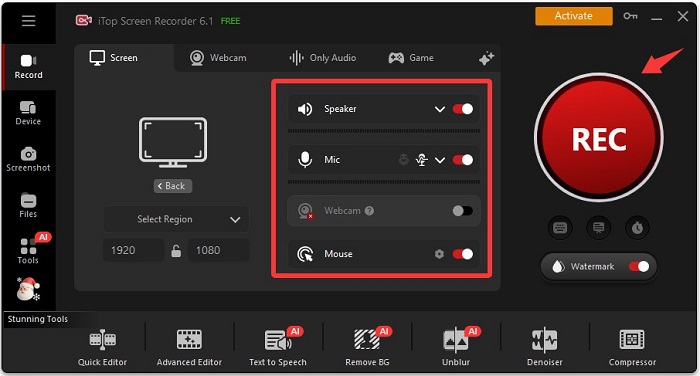
Step 2. Open BlueStacks and the game you wish to record. In the iTop Screen Recorder, select the region you wish to record.

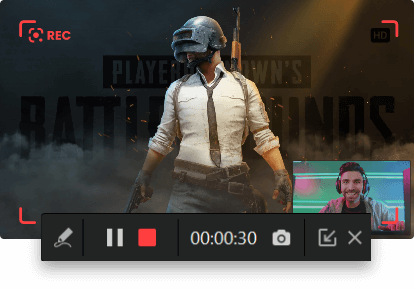
Step 3. Enable the speaker and microphone to your preference. Once done, click REC to start recording. Or you can use a hotkey (like F9 or F12) to start instead.
Step 3. When you want to finish recording, you can press the stop hotkey to finish. Then, you can find your recordings in Files > Video.
The Bottom Line
In this guide on how to record BlueStacks, we covered various methods and features that can enhance your recording experience, including customizable recording areas, high-definition output, and a user-friendly interface. For the best quality and flexibility, we advise you to download iTop Screen Recorder. With its powerful tools and convenient functionalities, it’s the ideal solution for capturing your gameplay and sharing your moments effortlessly. Get started today!