Podcasts are a popular way to share and communicate in recent years. People all throughout the world enjoy podcasts like The Joe Rogan Experience, The Daily, This American Life, Stuff You Should Know, and so on. The success of these shows has also motivated an increasing number of people to start their own podcasts. However, being in the exact location as the guest or co-host would be pretty challenging. This is the point at which you must record podcasts remotely.
How to record a podcast remotely? This guide covers 4 methods, ranging from basic ways like using Zoom, to advanced methods. Pick what works best for you to start recording!
How to Record a Podcast Remotely - Basic Solution
The most common and easiest way to record podcasts remotely is by connecting a video calling app. Widely used video calling software like Zoom, Skype, or Google Hangout are all good choices. Zoom and Skype both have built-in call recording features, while Google Hangouts presently only offers this to enterprise users. How to record a podcast remotely with video calling software? The following steps take Zoom as an example.
How to Record a Podcast Remotely with Zoom?
Step 1: Sign in and start a new Zoom meeting.
Step 2: Configure your Zoom podcast and testing equipment.
Step 3: Invite guests to your Zoom meeting.
Step 4: A test run is necessary.
Step 5: Start your Zoom remote podcast recording.
Step 6: Edit and share your Zoom Podcast.
Pros:
- App for Mac, PC, Apple iPhone, and Android.
- Easy to use.
- Built-in recording
Cons:
- Only 40 minutes limited free recording.
- Zoom compresses your audio.
- Need a strong internet connection.
You May Need: How to Record a Zoom Meeting Without Permission >>
How to Record a Podcast Remotely - Advanced Solution
If you're ready to upgrade from Zoom, Riverside, a high-powered audio and video podcast recording software, is a good choice for recording a podcast remotely. It prioritizes quality by neither compressing nor removing portions of the audio or video feed. Furthermore, recording with Riverside implies that each participant's voice is recorded locally. Dropped or slow connections will have no effect on the outcome since the recording is not dependent on your internet connection.
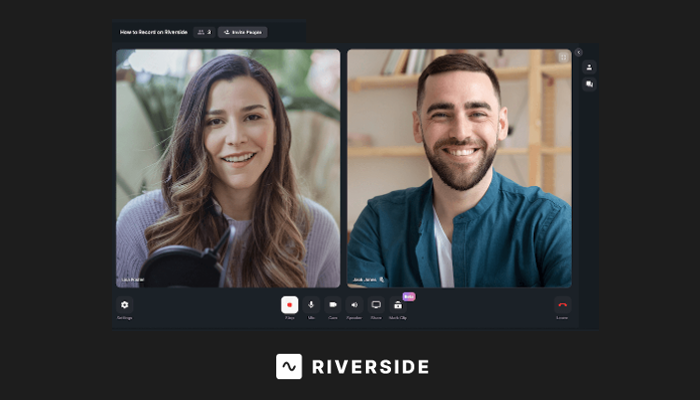
How to Record a Podcast Remotely with Riverside?
Step 1: Set up or sign in to your account.
Step 2: Enter the studio from your dashboard.
Step 3: On the upper left of your recording screen, click the Invite People option.
Step 4: Start recording the podcast remotely!
Step 5: Once all files have been uploaded, you can download or edit them from the Studio Recordings page.
Pros:
- No internet connection issues.
- Up to 8 participants.
- Separate audio and video tracks.
Cons:
- Comparatively harder to operate.
- Software subscription at $15/month.
How to Record Podcasts Remotely - Professional Solution
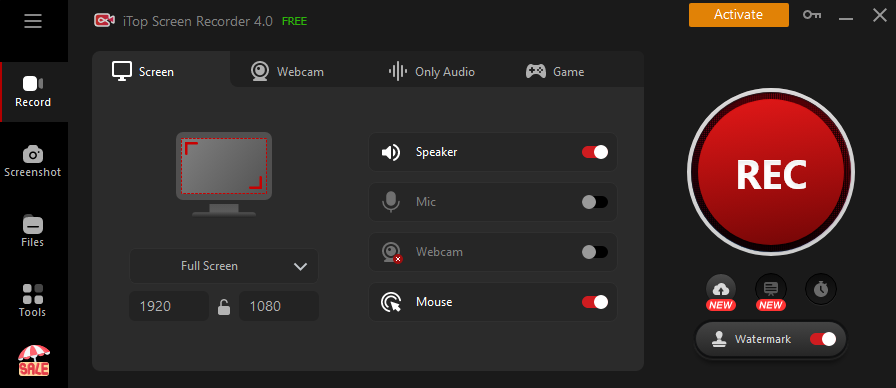
If you want to record a podcast remotely in a way that is easy for people on both sides of the podcast to prepare, but also with excellent quality, then professional screen-recording software is your best choice to record a podcast remotely. iTop Screen Recorder, for example, is the best solution to record audio as well as video at high quality. In this way, no matter what calling software you prefer to use, a high-quality voice outcome will be a must.
What features support iTop Screen Recorder to be one of the best solutions to record Podcasts remotely? Learn the details below.
- 100% free to record Podcasts no hidden consumption. Every user has a chance to try iTop Screen Recorder's free version which allows you to record podcasts anonymously without paying a cent. Moreover, the free version has no use time limit which means you can record screen with it as long as you wish.
- Record Podcasts with a teleprompter. To talk to a stranger face to face remotely via Podcasts still may be awkward occasionally, so you need a teleprompter to remind you what to say in case you forget the points suddenly, smoothing the communication progress as well.
- Export Podcast recordings in multiple formats. In order to share your Podcasts recordings to multiple social platforms, iTop Screen Recorder enables you to preset the resolutions, ratio aspects, FPS, and many optional formats such as MP4, MOV, AVI, MKV, FLV, TS, GIF, etc. to satisfy different demands.
- Additional editing and compressing tools support easy sharing. A perfect podcast recording must have a deliberate editing process. iTop Screen Recorder also provides a built-in free video editor which permits you to add texts, filters, BGM, effects, and transitions, and also to trim, cut, and split the videos if you need to. After all is done, you can use the compressor to lower the video size for easy sharing to different platforms.
How to Record a Podcast Remotely with iTop Screen Recorder?
Step 1. Download & install iTop Screen Recorder on your computer.
Step 2. Calling your guest at whatever calling software.
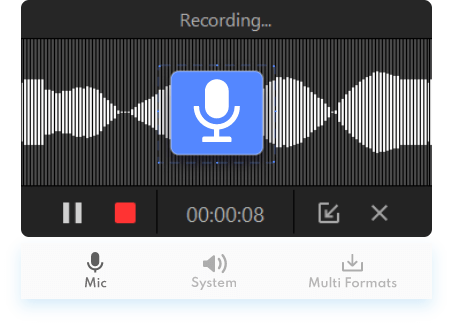
Step 3. Click the big “REC” button to start recording a high-quality remote podcast. You can also choose the dedicated Only Audio mode.
Step 4. Edit the video/audio with the built-in editing tool.
Pros:
- High-quality voice/video recorder.
- Easy & free to use.
- Dedicated Audio mode.
- Built-in editing tool.
Cons:
- Can’t contact the guest within the recorder, you still need to use a calling software.
Record Podcasts Remotely with Top Quality - Top Solution
When recording podcasts in which the audio quality is a must, recording a “double-ender” should be the best way to record a podcast remotely. A double-ender recording is one in which each guest or co-host records their own audio at the source, and then each track is assembled into a final result. In any event, if everything goes as planned, the producer will have high-quality recordings of each participant on separate tracks to work with in post-production.
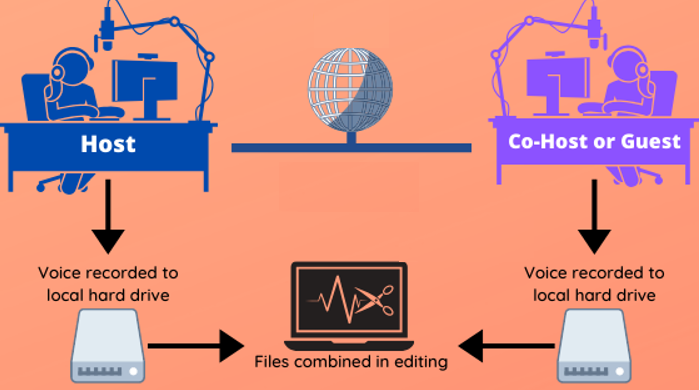
How to Record a Double-Ender Podcast Remotely?
Step 1: Turn on the audio/screen recorder for both you and the guest. (eg.iTop Screen Recorder)
Step 2: Prepare a calling software or just send your guest the necessary questions and answers.
Step 3: Record your voice separately.
Step 4: Hand over the two voice/video tracks to a video editor. You can also do it on your own.
Pros:
- Top quality voice track.
- Free option.
Cons:
- Super hard to edit a perfect podcast.
- Difficult to ensure that the other party's recording equipment is well prepared.
FAQs on Record Podcast Remotely
- What’s the best way to record a podcast remotely?
It depends. If you have a limited budget and want it to be easy. Video calling software like Zoom would be your best way to record podcasts remotely.
If you want top-quality of your audio, then recording double-ender suites you best, which may cost more time and energy.
Recording a podcast remotely with podcast software like Riverside, or with a professional free screen recorder like the iTop screen recorder are all good choices to get high-quality feedback.
- What to notice before recording a remote podcast?
Choose a quiet location away from distractions and background noises for your podcast studio setup. If at all feasible, consider a carpeted room to minimize any echoes. While you don't have to hire a professional to soundproof your room, you might consider purchasing a reflection filter.
- Audio or video remote podcasting?
Video. In such an era of rapid development of video, the choice of video podcasts is undoubtedly more in line with the trend of social development. Even if you're not ready to face people completely, adding some video content to your podcasts will make it easier for your audience to interact with you, thereby increasing user engagement.
Final Words
Podcasts have become a popular form of communication that is only getting hotter. For podcast creators, it can be difficult to be in the same space as your guest when conducting an interview podcast, that’s why the need to record podcasts remotely has arisen. How to record a podcast remotely? This guide provides 4 methods, choose the one that suits you best according to your needs, and start to record a podcast remotely at ease!