People try to record writing on screen for various purposes. Teachers record written annotations or problem-saving steps during a lecture; students record handwriting practices for feedback; and content creators record handwriting videos for social media or marketing. How to record writing on a laptop or computer? This article will show 3 ways to record yourself handwriting on screen with ease.

What You Need for Recording Writing
Beyond everything, you should prepare some tools for capturing writing.
- Whiteboard App: Better than drawing or pen tool, whiteboard app is designed as a digital workplace commonly used for team collaboration and remote education. It includes an array of tools to write everything on the screen and share in real-time.
- Screen Recorder: A powerful screen recorder can capture your activity when using the whiteboard app, like writing, drawing, sketching and more. It also enables you to record writing with your voice to explain a concept or problem at the same time.
If you have opened the whiteboard app and tried to record writing on screen to create a learning video or presentation, follow the 3 ways below to make the mission done.
How to Record Writing on Screen with iTop Screen Recorder
iTop Screen Recorder is an industry-leading screen recorder to capture what's happening on Windows desktop, from keyboard inputs, mouse movements to writing text on the screen. It is perfect for making a writing video on computer with all details kept.
iTop Screen Recorder supports recording screen with webcam and audio at the same time. You can record writing on the whiteboard app while explaining by yourself to make your audiences understand the content better and boost engagement. It guarantees high quality results, delivering crisp images and vibrant colors. As a free screen recorder with no time limit, it allows you to record yourself writing as long as possible. Moreover, using the inbuilt video editor, you can trim, crop and enhance the recording file at one stop.
iTop Screen Recorder is a beginner friendly program. In 3 steps, you can create a screen recording of your writing on the screen.
Step 1. Download and install iTop Screen Recorder on your PC.
Step 2. Open your whiteboard app. Launch iTop Screen Recorder.
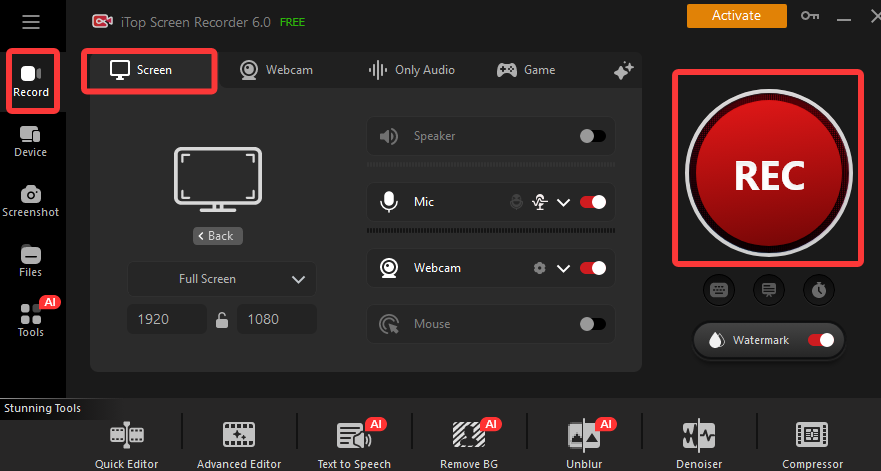
- Go to Record > Screen and select recording area, for example, the whiteboard window.
- Turn on Webcam and Mic to record writing with yourself.
- You can also only enable Mic to record writing with your narration.
- Then, click the REC button. Now, you can write anything on the screen and let the program start recording.
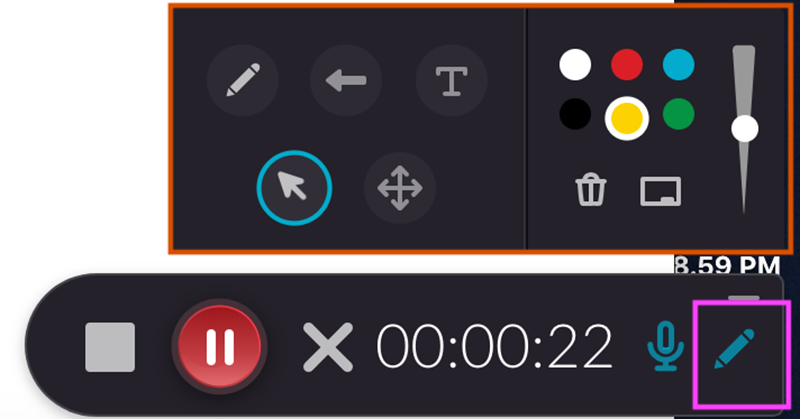
Step 3. A mini control bar appears on your desktop while recording. Click Done button on the bar to stop recording at any time you want to finish writing.
The recorded video file is saved to Files > Video. From here, you can access the video editor to customize the recording as you like.
In addition, if you want to record yourself handwriting on PC. Follow the steps.
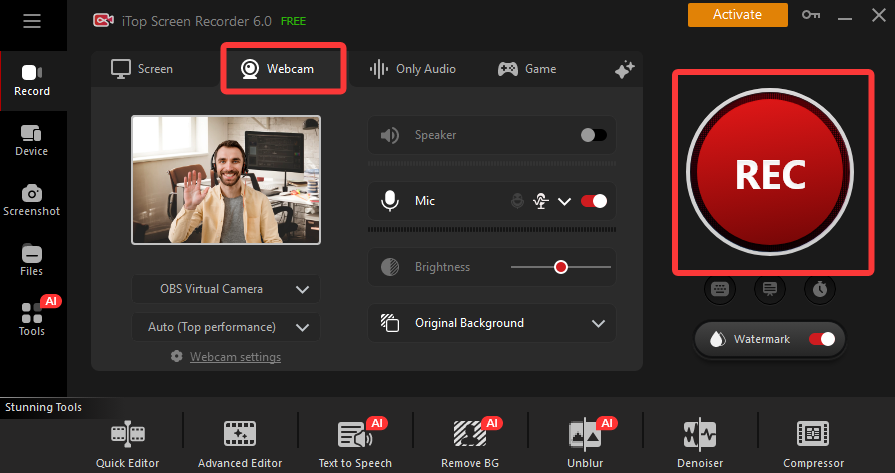
- Connect a camera with your computer. Let the camera focus on the paper.
- Launch iTop Screen Recorder.
- Go to Webcam and select your camera.
- Turn on Mic to record your voice if needed.
- Click REC button and start writing on the paper.
- Click Done button on the mini control bar when you end the handwriting.
Check a thorough tutorial of how to record screen and webcam >>
How to Record Writing Using Kaltura Personal Capture
Kaltura Personal Capture is a screen capture program ideal for making video presentation. It can automatically detect a PowerPoint presentation on the screen and capture the content with the presenter in one click. It builds in a whiteboard and annotation tools that enables you to record writing on a presentation easily.
Step 1. Install and launch Kaltura Personal Capture on your computer.
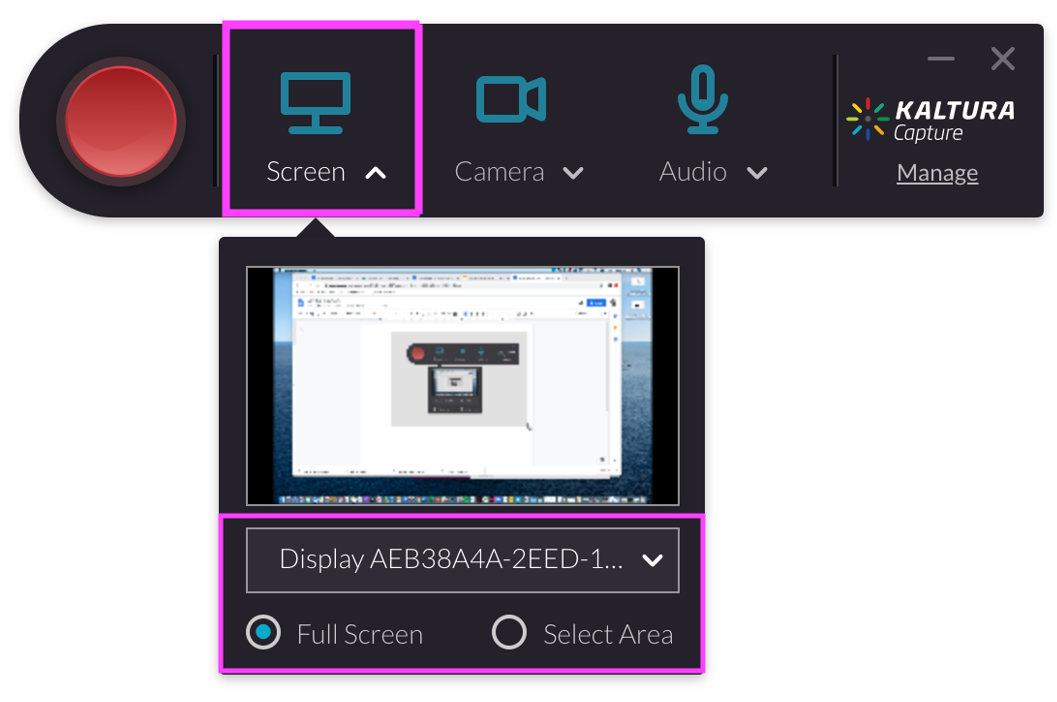
Step 2. Go to Screen and choose from Full Screen or Select Area.
Step 3. Adjust Audio options and enable Camera if needed.
Step 4. Press the red record button to start recording.
Step 5. Click the pencil icon to access annotation tools.
Step 6. Open the whiteboard to write what you want to show to your audiences or use the drawing tools to annotate your presentation.
Step 7. Click the Stop button to stop recording.
How to Record Writing for Annotating with Zoom
Zoom has own whiteboard and annotation tools. With the help of screen recording and sharing feature, it is easy to record writing in Zoom on a laptop. It is a good choice to record training videos with writing annotations.
But at first, you need to enable whiteboard > annotation tools for meetings.
Log in your Zoom account > My Account > Settings. Next, verify that Whiteboard and Annotation are enabled.

After confirming that annotation or whiteboard is available, follow the tutorial to record writing using Zoom.
Step 1. On the Zoom workplace homepage, click New Meeting to host a meeting.
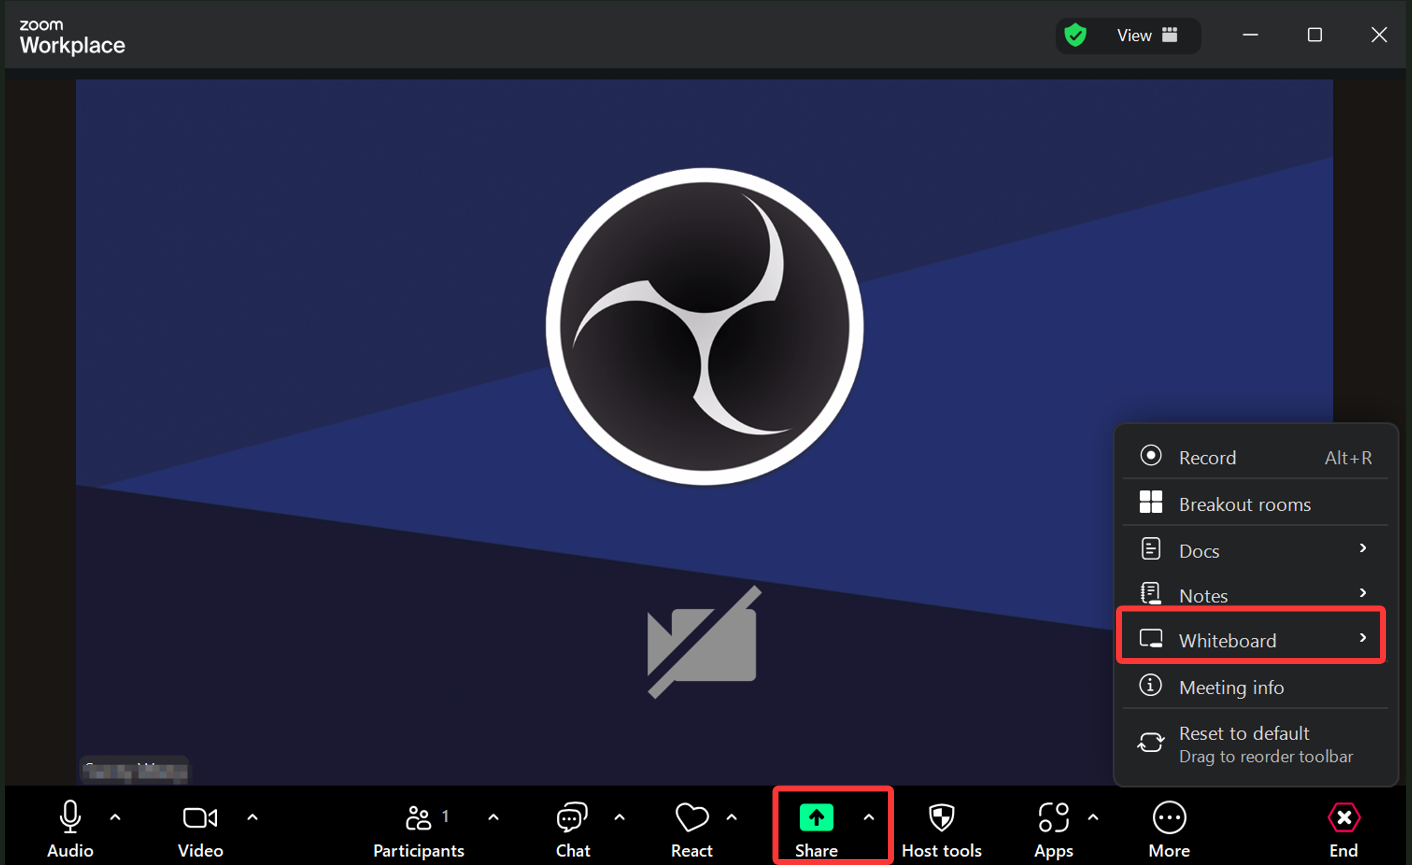
Step 2. Click More > Whiteboard to launch the whiteboard. Otherwise, head to Share to share a document, a third-party whiteboard or any other content in the meeting.
Step 3. Click More > Record to start recording.
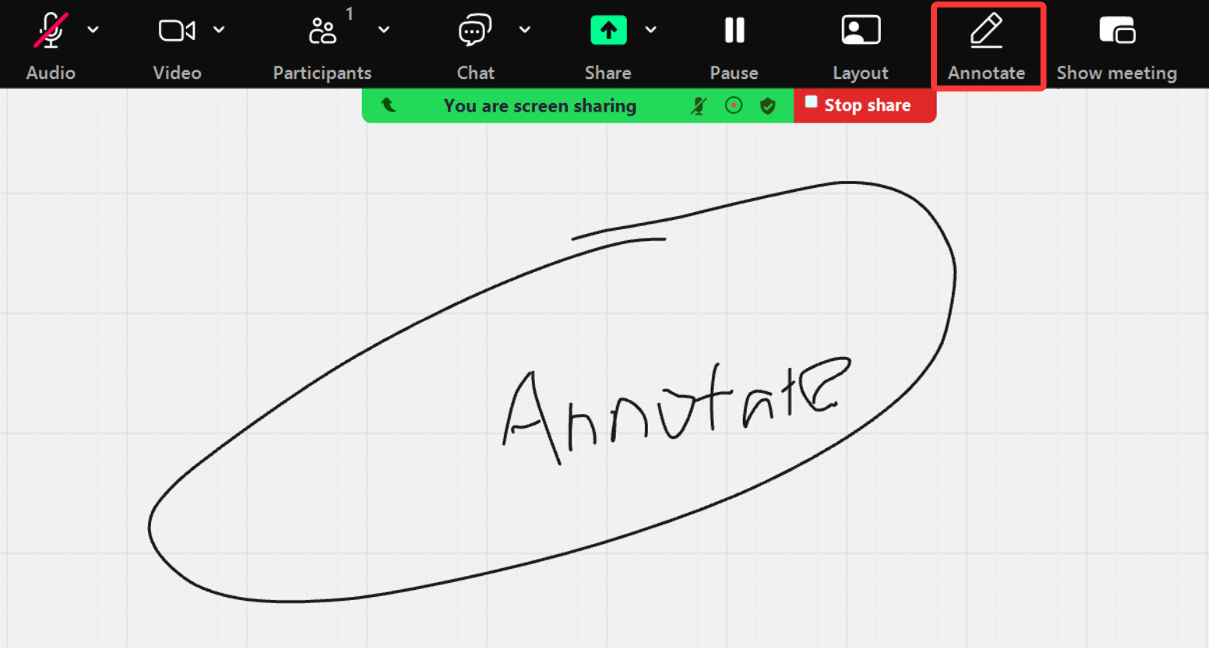
Step 4. Now, write on the whiteboard or annotate on Zoom using the annotation tools.
Step 5. Click More > Stop Recording when the meeting is ended.
Step 6. Zoom app will automatically convert the recording and open the folder where the result file is saved.

Tips: Participants should get permissions to activate whiteboard/annotation tools and record during a meeting. If you want to record a Zoom meeting without permission, please use a third-party screen recorder, for example iTop Screen Recorder.
Conclusion
Recording writing helps create a more engaging educational or training video. It highlights the key information to make audiences understand the content better. How to record writing on a laptop or computer? You can use a professional screen recorder, like iTop Screen Recorder, to easily capture yourself writing on screen while keeping original quality. Also, some collaboration platforms, like Zoom, natively support whiteboard and screen recording feature empowering you to record handwriting more conveniently.