


GoTo Webinar is a professional and convenient service tool for online seminars. It has a built-in screen recording tool to record a seminar session for later reference or share it with those who are absent. However, only professional account users and the host/co-host can record the screen during an online seminar. As an attendee, if you need such a screen recording for free, you need to ask the host's permission to get a copy.

This article will show you how to record GoTo Webinar easily and quickly, either as an attendee or a presenter.
- This is an Article Index.
- Do not insert any text in here.
- This index will be generated automatically when displayed on the front end.
- Of course we still love you.
How to Record GoTo Webinar Recording as an Attendee?
As a participant in a web seminar, you can't use the built-in screen recorder of GoTo Webinar. Fortunately, there are plenty of better options to record GoTo Webinar sessions: a computer's built-in screen capture functionality, a third-party screen recorder, or an online screencasting tool.
How to Record GoTo Webinar on Windows 10
Windows PC has a free and native screen recorder called Xbox Game Bar for screen capture. However, it is not an ideal choice for recording an online seminar on GoTo Webinar as Game Bar doesn't support recording a full screen and doesn't allow a webcam.
To record GoTo Webinar on Windows 10, you will need a professional screen recorder for PC to complete the task without any limitations.
iTop Screen Recorder is an easy-to-use yet professional screen recorder with a light built-in video editor for Windows 11/10/8/7.
Highlights:
- Facecam recording. This screen recorder allows you to record your face in a video, which is essential for recording videos during a GoTo Webinar session.
- Flexibility in recording area and schedule. iTop Screen Recorder allows you to record any portion of your screen and set up a recording time, which makes recording a seminar as easy as possible.
- Wide support of video formats. The recording tool by iTop supports 12+ video formats while exporting the recorded footage. It is very helpful when you need to share it with other participants, upload to a streaming platform, or edit it for future reference.
- Simple video editing tools. iTop Screen Recorder comes with some basic video editing functions such as cutting, annotation, trimming, and splitting.
- High-quality videos. This screen video recorder can record 4K and 1080P videos without lagging.
How to record GoTo Webinar on Windows 10, follow the detailed tutorial below:
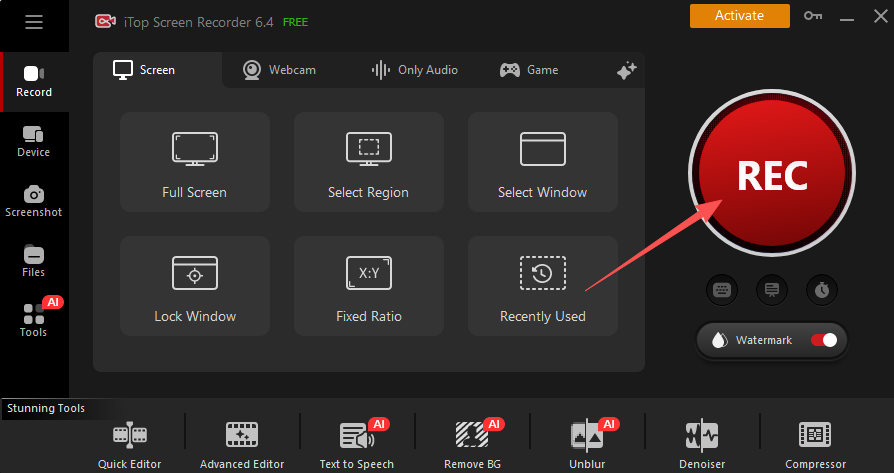
Step 1: Free download iTop Screen Recorder on your Windows PC.
Step 2: Select the recording area on your screen and turn on the Audio and webcam.
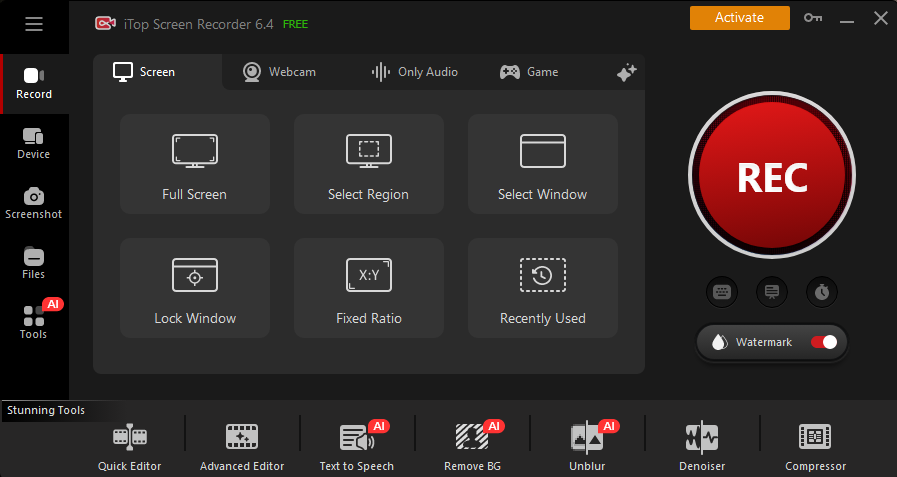
Step 3: Click the "REC" button to start recording and click the recording icon on the overlay to stop recording.
How to Record GoTo Webinar on Mac
Apple's Mac computer has a built-in screen capturing feature to allow users to take a screenshot and record a screen video. You can capture everything on your screen and turn it into a video clip with audio from internal or external sources. Mac's native screen recorder doesn't support the GoTo Webinar record webcam.
To record GoTo Webinar videos on Mac, here are the steps:
Step 1: Stay on the web seminar and press Shift + Command + 5 to open the screen recorder toolbar.

Step 2: Select Record Entire Screen or Record Selected Portion. Click Options to find more settings for the recording.

Step 3: Click Record to start recording the seminar session.
You may like: The Tested Ways about How to Record Zoom Meeting Without Permission
How to Record GoTo Webinar with a Built-in Recorder?
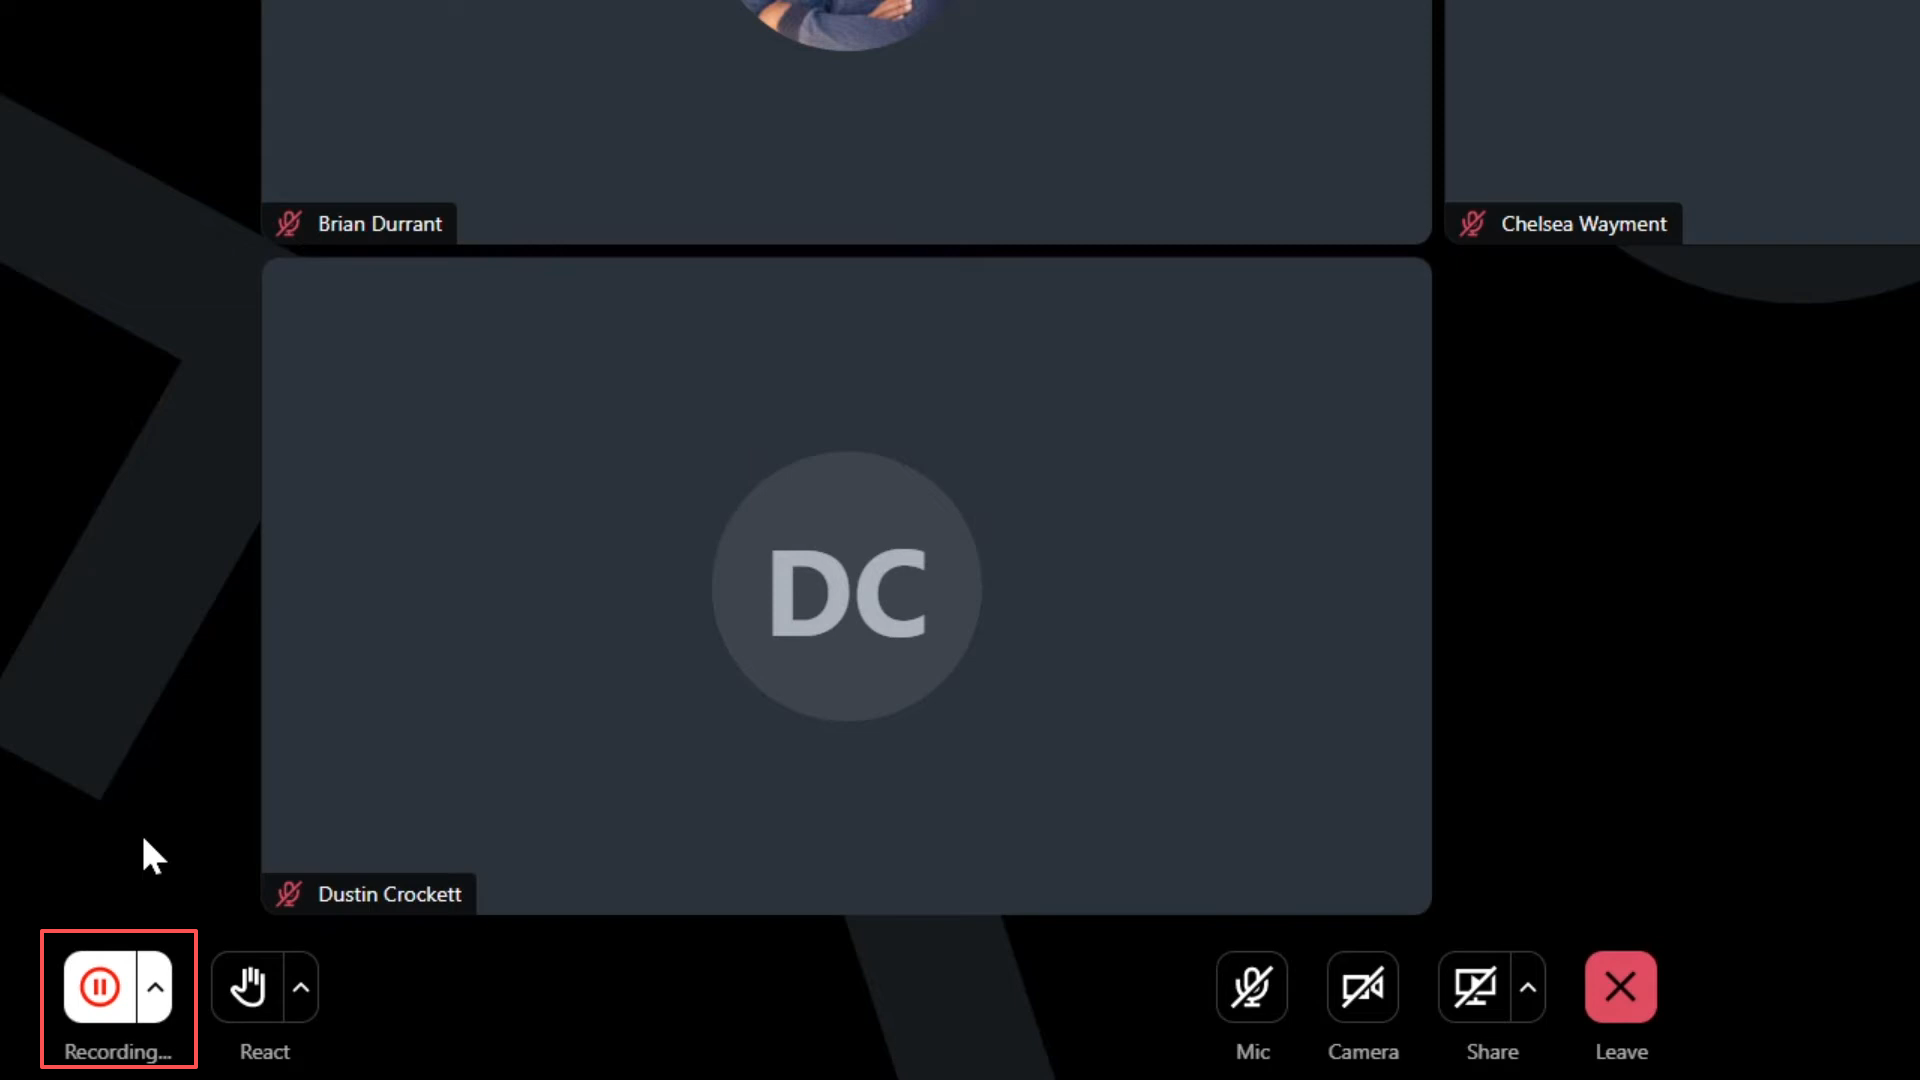
Unlike third-party tools, GoTo Webinar provides a built-in recording feature that allows organizers and co-organizers to capture the entire session—including screen sharing, audio, and presentations - without installing extra software.
Here’s how to record a webinar based on the official GoTo instructions:
Step 1: Start or Join Your Webinar Session
Launch the webinar from the desktop or web app and begin your session.
Make sure you start broadcasting and share your screen if you want your content included in the recording.
Step 2: Start Recording
In the control panel, click: “Start Recording” (Windows) or “Record” (Mac). Once enabled, the system will begin capturing your webinar instantly, and attendees will be notified that recording is in progress.
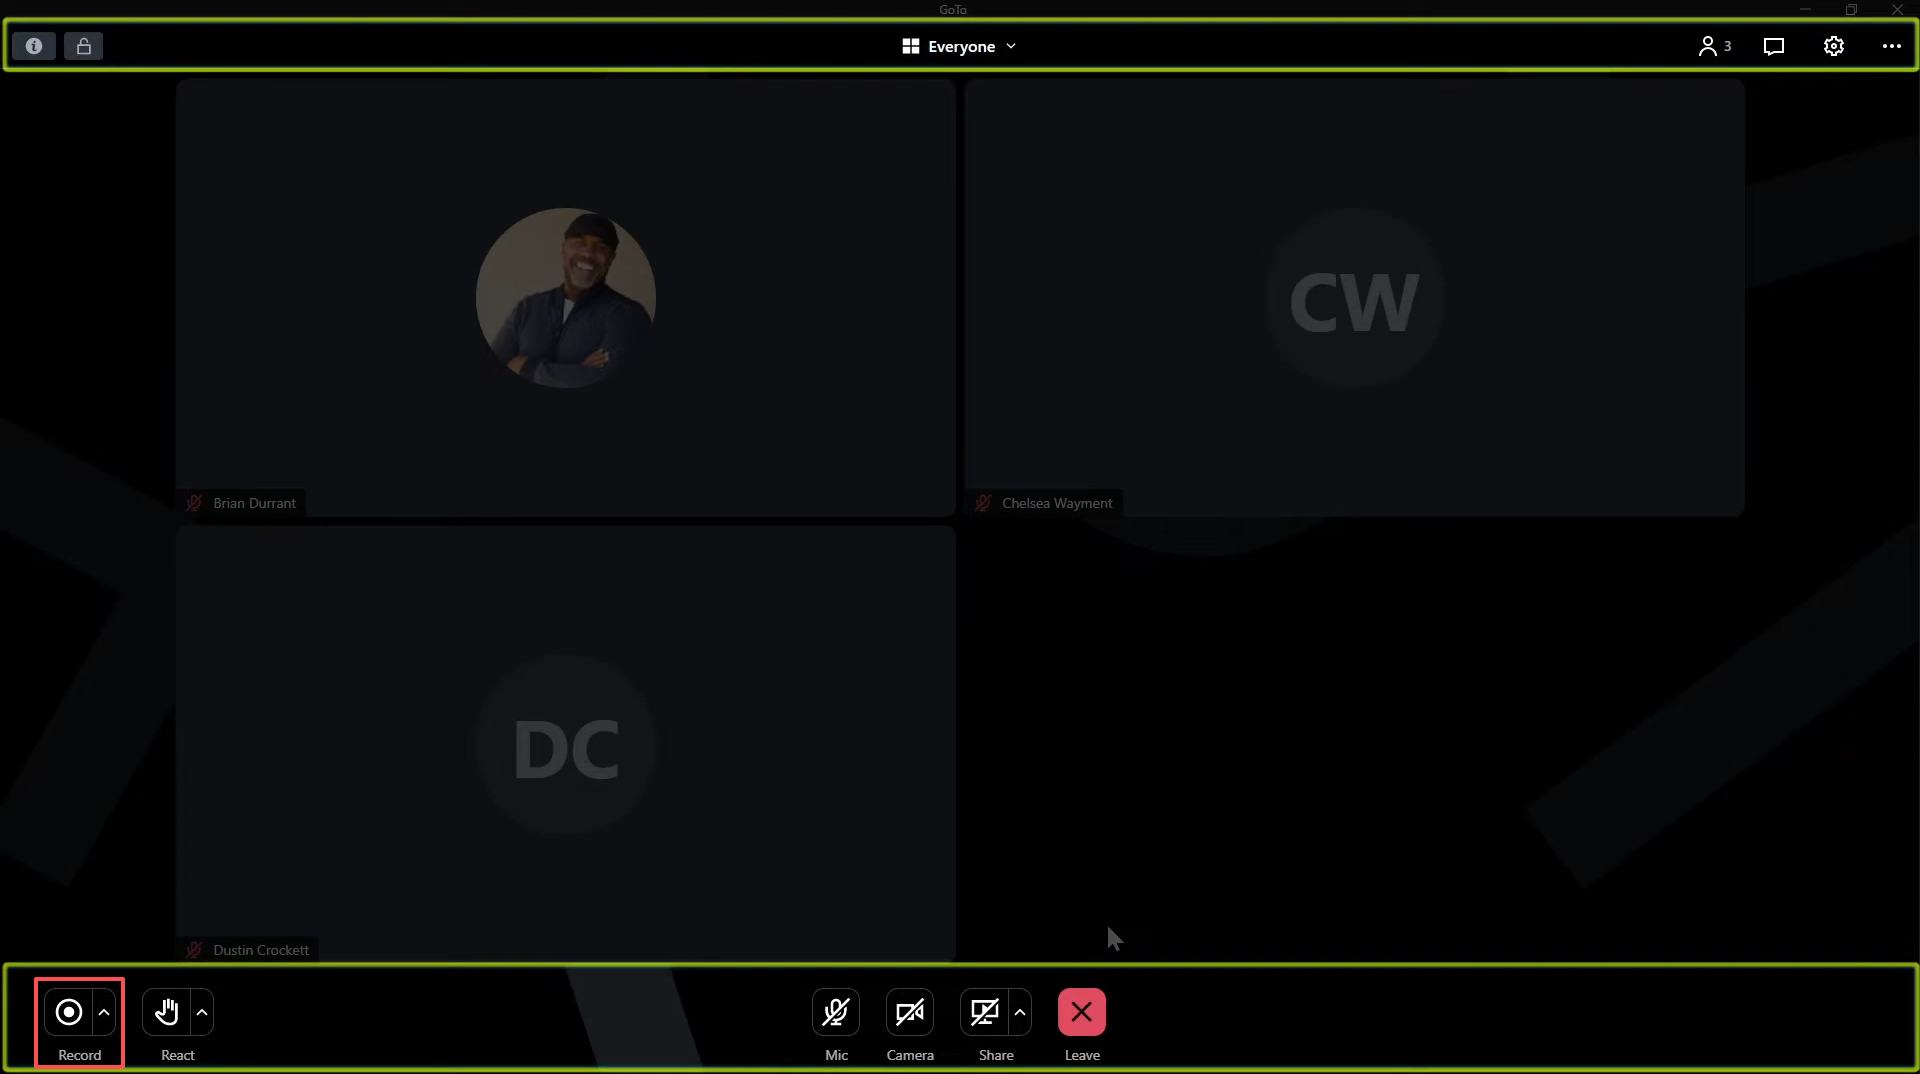
Step 3: Pause or Stop Recording
You can control recording anytime during the session: Click the Record button again to pause or stop. Or simply end the webinar, which will automatically stop recording. Pausing and resuming will still generate one complete recording file.
Note: A notification will be sent to all participants that the session is being recorded.
Step 4: Access, Edit, and Share the Recording
After the webinar ends:
- Cloud recording → Automatically saved to your Video Library
- Local recording → Saved to your computer (may require conversion before sharing)
From the Video Library, you can download, edit, or share your recording
You may like: How to Screen Recording On Zoom?
FAQ About Record GoTo Webinar
1. Can you record a GoTo Webinar session if you are not a presenter?
As an attendee, you can record a GoTo Webinar session for later view with a third-party screen recorder like iTop Screen Recorder.
2. How do I record Goto Webinar as an attendee for free?
How to record GoTo Webinar as an attendee for free with an online screen recorder:
- Go to iTop Online Screen Recorder website.
- Click Start Recording.
- Select the audio option and click Continue.
- Select the recording area and click Share.
3. Where is the GoTo Webinar recording stored?
By default, the GoTo Webinar recording is stored in the local Documents folder for local recording and the Video Library for online recording.
In the End
GoTo Webinar provides a fast, convenient, and secure connection for people around the world to be able to meet online for a seminar. The presenter's screen, the audio conference, and any other shared applications can be recorded by a host or co-host at any time and shared with attendees in case of absenteeism.
To record GoTo Webinar as a participant, you can download iTop Screen Recorder on your PC to easily capture the whole webinar session.
Powered by Froala Editor


