Fanbase is an all-in-one social economy platform that has been widely discussed for its popularity. Some hot topics about this platform include, but are not limited to, “How to get paid on Fanbase?” “How does Fanbase work?” “How to screen record on Fanbase?” Whatever, today’s guide mainly focuses on the screen recording Fanbase.

There are many reasons why people might want to screen record on Fanbase. It might be because you want to create detailed instructions for an interesting topic, or you just want to capture reactions to videos, games, or other content. Whatever your purpose for doing so, this guide will tell you how to screen record on Fanbase.
Method 1. How to Screen Record on Fanbase on Windows
On a Windows computer, your best option to record on Fanbase is to use iTop Screen Recorder, which is not just a screen recording software but a comprehensive tutorial design solution jam-packed with features. With this software, you can record any online videos, live streams, and social media while keeping the original quality. Thanks to the hardware acceleration feature, you can record 4K UHD or 1080P 60fps videos without lag.
On top of that, you can take advantage of iTop Screen Recorder’s video editor to perfectly polish your recordings by trimming, cutting, as well as adding effects, annotations, and titles.
How to record on Fanbase Windows 10 using iTop Screen Recorder? Here are the steps.
Step 1. Download and install iTop Screen Recorder on your PC that is running Windows 11, 10, 8, and 7.
Step 2. Open Fanbase and start a video you wish to record. Then, launch iTop Screen Recorder and go to Record > Screen. Select your desired recording area and click on the REC to start recording.

Step 3. After a 3-second countdown, you’ll see a mini control bar. From where you can pause, stop, or add some elements to your recordings.

Step 4. After recording, your recording will be stored in Files > Video. From here, you can play, edit, or share your recording.
Additionally, there are many other reasons that make iTop Screen Recorder the best option for screen recording.
- Flexibly record part of screen, full screen, or a fixed window.
- Record a screen, webcam, or both together with audio.
- Capture videos in HD resolution.
- Export recordings in various formats.
- The scheduled recording feature makes it perfect for superbox recording.
Method 2. How to Screen Record on Fanbase on Mac
On a Mac, you can record Fanbase either using keyboard shortcuts or using the QuickTime Player. The former option is available for people who’re in a hurry to create a quick screen recording, and the latter is more suitable for those people who want basic editing features. Whichever you choose to use, follow us to see how to screen record Fanbase on Mac.
Using Keyboard Shortcuts
Step 1. Locate the Fanbase page you want to record.
Step 2. Press “Shift + Command + 5” on your keyboard. This will bring up the Screenshot toolbar.
Step 3. Go to Options in the toolbar, and under Microphone, check your microphone. Then, press Record to start recording.
Step 4. When you’re finished, you can press “Command + Control + Escape” to stop recording.

Using QuickTime Player
Step 1. Open the Fanbase and select the content you want to record.
Step 2. Open QuickTime Player and go to File > New Screen Recording.

Step 3. You’ll see a Screen recording prompt, from where click on the record button. A pop-up will appear in the center of your screen.
Step 4. Click anywhere to record the entire screen, or click and drag your mouse cursor to select a part of your screen to record. Once selected, click "Start Recording."
Step 5. When you are ready to finish recording, click on the Stop icon in the top menu bar.
Step 6. Then, go to File > Save to save your file on your computer.
In addition to the options introduced above, you can also use some online screen recorders like free online screen recorder from iTop to create a quick screen recording.
Method 3. How to Screen Record on Fanbase on iPhone/iPad
To screen record on Fanbase on an iPhone or iPad that is running iOS 11 or above, you can utilize your device’s built-in screen recording feature. Such a feature, while convenient, often lacks advanced features and can be limited in terms of storage, quality, and customization. If you want to create a professional-looking video tutorial, it’s better to use a more professional screen recorder Loom or a desktop-based HD screen recorder.
Whichever way you prefer to use, follow these steps to learn how to screen record on Fanbase, either using the native screen recording feature or the third-party recording software.
Now, let’s see how to screen record on Fanbase iPhone.
Using the Built-in Screen Recording Software
Note: Ensure you’ve enabled screen recording in Control Center. To enable this feature, you can tap Settings > Control Center, and make sure to add Screen Recording to the “Included Controls” section.
Step 1. Open the Fanbase app and locate the screen you wish to record.
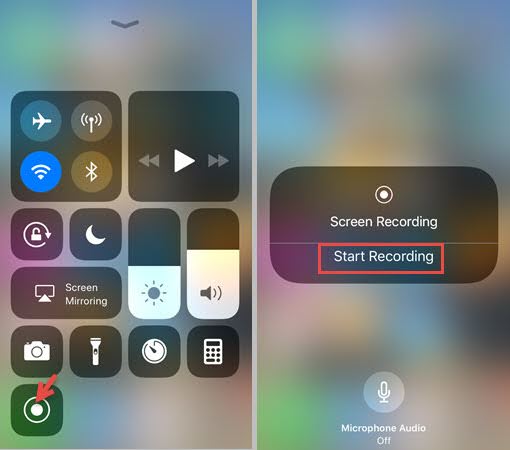
Step 2. Swipe from the top right of your phone.
Step 3. Find and tap the Screen Recording button to start recording. If you want to record your microphone audio, then you can long-press the screen recording button and hit the microphone icon.
Step 4. When you’re ready to finish recording, you can simply tap the red status bar at the top of your screen and hit the Stop icon.
Step 5. Your iPhone automatically saves the video to your Photos app.
Using a Third-party Screen Recorder (Loom)
Step 1. Download and install the Loom from your App Store.
Step 2. Open the Fanbase and find the content you wish to record.
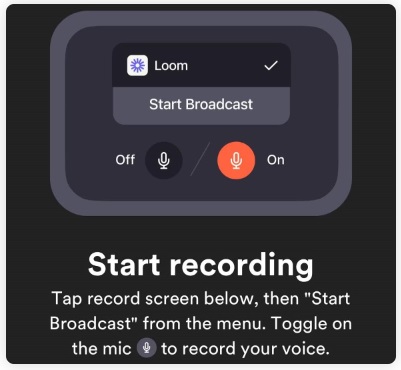
Step 3. Launch Loom on your iPhone and select the Screen tab at the bottom of your screen, then tap Record Screen.
Step 4. Choose whether to include your microphone sound. Then, select Fanbase and tap the Start Broadcast option.
Step 5. Go back to the Fanbase and record your wanted content. When you’re finished, you can find your video in the My Videos page.
Method 4. How to Screen Record on Fanbase on Android
Likewise, Android users can also use either the built-in screen recorder or third-party apps like AZ Screen Recorder, Mobizen, or X Recorder to record Fanbase. Which option to choose depends on your preference and whether your device supports recording. Typically, this feature is accessible on Android devices running Android 10 and later. Check your system and follow these steps to learn how to record on Fanbase on Android using the built-in screen recording feature or using a third-party screen recorder.
Using the Built-in Screen Recording Feature
Step 1. Open the Fanbase app and locate the screen you wish to record
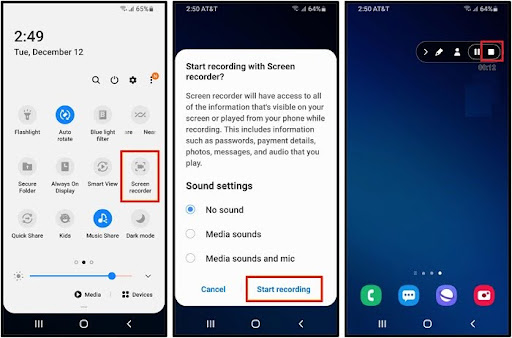
Step 2. Swipe down from the top of your screen to open Quick Settings.
Step 3. Select Screen Recorder and confirm whether to include audio.
Step 4. Tap Start Recording to start the recording process.
Step 5. Tap the Stop button in the top right corner to end the recording process.
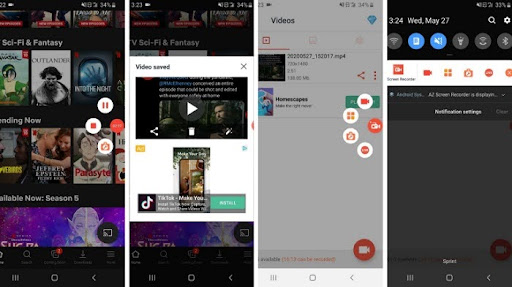
Using a Third-party Screen Recording app (AZ Screen Recorder)
Step 1. Download AZ Screen Recorder in the Google Play Store.
Step 2. Install and open AZ Screen Recorder on your Android device.
Step 3. Open the Fanbase app and locate where you wish to record.
Step 4. Go to AZ Screen Recorder and tap the red camera icon to start recording.
Step 5. When you’re finished, tap the stop icon, a camera icon, to stop recording.
Step 6. Then, you can find the recording in your device’s gallery.
Final Words
Now, you’ve learned about all possible ways on how to screen record on Fanbase. As you can see, there are various ways to capture your favorite moments in Fanbase effortlessly. You can find how to screen record on Fanbase Reddit or other platforms. While you don’t have to waste time. As this guide contains all possible ways.
Whether you’re using a computer or a mobile phone, you can choose a suitable way. For mobile users, the best way is to use this screen recorder Windows 10 - iTop Screen Recorder, which offers user-friendly features and high-quality recording capabilities, making it an excellent choice for capturing content on Fanbase. As for iPhone and Android users, they can either use a built-in screen recording tool or a third-party screen recorder. Now, choose the way that you think might work best for you.