NVIDIA GeForce is a cloud-based game streaming service, mainly used for handling high-performance gaming and other demanding visual computing tasks. Also, it comes with ShadowPlay feature that empowers you to capture instant or past gameplay moments. But it is not the only choice for gameplay recording. If you want to know how to record with NVIDIA Geforce or want to explore more screen recording options, this guide is what you need.
How to Record with GeForce Experience ShadowPlay
To record with Nvidia GeForce, you’ll need to utilize the GeForce Experience software, especially its ShadowPlay feature. ShadowPlay is a hardware-accelerated screen recorder for Team Green’s GPUs. It is currently the simplest way to record and share your gameplay videos, screenshots, or live streams with your friends. If your Windows computer has an NVIDIA graphics card, you can follow these steps to see how to record with ShadowPlay.
Step 1. Download and install the GeForce Experience software on your computer and then update your GPU drivers.
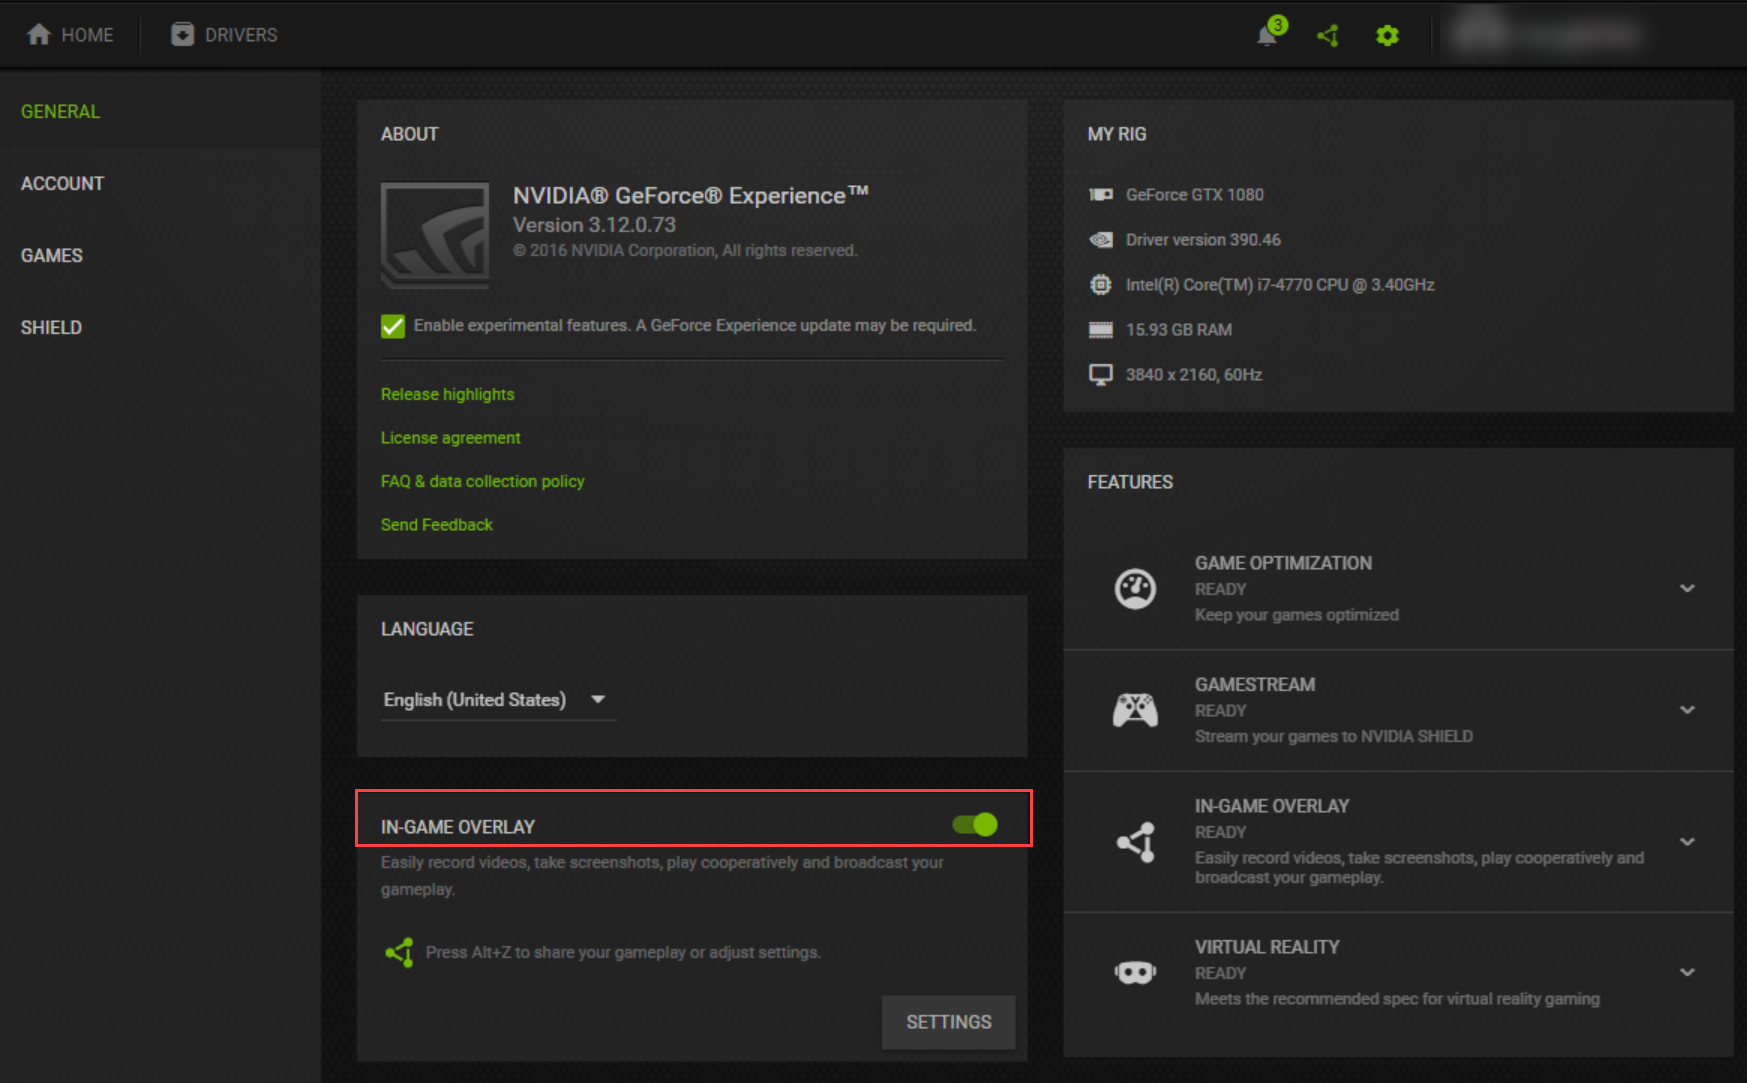
Step 2. Start GeForce Experience and click on the Settings icon. Then, ensure the In-game Overlay is enabled.
Step 3. Tap the Settings icon to adjust your ShadowPlay settings. You can connect your streaming services accounts or change your HUD layout, video quality, save location, and more.
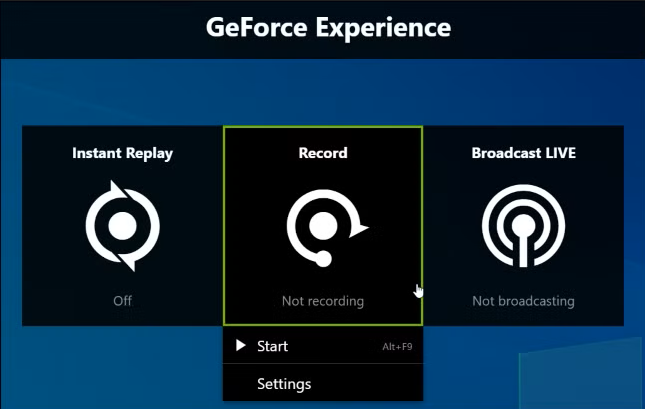
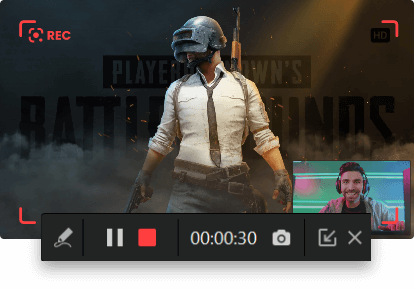
Step 4. After that, press Alt+Z to open the NVIDIA overlay.
Step 5. Press Alt+F9 to start and stop recording.
Though Shadowplay is powerful, it has limitations in recording capabilities, particularly regarding recording length. It is capable of recording up to 8K videos, but the recording time is limited to 20 minutes for Instant Replay and unlimited for manual recording on Windows 8 and 10. For Windows 7, you're only allowed to record 20 minutes.
Why Can't I Record with NVIDIA GeForce Experience
Setting aside the recording length, many users encounter the issues like "Can't record with GeForce", "Geforce Experience not recording". What are the causes of this kind of problem? Explore the possible reasons below.
- Outdated software and drivers. Check for updates within GeForce Experience.
- Game settings compatibility issues. GeForce Experience will detect a full-screen game to record. If not, the recording might fail.
- Software conflicts. If you're running other screen recorders simultaneously, it may also affect the recording process.
- Incorrect GeForce experience settings, such as disabled in-game overlay or recording paths.
To fix "can't record with NIVDIA" issue, please try restarting GeForce Experience or run it as an administrator. If the issue still exists, reinstall GeForce Experience on your computer.
How to Record with NVIDIA GeForce Alternatives
If unfortunately, NIVIDA GeForce still doesn't work well for recording clips on PC after you have tried all the troubleshooting tips, there are multiple professional alternatives that enables you to capture gameplay hassle-free.
In the following, let's explore how to record with NVIDIA GeForce alternatives.
1. iTop Screen Recorder
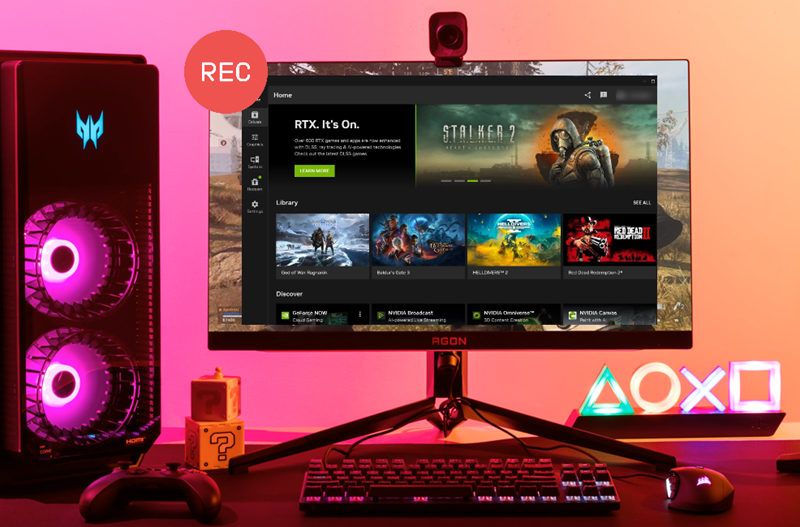
iTop Screen Recorder is a versatile free screen recorder for PC. It excels in capturing everything that happens on your screen. With the support of webcam and microphone, it helps you create videos with yourself and voice-over for various purposes.
iTop Screen Recorder offers a dedicated game mode that can automatically detect the game you're playing or allows you to manually add a game. It is able to record yourself playing games through capturing clips, audio and webcam simultaneously. The utilization of hardware acceleration from Intel, AMD, and Nvidia ensures smooth and high-quality recordings, up to 4k/120fps, no lag and no fps drops. What’s more, it works as a free screen recorder with no time limit so that you can capture long gaming sessions without interruptions.
How to record game clips with iTop Screen Recorder?
Step 1. Download and install iTop Screen Recorder on your Windows computer.
Step 2. Tap "Game" mode to auto-detect your game or add it manually. Activate the settings of the speaker, mic, HUD, and webcam, and restore them depending on your needs.
Step 3. Once your game is detected or added, click REC to start recording. If you want to end the recording process, just click on the Stop button.
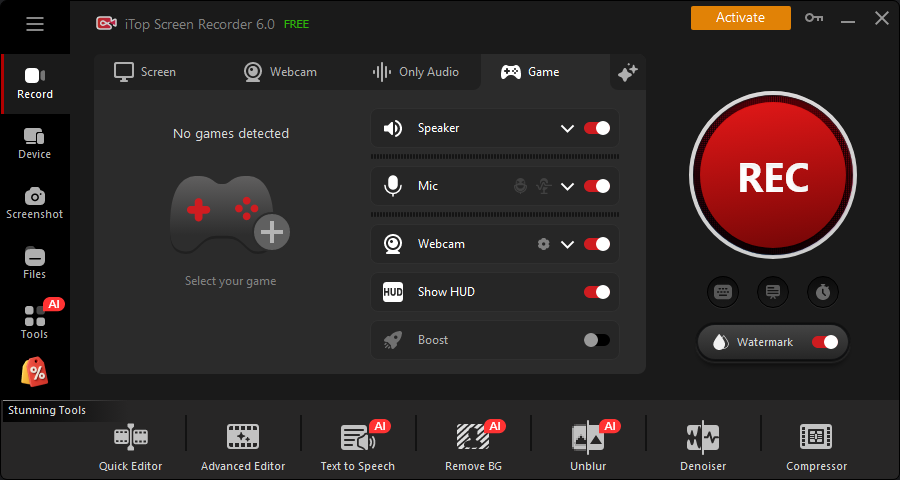
Your recordings will be stored in Files > Video. You can activate the video editor to enhance your game video for later sharing on social media.
2. Xbox Game Bar
Xbox Game Bar is a gaming overlay built into Windows 10 and 11. It provides quick access to various gaming features and widgets without leaving your game. It features video recording, retroactive recording and quick screenshots. It can also optimize your gaming experience by prioritizing system resources towards the game and minimizing background processes. Anyway, it is a good option for gameplay recording.
How to record gameplay with Xbox Game Bar? Here is the guide.
Step 1. First, you’ll need to enable Xbox Game Bar by heading to Windows Settings (Windows key + I), and then searching for Xbox to enable it.
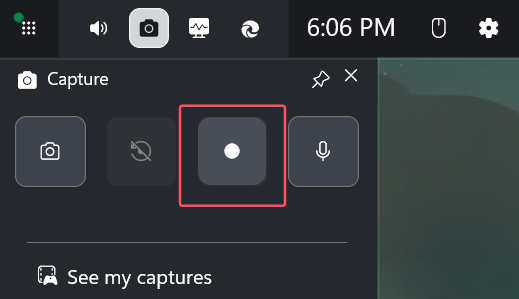
Step 2. Play your game and press Windows key + G to open the Xbox Game Bar overlay. Click the Capture button or press Windows key + Alt + R to start recording.
Step 3. Once finished, press the Windows key + Alt + R or click on the Stop button to end the recording process.
Step 4. Your recording will be stored as an MP4 in the Captures folder within your Videos folder.
Also Read: Xbox Game Bar not Working Troubleshooting Tips >>
3. OBS
OBS is a completely free tool without any hidden costs or subscriptions. It is capable of recording gameplay at high resolutions, including 4K and at high frame rate like 60 fps, with minimal lag. Like many other screen recorders introduced above, OBS also comes with features like GPU acceleration for improved performance and smooth gameplay recording. If you prefer to use OBS for a screen recording, here are the steps.
Step 1. Download and install OBS on your PC.
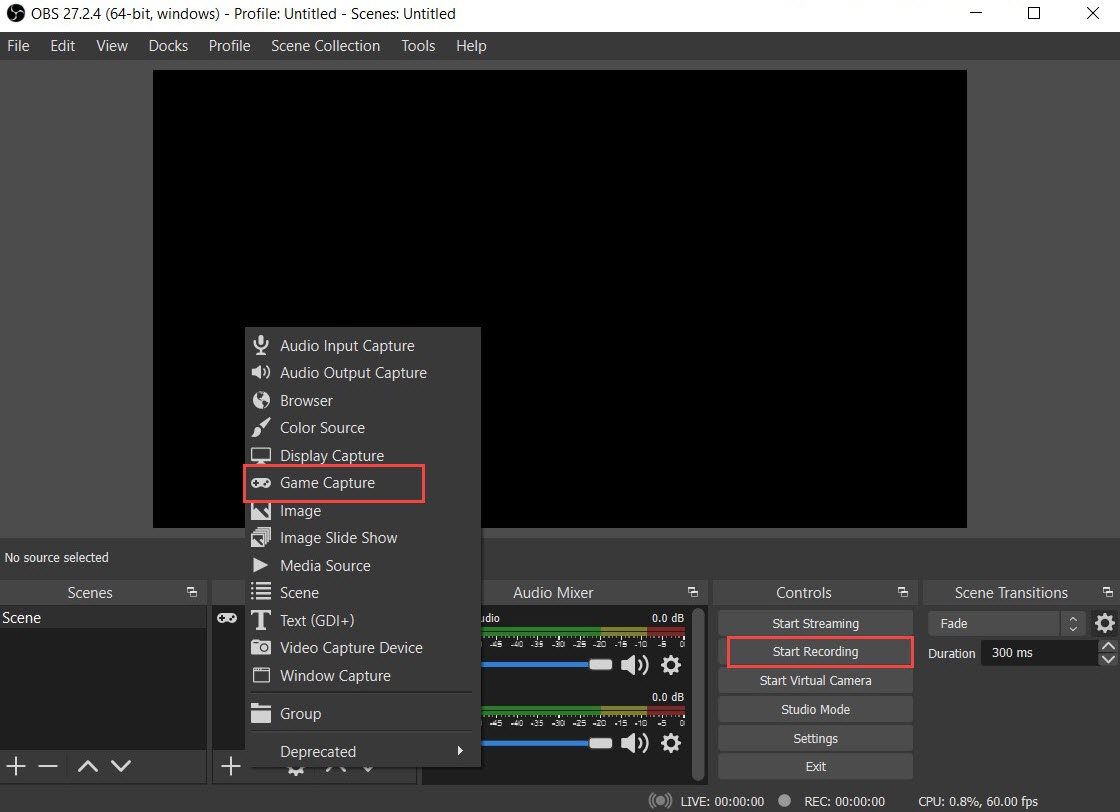
Step 2. In the Scenes box, click the "+" icon to add a new scene and give it a name. Then, click the "+" icon in Source Box to add the Game Capture mode and select the recording area.
Step 3. Once selected, go to Settings in the lower-right corner to set your preferred file saving location and customize other settings like video and audio quality.
Step 4. Once you're ready to start, click Start Recording. If you want to end the recording process, just click Stop Recording.
The Bottom Line
It is not a difficult question of how to record with NVIDIA GeForce. There is a native recording feature enabling you to capture game clips on your PC. However, its limitations and issues drive users to seek for a more stable solution for gameplay recording. iTop Screen Recorder is one of the best NIVDIA GeForce Experience alternatives, which introduces a free and easy way to to record game videos and audios on PC seamlessly. If you need a powerful and reliable free game recorder for PC, iTop Screen Recorder is a good choice.