VRChat is an online virtual world platform that enables you to talk to other players in real-time in the form of 3D avatars. With it, you can create 3D avatars and worlds according to your imagination. Also, you can play VR games for free on it, wearing VR glasses.

If you want to save interesting VRChat videos and share them to YouTube like other players did, you need to record videos in VRChat first. But how to record in VRChat? Depending on your demands, the article below lists the best ways to record VRChat videos for sharing and live streaming. Stay tuned.
- Contents
- How to Recover Temporarily Deleted Data from Laptop
-
How to Recover the Permanently Deleted Data from Laptop
- Recover the Deleted Data from Laptop with Data Recovery Software
- Recover the Deleted Data from Laptop with File History on Windows 11/10
- Recover the Deleted Data from Laptop Using Backup and Restore
What Can You Do in VRChat?
VRChat is not only being identified as an online chatting room or a VR game place, it is an all-round virtual reality community that allows you to do more than you thought.
- Do daily things. You can make new friends from the whole world in VRChat. Talk to them in 3-D spatialized sound effects, express yourself with emojis, gestures, and emotes, and have fun with them by painting, sculpting, and chatting together.
- Make 3D avatars. In VRChat, you can easily change up your look by creating a full-body avatar. It can complete a full range of motion like lip sync, eye tracking, and eye blinking. It is quite attractive to be used in playing games, dancing, and chatting in VRChat, especially for helping overcome social anxiety.
- Create virtual reality worlds. Every user is allowed to use the Unity SDK to build worlds and invite people to them. Also, you can join other created worlds directly.
- Play VR games in VRChat. you can play Capture the Flag, Battle Discs, and other games built by the community.
All your interactions with these 3D avatar players in VRChat can be recorded to save, share, and also live stream if you need to. Check the following parts to see how to record in VRChat with HD screen recorders and a VR headset.
How to Record in VRChat on PC for Saving and Sharing?
To save the funny scenes in VRChat by recording is a simple way to generate content for your social platforms. With the help of iTop Screen Recorder, a 100% free on-screen recorder, you can keep the complete VRChat videos in HD and even up to 4K, and export them in commonly-used formats that are compatible with platforms and devices, such as MP4, MKV, MOV, etc.
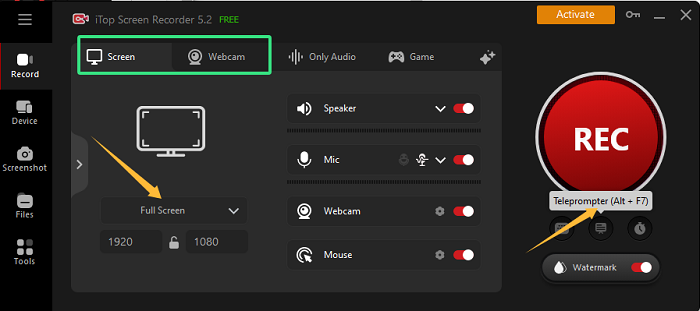
It features a flexible screen recording and provides a game mode so that you can easily capture clear audio and smooth motions in VRChat without lag. Suppose you are a social content creator or a gamer, you may need to record in VRChat with a teleprompter to remind you of your script. You may also need to record yourself while recording videos in VRChat, this free screen recorder provides a webcam recording feature that permits you to change your background into any still images, transparency, or blurry scenes.
How to Record in VRChat on iTop Screen Recorder?
Step 1. Install iTop Screen Recorder and Open VRChat
Download and install iTop Screen Recorder on Windows 7/8/10/11 as below. Run VRChat to chat, draw, and play games on it as you wish.
Step 2. Set Recording Performance
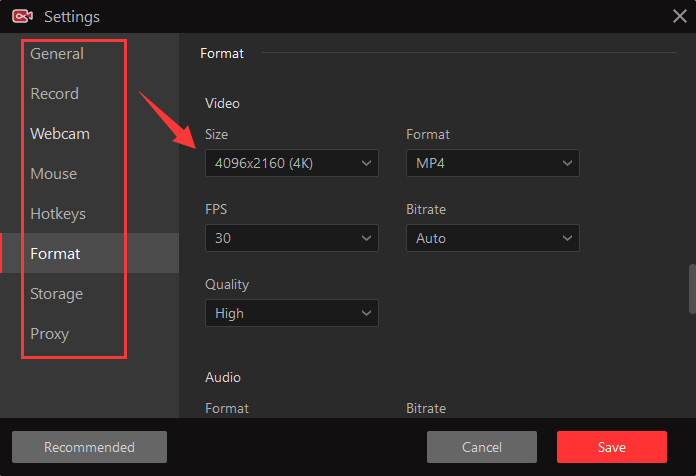
Go to Settings to refine the storage location, recording hotkeys, mouse, webcam preference, output format for video and audio, etc. according to your need.

- If you want to record gameplay in VRChat, you can select iTop Screen Recorder’s Game mode. When VRChat is open, it can be auto-detected; otherwise, you have to choose it manually.

- And if you just record on VRChat to capture interesting scenes, you just need to check the recording screen, audio, webcam(if you want to record yourself), and mouse.

Step 3. Start VRChat Recording and Stop Recording
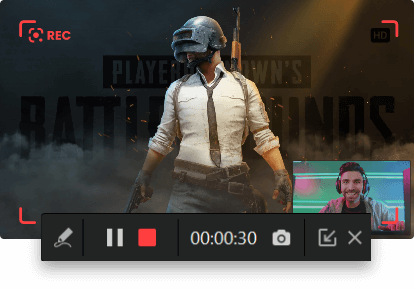
Tap the “Rec” button to record videos in VRChat. When it is finished, tap the red square button on the floating bar to stop recording. Also, you can control the whole recording process via hotkeys.

Step 4. Edit and Compress VRChat GamePlay Recordings
All the recorded videos and audio can be found in Files, you can access their PC locations via the folder icon. iTop Screen Recorder also offers a free video editor and a compressor to optimize your VRChat recordings. Get them in Tools.

If you're a social content creator, you can customize the watermark to your VRChat videos in Settings. And it will be auto-added to your output videos. In addition, you can screen record protected videos on it.
How to Take a Video in VRChat on OBS for Live Streaming?
Except for sharing and saving VRChat videos, you may want to stream your experience or gameplay for your audience on YouTube. In that case, you can try OBS to record in VRChat.
OBS is a well-known free and open-source software that can be used to record on VRChat while you are streaming your screen of VRChat. Whether you are using Windows, Mac, or Linux, OBS supports it. If you want to show yourself in live streaming or in recording, you can enable its webcam so that a picture-in-picture will show on the screen. OBS is a good choice for streamers or gamers who want to stream or record in VRChat because it is cost-free. The only drawback is its interface is too complicated for new beginners to start quickly.
For your convenience, the following guide will show you how to record in VRChat on OBS step-by-step.
How to Stream and Record in VRChat on OBS?
Step 1. Open VRChat and OBS. Create a new scene by clicking Scenes > New.
Step 2. In the Sources panel, click “+” > Game Capture or Display Capture > choose VRChat.

Step 3. If you need to record yourself, click “+” in the Sources panel, and add Video Capture Device. To record your voice, you need to add Audio Input Device, and Audio Output Device too. Finally, select the corresponding devices.

Step 4. Click Settings > General > Output > Automatically record. Then the VRChat videos can be recorded while you are streaming it.

Step 5. Click Start Streaming and go on playing on VRChat, then click Stop Streaming and find the recorded VRChat videos in File > Show Recordings.

If you only need to record VRChat without streaming, you can finish the whole recording process by clicking Start Recording and Stop Recording.
How to Record Videos in VRChat on Quest VR Headset?
Suppose you have an Oculus Quest 2, a VR headset, you can use it to record VRChat gameplay easily without downloading iTop Screen Recorder or OBS. Quest VR headset is specially for VR gaming which can connect to play Steam titles like VRChat wirelessly. There is a way to record on VRChat non-PC with the assistance of controllers and a Quest VR headset.
Go through the below guide to learn the exact operations.
How to Record VRChat on Meta Quest 2?
Step 1. Wear your Oculus Quest 2 headset and open the VRChat game
Step 2. Click the Share icon > Record Video > Include Mic Audio > Start Recording. It will start recording automatically when the recording dot turns red.

Step 3. Click the Recording button again to stop the VRChat gameplay recording. Then go to Media > Files App to find the recorded videos.
The Bottom Line
In conclusion, this article shares 3 solutions on how to record in VRChat. iTop Screen Recorder is the simplest way to record on VRChat without paying. OBS is the best way to stream VRChat play and record it simultaneously though its operation guide is not user-friendly. And Quest VR headset is only available for recording VRChat gameplay. Download the screen recorder Windows 10 and try it to record VRChat videos right now!
 Vidnoz AI creates engaging videos with realistic AI avatars. Free, fast and easy-to-use.


