If you want to show someone how to navigate a particular website or troubleshoot a minor computer issue, you can start by explaining a lot on a video call. However, we are here to show a more straightforward way that involves how to record computer screen.

That will ease the long talk and too much writing as you exchange messages. Whether you want to capture gameplay or create a tutorial that involves your computer, it’s much better if you learn how to screen record on computer. Here, we will show you how to do it for free using the best tool. You will also learn other ways to record using available free screen recorder on a computer.
- This is an Article Index.
- Do not insert any text in here.
- This index will be generated automatically when displayed on the front end.
- Of course we still love you.
Get the Best Free Computer Screen Recorder
Learning how to record computer screen can involve many things, or you can simplify it by getting a professional option like iTop Screen Recorder. It has helped many in recording on all Windows PC. It is a free computer screen recorder that excels in capturing every activity on your computer. That is, it can grab any screen proceedings from webinars to gameplay.
What Do You Get From iTop Screen Recorder?
Record Any Screen Area on Computer
You can use iTop Screen Recorder to capture the whole screen or just a part of it. Selecting a screen area has several options, including freely setting the area to catch or a fixed region.
Record Computer Screen with Audio and Webcam
iTop Screen Recorder allows you to capture video with audio (both internal and external audio) and webcam, making it be a powerful program to record zoom meetings, online courses and presentations.
Screen Record with no Time Limit
We advocate for iTop Screen Recorder since it can record computer screen with no time limitations. You can record for as long as you wish or as your storage permits. So, you can take your time with it to create the best tutorial video.
Capture Computer Screen in HD with no Lag
This best free computer screen recorder enables you to capture screen videos in 4K, 1080P HD with no lag as well as record 60fps videos with no fps drop. Thanks to low CPU usage, it performs well on screen recording and will not interrupt other tasks.
What’s more, after recording, you can send the video in your favorite format, MP4, FLV, AVI, and more and directly sharing it on social network or storing in online cloud drive.
How to Record Computer Screen with iTop Screen Recorder
iTop Screen Recorder is an easy-to-use program and you can quickly get started with it. It is also a high compatible screen recorder for Windows 10, 7, 8 and the latest 11. Here, let’s get learn how to record computer screen with audio, webcam and capture gameplay using it one by one.;
Beyond everything, you need to download and install iTop Screen Recorder on your PC.
How to Record Computer Screen with Audio
Step 1: Select the screen area to record using the dropdown on the Full-screen part. After that, activate the Mic option to record your voice as well.
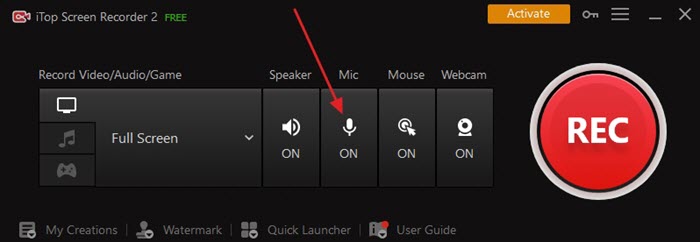
Step 2: You can use the three vertical lines at the top right for more settings. Once you are done with the setup, hit F9 to start recording or click on the big REC button.
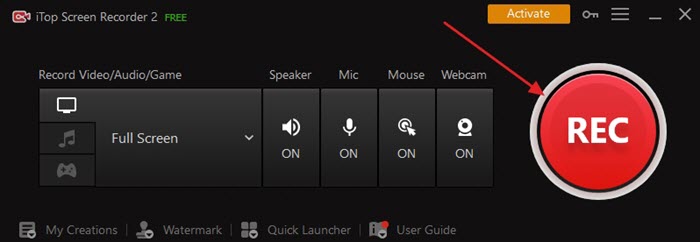
Step 3: After the recording control bar appears on the screen after countdown, you can click Pause to& temporarily stop recording and click Done (the red square icon) to complete recording screen with audio.
How to Record Computer Screen with Webcam
Step 1: Select the screen area to record and click on the Webcam option to activate it.
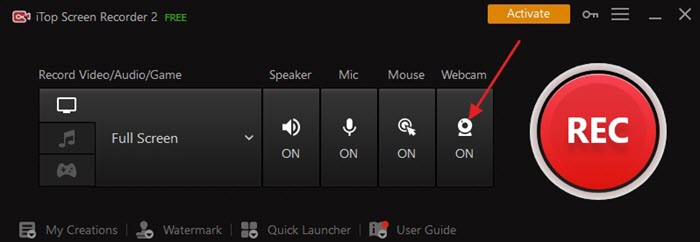
Step 2: Hit F9 or use the Big REC button to start video capture.
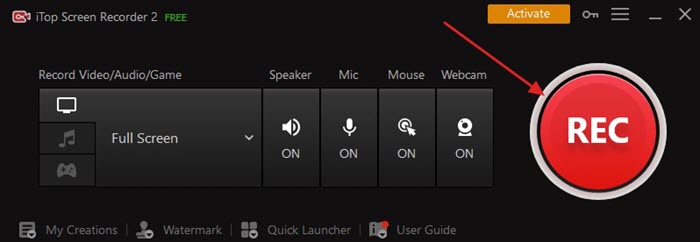
Step 3: The recording control bar appears in the bottom right corner of the screen. Click the Done button (red square icon) to finish recording.
How to Record Computer Screen to Capture Gameplay
Step 1: Launch iTop Screen Recorder and click on the Record Game option. It will pick the game settings on your computer, especially the FPS rate.
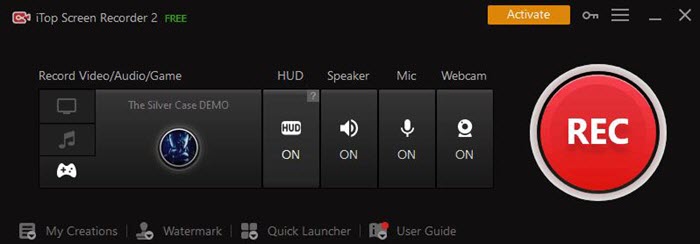
Step 2: If you would like to record the speaker, webcam, and so on, use the options on the quick settings part.
Step 3: Once you are ready and the game is in motion, hit F9 or the big ‘REC’ button to begin recording.
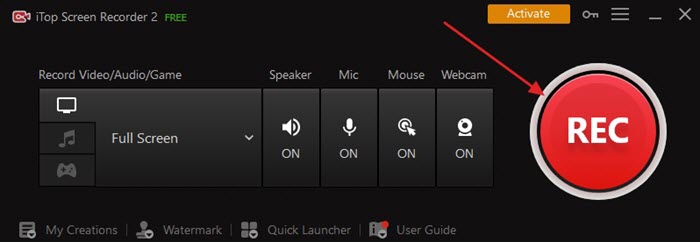
After recording what you need to capture, you can use the video editor to cut out parts you don't need and share the video online. Everything you record is available under the My Creations tab.
More Ways to Record Computer Screen on PC/Mac
You can also try to screen record on computer using other available means. It may be a bit longer depending on what you will use, but it’s still doable. What you may have to compromise is maybe the FPS and the resolution you get.
How to Record Your Computer Screen Using VLC
VLC is a known media player for both audio and video. If you want to record computer screen with VLC, you can do it by toggling with some of the settings to enable the feature. Here is how you go about it:
Step 1: Open your VLC player. If you don't have it, download it free from the main website.
Step 2: Select Media from the top menu and click on Open Capture Device.

Step 3: You'll see Open Media dialog. Click on Capture mode to access the dropdown and select Desktop option.

Step 4: Set the frame rate you need but remember that your hardware also determines the best settings. Go to Show more options for other settings, such as setting the caching option to lower or higher depending on your machine.

Step 5: Next to Play, there is a drop-down. Click on Convert to encode the recording into a file.

Step 6: You will see a window to set up the encoding options. Enter screen:// in the source text box and select Profile in the dropdown menu. You can choose the codecs VLC will use to create the file or use the default one, Video - H.264 + MP3 (MP4), which is okay in most cases.

Step 7: Click Browse to get the destination folder. Select the folder you need, enter the name, and click Save. Once you are ready, click Start.
Step 8: VLC will go back to normal, and you will see a playback bar at the bottom. That shows the software is now recording. Once you are done, click Stop via the displayed controls.
Also Read: How to Make a Screen Recording on MacBook Air/Pro
How to Record Computer Screen on Mac with Keyboard Shortcuts
If you are using a Mac, you don't need the QuickTime player method since there are shortcuts to capture screenshots and record the screen. Here are the steps you need to use to use the Mac inbuilt computer screen recorder.
Step 1: Use the Command+Shift+5 keyboard shortcut to launch the screenshot toolbar.
Step 2: Click on Record Entire Screen to begin recording immediately. If you want a part of it, select the Record Selected Portion option and click Record on the screenshot and the control bar.
Step 3: To stop the recording, click Stop button. Use Control+Click or Two-finger clicking on the recording appearing on the bottom right to save the file.
Step 4: Use the menu available to save the file.
The End
How to record computer screen? It’s a frequently asked questions by people who would like to create a tutorial video or capture a presentation, lecture or more. iTop Screen Recorder is a highly recommended computer screen recorder for PC. It is able to flexibly record any area on your screen and capture computer screen with audio, webcam. There’s no time limit and you can experience the best performance to capture HD video on computer. Try it now.
 Vidnoz AI creates engaging videos with realistic AI avatars. Free, fast and easy-to-use.


