


Using the built-in webcam on your computer is convenient for taking quick photos. Whether you need a profile picture, want to capture a moment, or simply test your camera, taking a picture with your webcam is easy.
This article here comes up with four efficient ways of how to take a picture with webcam, whether you’re using a Windows or a Mac computer, or prefer to do this job online, you can find a solution in this article.

Take a Picture with Webcam on Windows 10
The first method is for Windows 10 users. You can use the Camera app, a built-in Windows tool, to take a picture with webcam. You can also customize the photo-taking process with the Camera app. Here are the steps to take a picture with webcam on Windows 10:
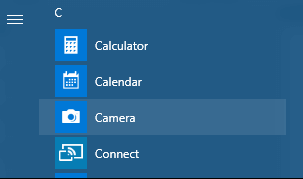
Step 1. Click the Start menu and search “Camera” on your computer. When finding it, click on it to open the app.
Step 2. Now you can click the Camera icon to start taking a picture or you can use the keyboard shortcut "Windows key + PrtScn".

Step 3. The picture you took with Camera app will be automatically saved to the Camera Roll folder in the Pictures library. You can also save your picture in a different location.
That’s it! These are the steps of how to take a photo with webcam on Windows 10. If you have multiple cameras connected to your computer, click the Change Camera icon to switch to the one you want.
Take a Photo with Webcam on Windows 11
Although the Camera app is also available on Windows 11, you can try third-party methods that are easy, convenient, and powerful with rich features. Using a reliable screen recording software is a recommended choice, which not only allows you to record your screen but also enables you to take a picture with webcam on Windows 11 easily. One such tool you can rely on is iTop Screen Recorder.

There are several screen recording modes in iTop Screen Recorder, including taking a full screenshot, recording the webcam, recording audio only, and recording for gameplay. It only takes three simple steps for you to take a picture with webcam using iTop Screen Recorder.
Step 1. Download and install the latest iTop Screen Recorder on your Windows 11 computer.
Step 2. Switch to the Webcam tab, here you can adjust the brightness of the photo or replace the original background with a blur or transparent one.

Step 3. Click the Rec button on the right side, and then take a picture. The photos you take will automatically stored in the Files.

What you can get from iTop Screen Recorder is not only a picture-taking tool, here are some other features you can get from this tool.
- Screenshot Any Part of Screen. With this tool, you can easily capture any part of your screen. Whether it’s a specific window, a particular region, or the entire screen, iTop Screen Recorder allows you to effortlessly capture the perfect shot using your webcam.
- Capture Webcam and Mic. This screen recorder also enables you to capture both video and audio using your webcam and microphone simultaneously. This could be a handy feature when you want to record not only visual images but also add audio commentary.
- Change Background When Using Webcam. As mentioned before, iTop Screen Recorder offers a unique feature that allows you to change the background. With this capability, you can customize the visual appeal of your photos.
- Record HD Audio and Video. Quality always matters when making a video. It ensures your photos and videos are captured in HD, and offers various resolutions including 720p, 1080p, and even 4K.
- Video and Audio Editing Available. Last but not least, iTop Screen Recorder provides you with video and audio editing tools. You can trim, crop, add text, apply filters, or make other adjustments to your photos.
Take a Photo with Webcam on Mac
The third method is for Mac users. Mac’s built-in webcam is a quick and easy way to capture a moment. Whether you want to snap a selfie or take a picture of your surroundings, you can use the Mac Photo Booth app to take photos.
To take a photo with webcam on Mac, follow these steps:
Step 1. Open the Photo Booth app on your Mac.

Step 2. Now you should see yourself in the preview window.
Step 3. Click the “Take Photo” button to capture an image. You can also click the "Take four quick pictures" button to capture a sequence of four photos.

Step 4. After taking a photo, you can preview it in the bottom left corner of the app. If you’re happy with the photo, you can save it to your Mac by clicking the “Save” button.
You can also share the photo taken with Mac webcam from Photo Booth via email, iMessage, or social media. Overall, taking photos with Mac’s built-in webcam is a simple process.
Take a Picture with Webcam Online
If you don’t feel like downloading and installing the software on your computer to take a picture with webcam, an online tool is a good choice. You don’t need to take the risk of installing an insecure fake app and at the same time, you can enjoy the convenience and easiness of the online tool.
Here are the steps of how to take a picture with webcam online, the tool used here is Pixect.
Step 1. Go to the Pixect website, it is a simple site with easy UI.
Step 2. Click the Get started now button.
 Step 3. Now choose “Use Camera” and Pixect will detect and use your webcam. Then you can take a photo with it.

Step 4. After taking the photo, you can trim, rotate, or add filters to the photo.
Besides using your computer’s camera, you can choose a photo stored on your computer and use Pixect to edit it.
FAQs
1. Can I change my background when I take a picture with webcam?
Yes, you can. There are several ways to change your webcam background when you take a picture with a webcam. One way is to use a virtual background feature. iTop Screen Recorder enables you to change the background to a blur or transparent one.
2. Can I take a photo with my laptop webcam?
Yes. The majority of laptops have a built-in camera that you can use for taking pictures. You must start the laptop camera app and select the capture button in order to use your laptop webcam to take a picture. To take pictures with your notebook webcam, you can also use a third-party screen recorder for Windows or Mac.
3. How do I make sure my laptop has a camera?
To make sure your computer has a camcorder, you can check the specifications of your computer online or in the user's manual that came with your computer. You can also check the system manager on your computer to see if the cameras are listed under scanning devices. If you are not certain how to do this, you can search online for directions specific to your computer type.
4. Is a webcam the same as a camera on your computer?
A camera is a particular kind of camera that can be connected to laptops or computers. It is generally used for video conferencing, survive streaming and taking pictures. A lens in your laptop, on the other hand, is usually built into the laptop or desktop and is used for taking pictures and recording videos.
5. How do I capture an image in Windows 10/11?
On a Windows 10/11 computer, the easiest way is to use the built-in camera app. Enter “Camera” in your computer’s search bar and run the exact match. With only one click, you can get a picture taken by the Camera app. You can also use the Windows + PrtScn shortcut to execute the process.
Conclusion
In all, it is a simple process to take a picture with webcam. If you're looking for a reliable and easy-to-use webcam recorder, iTop Screen Recorder is highly recommended. It offers a simple interface, high-quality recording, and a range of features to meet your needs. So why not give it a try and download iTop Screen Recorder today?


