Blackboard Collaborate is one of those classroom platforms you don't realize you need until you’re knee-deep in online classes, workshops, or virtual office hours. Live sessions, shared materials, and engaged students - that's what this education platform makes easy, wherever you and your students are located.
However, if you don't record those sessions, everything’s gone the second you close the tab. For instructors who want to save a lecture or students hoping to replay a tricky section before a big exam, having a recording makes sense. Learn how to record Blackboard Collaborate sessions, then go back and watch important parts whenever you want.
How to Record Blackboard Collaborate Session as a Teacher
If you're teaching with Blackboard Collaborate Ultra, you can use its built-in recording tool designed to help instructors record Blackboard Collaborate, including every word, slide, and question from a session. Whether it’s for students who couldn't make it or for your own review later, recording live sessions is a good way to pick up.
Better still, teachers can insert voice or video recordings for students as feedback. Let's break down how to record on Blackboard Collaborate.
How to Screen Record on Blackboard Collaborate Natively
Recording an online class or live meeting on Collaborate isn't complicated, but you do need to start the recording manually. Follow these steps on how to access Blackboard Collaborate Ultra and how to screen record on Blackboard Collaborate.
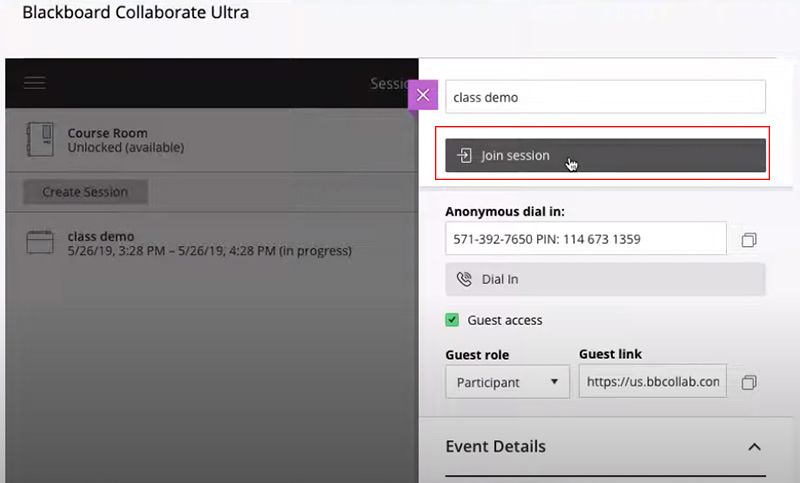
Step 1. Open and join your session in Blackboard Collaborate Ultra.
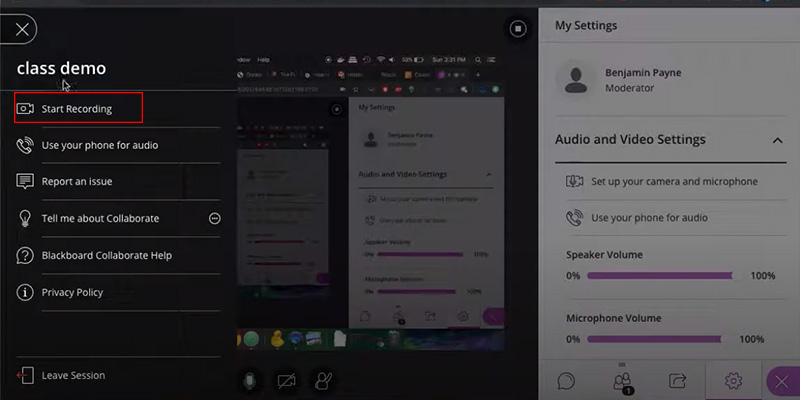
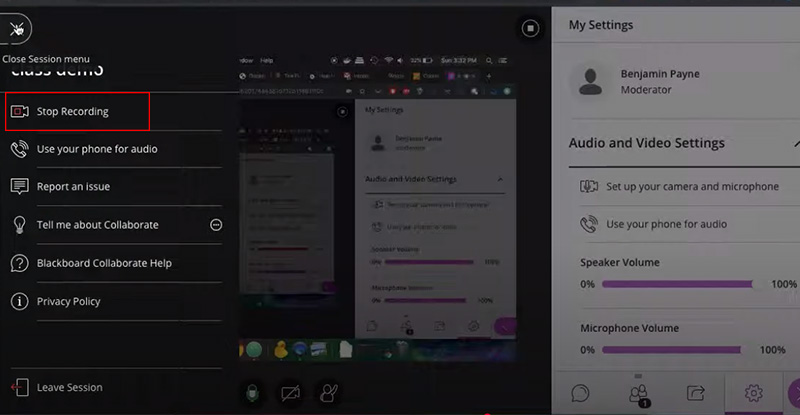
Step 2. Locate the Session Menu, the button with three horizontal lines in the top left corner. Click on it, and select Start Recording from the dropdown list.
Step 3. Once you hit that, the platform will quietly start recording everything happening in the session: audio, video, screen shares, and even chat messages (if enabled). You can stop the recording anytime by clicking "Stop Recording".
After the session ends, your recording will be available under Recordings in the Collaborate panel for sharing, downloading, or reviewing.
How to Record Video or Audio Feedback on Blackboard Collaborate
Giving feedback through video or audio makes a bigger impact than you might think. A short voice note or face-to-camera clip can clear up confusion, soften tough critiques, and make your presence felt in an online class. Here's how to record Blackboard Collaborate video/audio feedback.
Step 1. In your course content area, click Insert Content. Choose Audio/Video Recording from the menu.

Step 2. In the feedback area, click the expanded purple plus sign to insert feedback. Then, select Insert/Edit Recording.
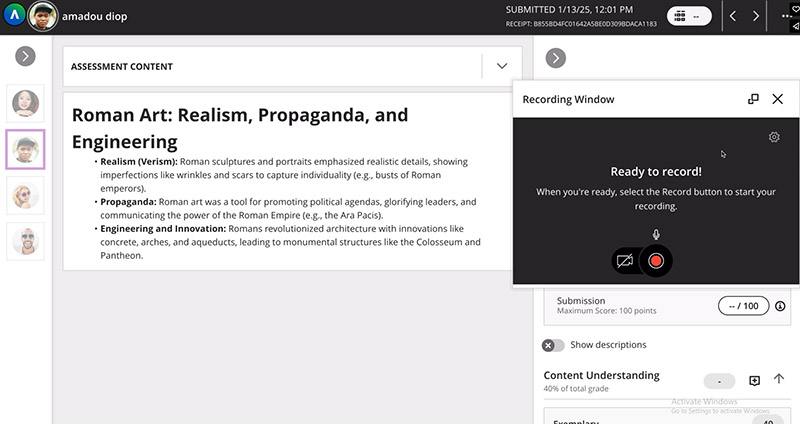
Step 3. In the recording window, click the camera icon to enable your webcam if you want to include video.
Step 4. Hit the red Record button. A countdown will appear, and your recording will start. You can record Blackboard Collaborate for up to five minutes.
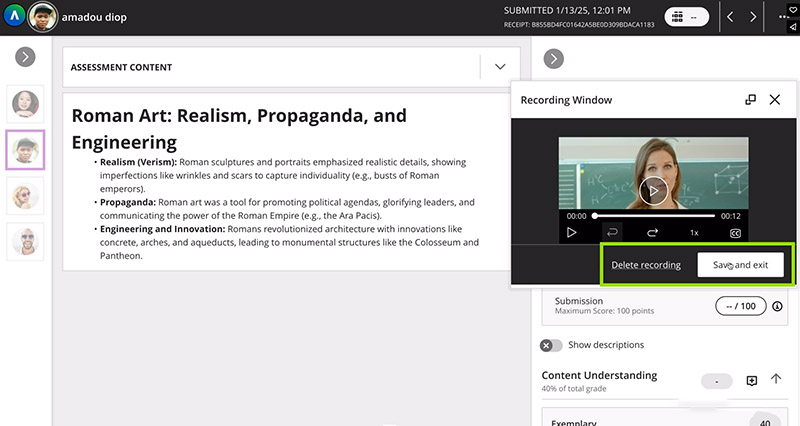
Step 5. Click Pause to temporarily stop and then continue recording. Click Stop when you're done. Once saved, your recording is automatically added to the content editor, ready to share with your student.
How to Record on Blackboard Collaborate as a Student
Here's the drawback: Blackboard Collaborate doesn’t let students record sessions on their own. Only instructors have access to the built-in recording tool. If your teacher starts a recording, you can view or download it later. But what if you - a student - want to record Blackboard Collaborate for yourself, maybe to revisit a tricky lecture or keep a presentation you gave? That's where a reliable screen recorder like iTop Screen Recorder comes in handy. Need to record a lecture? Give a killer presentation? Save and edit key points? You name it, this tool can do it easily.
Record online courses and lectures with audio flawlessly
iTop Screen Recorder can record Blackboard Collaborate with both your system audio and microphone input without lag, distortion, or sync issues. You’ll get every word, explanation, and video conference details with perfect clarity in a single recording.
Create high-quality screen recordings of online sessions
Unlike some free recorders that leave you with grainy, choppy videos, iTop lets you record crisp, high-definition online sessions and meetings. It ensures your videos stay sharp and smooth, preserving every slide, webcam feed, and screen share exactly as they appeared in your session.
Record screen, voice, and webcam for making presentations
The screen recorder allows you to capture your screen activity, voice commentary, and webcam footage at the same time. So it’s easy to create professional-looking presentations, project demos, or assignment recordings where both your face and content need to be on display.
Add annotations to highlight information with drawing tools
You can use the built-in tool to mark up the screen with circles, arrows, lines, or text notes. Use it to stress the main points in your lecture, jot down reminders, or visually explain your ideas.
Integrate with a video editor to edit recordings at one stop
The built-in video editor helps trim, cut, merge, add effects to your videos, compress, and denoise recordings right away. It puts everything in one smooth workflow.
How to Record on Blackboard Collaborate as a Student
Follow these steps and learn how to record a Blackboard Collaborate session as a student with iTop Screen Recorder on PC.
Step 1. Free download iTop Screen Recorder, install the tool on your PC, and launch it.
Step 2. Access Blackboard Collaborate. Go to your browser and navigate to Blackboard Collaborate Ultra.
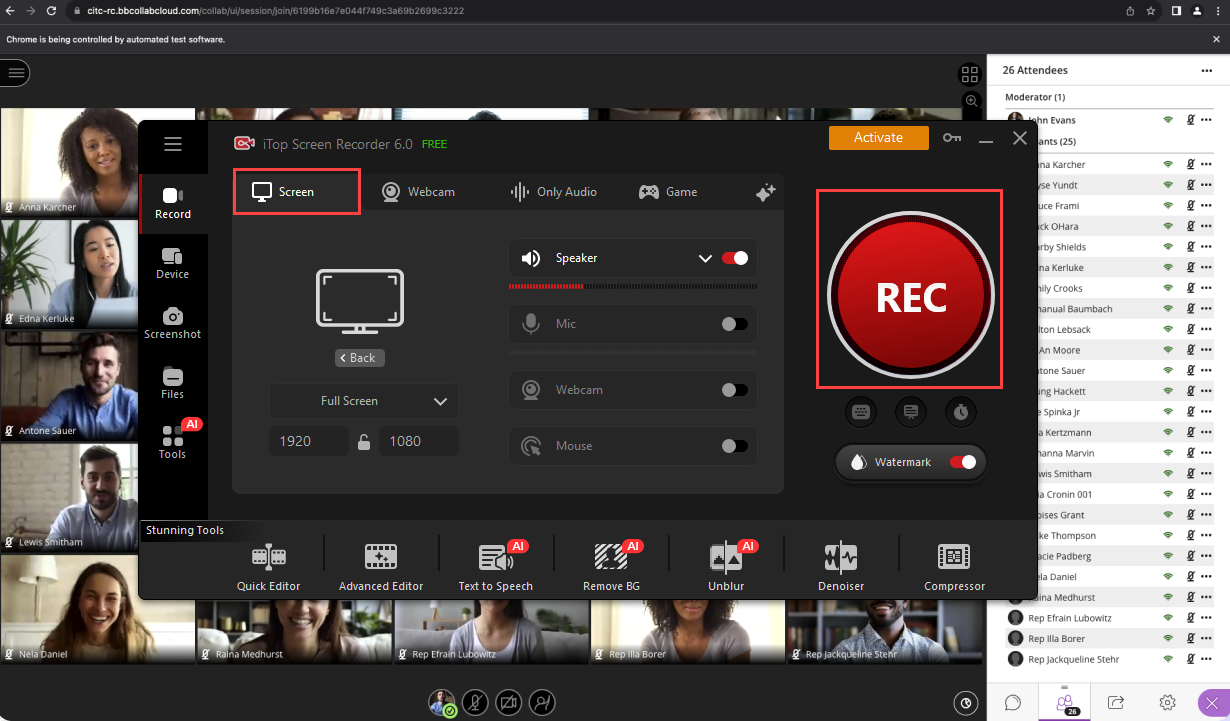
Step 3. In iTop Screen Recorder, select the specific window displaying Blackboard Collaborate as your capture region or select the full screen. Turn on the Microphone and Camera if you'd like to include your voice and webcam footage.
Step 4. Hit the REC button in iTop Screen Recorder to start to record Blackboard Collaborate session. Click the Stop Recording button when the Blackboard Collaborate session capturing process is completed.
How to Record on Blackboard Collaborate – FAQs
How to Find Your Blackboard Collaborate Recordings?
Go to the Session Menu > Recordings tab in your Blackboard Collaborate panel. All available session recordings will be listed there by date. You can review, download, and share your Blackboard Collaborate recordings.
How Do You Download a Recording from Blackboard Collaborate?
Open the Recordings tab, click the three dots next to the session you want, and select Download (if your instructor has enabled downloads).
Can You Edit Blackboard Collaborate Recordings?
No, you can't edit recordings directly within Blackboard platform, but you can download them and use video editing software like iTop Screen Recorder's built-in editor or any other editor you prefer.
Conclusion
Blackboard Collaborate is a winner among tons of online learning platforms. Teachers prefer the saved lessons, and real-time chats, and there's always a flip side. What about the downside of Black Board Collaborate? Students can't record Blackboard Collaborate sessions on their own. While you can rely on instructor-made recordings, using a tool like iTop Screen Recorder gives you total control. It helps you record, annotate, and edit Blackboard Collaborate sessions in original quality smoothly without time limits. Free download iTop Screen Recorder and take control of your online learning in Blackboard Collaborate easily.