


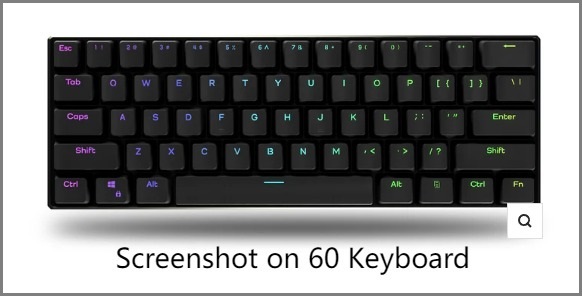
60 Keyboard is popular among gamers and minimalists for its compact design and space-saving benefits. However, their smaller form factor makes them lack dedicated function keys, including the traditional Print Screen button. That’s why some users are wondering: how to screenshot on 60 keyboard?
The good news is that taking screenshots on a 60-key keyboard is possible! There are several effective methods to capture your screen on 60 keyboard. Whether you're a gamer wanting to save epic moments or a professional needing to document your work, these four methods will help you screenshot with ease.
Method 1. How to Take Screenshot on 60 Keyboard Through Shotcuts
To take screenshots on a 60% keyboard with a dedicated Print Screen Key, you’ll need to use a keyboard shortcut. This method is effective without using any additional software. You can directly copy the screenshot to the clipboard, making it ready to be pasted into other applications for immediate use. But on the downside, this method lacks advanced editing and annotation capabilities, so you’ll need separate software for editing. If you stick with this method, here are the steps on how to screenshot on Windows 60 keyboard.
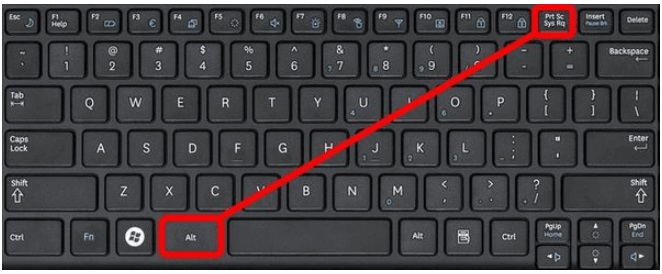
- Step 1. Locate the Fn key on your keyboard. Then, find the Print Screen (or PrtScn), which is usually on a different layer.
- Step 2. Press and hold the Fn key and the Print Screen key simultaneously to capture the full screen. If you want to capture an active window, you can press Fn + Shift + PrtSc instead.
- Step 3. Your screenshot will be automatically saved to the clipboard, and you can paste it into an application like Paint or Word.
Method 2. How to Screenshot on 60 Keyboard Using Snipping Tool
The Snipping Tool in Windows is a handy utility for taking screenshots and making basic edits. It allows you to annotate screenshots with pens, highlighters, and shapes. With its extra Optical Character Recognition, you can even extract text from an image. Not only that, but it can also record your screen and capture system audio or microphone input. Here’s how to screenshot on 60 keyboard using Snipping Tool.
- Step 1. Press the Windows key + S to open the search bar, then type "Snipping Tool" and press Enter to launch the application.
- Step 2. Click "New" in the Snipping Tool window, then select your preferred capture mode (rectangular, free-form, window, or full-screen snip).
- Step 3. Draw around the area you want to capture, then save the screenshot using Ctrl + S or click the save icon in the toolbar.

Method 3. How to Screenshot on Windows 60 Keyboard Using Game Bar (Windows 10 & 11)
You can also take a screenshot on 60 keyboard using Game Bar, a built-in Windows feature that allows users to capture gameplay moments and take screenshots. It allows for instant screenshots, even while in a game, without pausing the action. Though it is a good option for a screenshot, it also comes with some shortcomings. Limited capture scope is an obvious one. It can't capture the desktop or File Explorer windows, only specific apps or full-screen games. If you don’t mind it, follow these steps to learn how to screenshot on 60 keyboard Windows 10 using Game Bar.
- Step 1. Press Windows key + G to open the Game Bar overlay.
- Step 2. Click the camera icon in the Game Bar widget or use the shortcut Windows key + Alt + PrtSc to instantly capture your screen.
- Step 3. Your screenshot will be automatically saved to your Videos/Captures folder, and you'll see a notification confirming the capture.

Method 4. How to Screenshot on 60 Keyboard Without Print Screen Button
While the methods above work well for basic screenshots, they lack advanced options that many users need. For more professional and versatile screenshot capabilities, we recommend using dedicated screenshot software like iTop Screen Recorder.
Compared to traditional screenshot methods, iTop Screen Recorder offers superior features, including an intuitive user interface, flexible capture options, built-in editing tools, and comprehensive screen recording capabilities. This professional tool transforms your screenshot experience with these powerful features:
- Flexibly Take Screenshot of Your Screen: Capture full screen, specific windows, or custom rectangular areas with pixel-perfect precision. That makes it perfect for a Grindr screenshot.
- Scrolling Screenshot Capture: Automatically capture long web pages, documents, or chat conversations in a single seamless image.
- Edit Your Screenshot Online: Add annotations, arrows, text, highlights, and shapes directly within the software.
- Save and Share Screenshots to Other Platforms: Export in multiple formats (PNG, JPG, GIF) and share directly to cloud services or social media.
In addition to that, this screen recorder also does a good job of recording your screen with webcam and speaker. With this feature, you can record Zoom meetings or gameplay without hassle. Now, let’s see how to screenshot on Windows on 60 keyboard with iTop Screen Recorder.
Step 1. Download and install iTop Screen Recorder from the official website, then launch it on your computer.
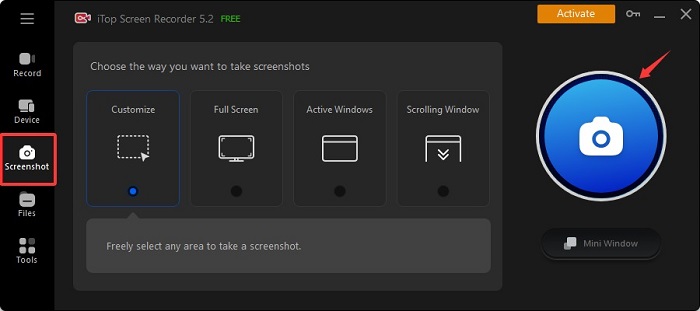
Step 2. Click Screenshot in the left menu bar, and then choose the way you wish to take screenshots. Once done, click the camera icon to take a screenshot.
Step 3. Then, you can find the screenshot in Files > Local Storage. You can edit, save, share, or pin it to the desktop.
Final Words
That’s all about how to screenshot on 60 keyboard Windows 11/10. With the methods introduced above, you can easily capture what you want with your 60 keyboard. The simplest and quickest way to get the thing done is to use a shortcut or snipping tool, but they lack some advanced options like adding annotations. Given that, we recommend using this screen recorder Windows 10 - iTop Screen Recorder. It offers more advanced screenshot options as well as a screen recording feature. With its screen recording feature, you can capture everything that happens on your screen. For example, you can record TikTok live.


